Currently, a percentage of the reptile hobby finds itself tilting towards “industrialized” and “sterilized” care. As a result, you might encounter the commonly spouted myth: “The risk of adding enrichment into your reptile’s enclosure is too high, due to the potential of harmful bacteria growth”. In other words, the claim is— you might as well keep your reptiles in an environment that can be sterilized quickly and easily (i.e. paper towel substrate, plastic tub, etc.) to ensure optimal health. Is that true? Is the risk of environmental enrichment truly higher than the reward?
Greater Risk Than Reward—
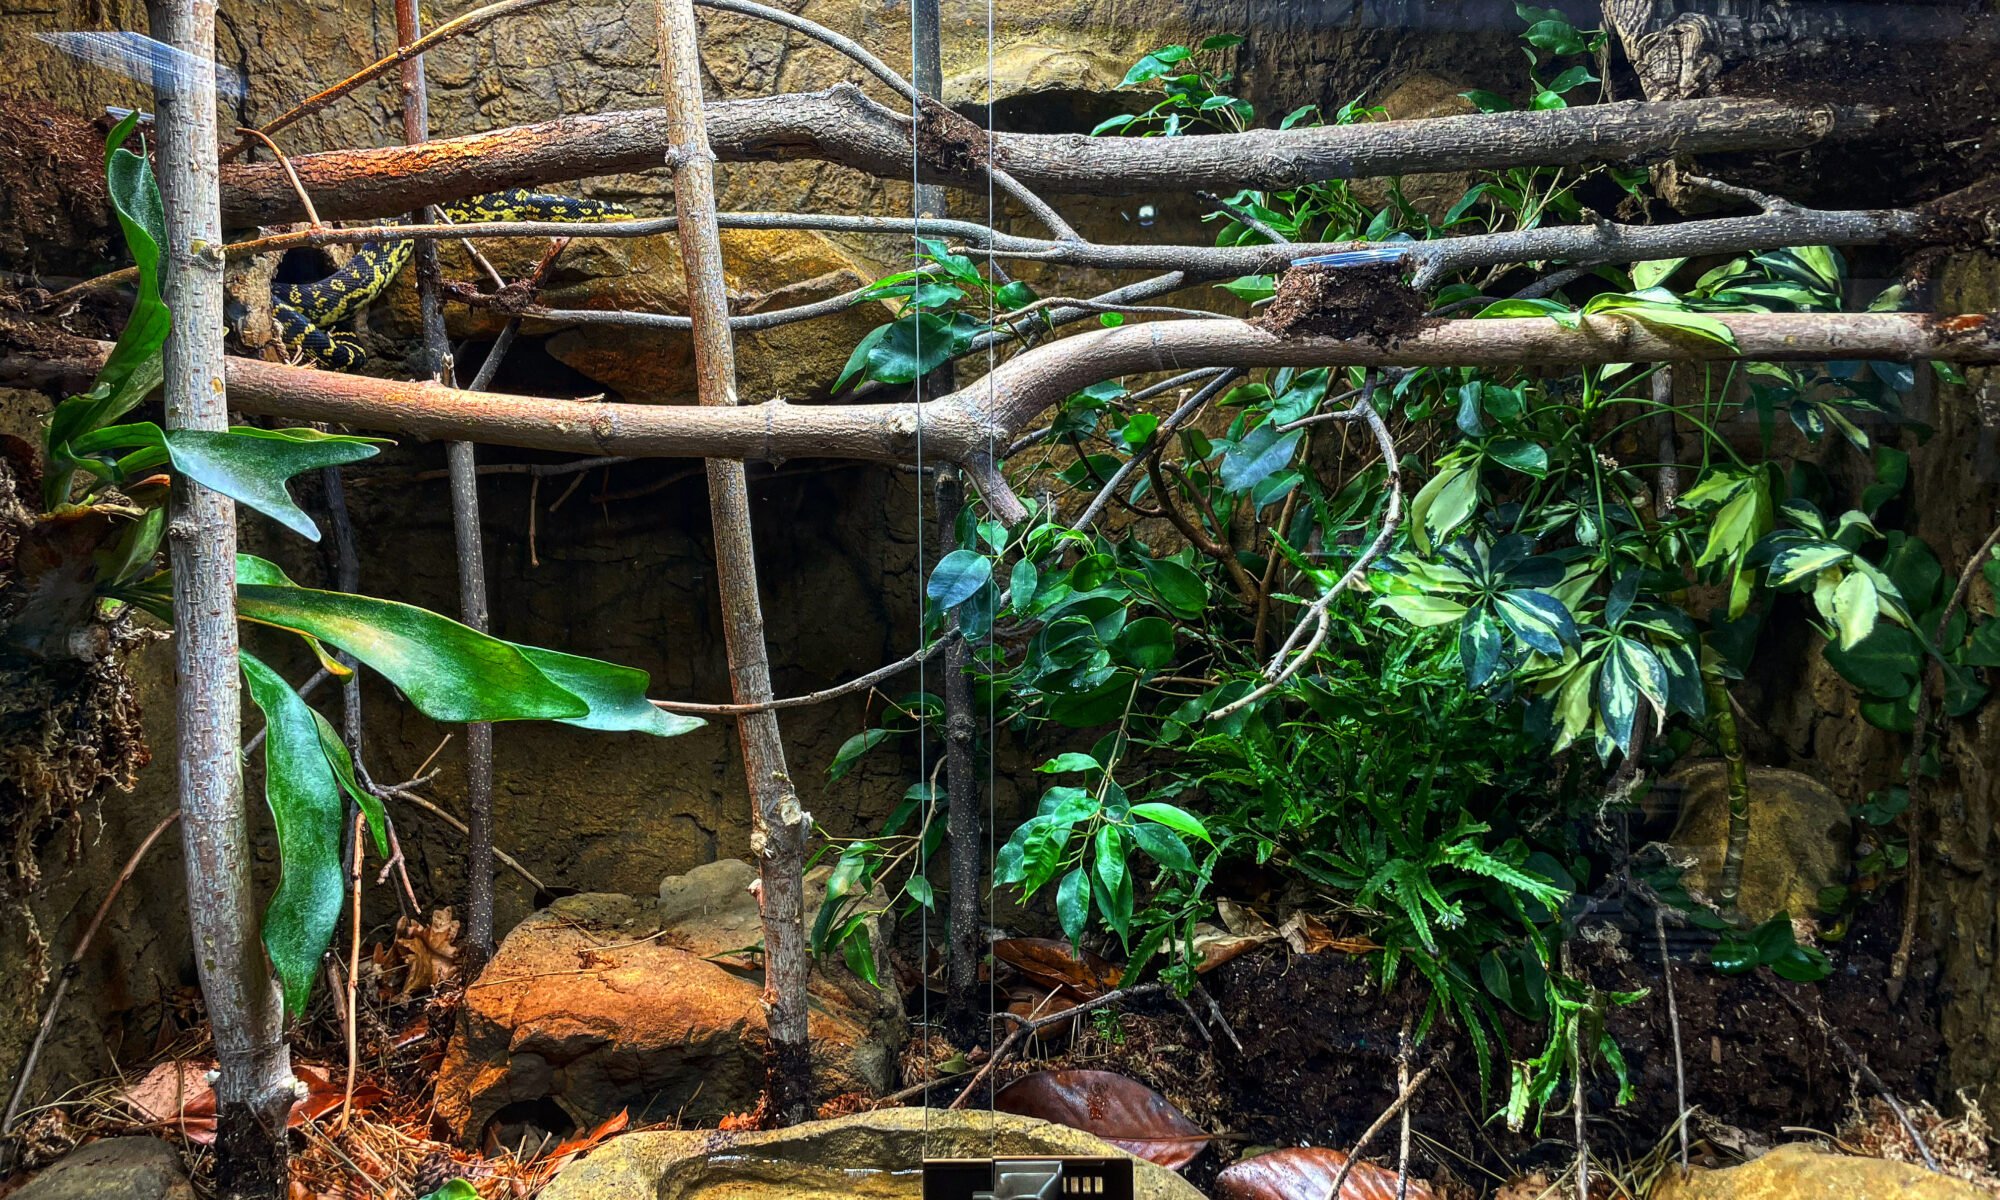
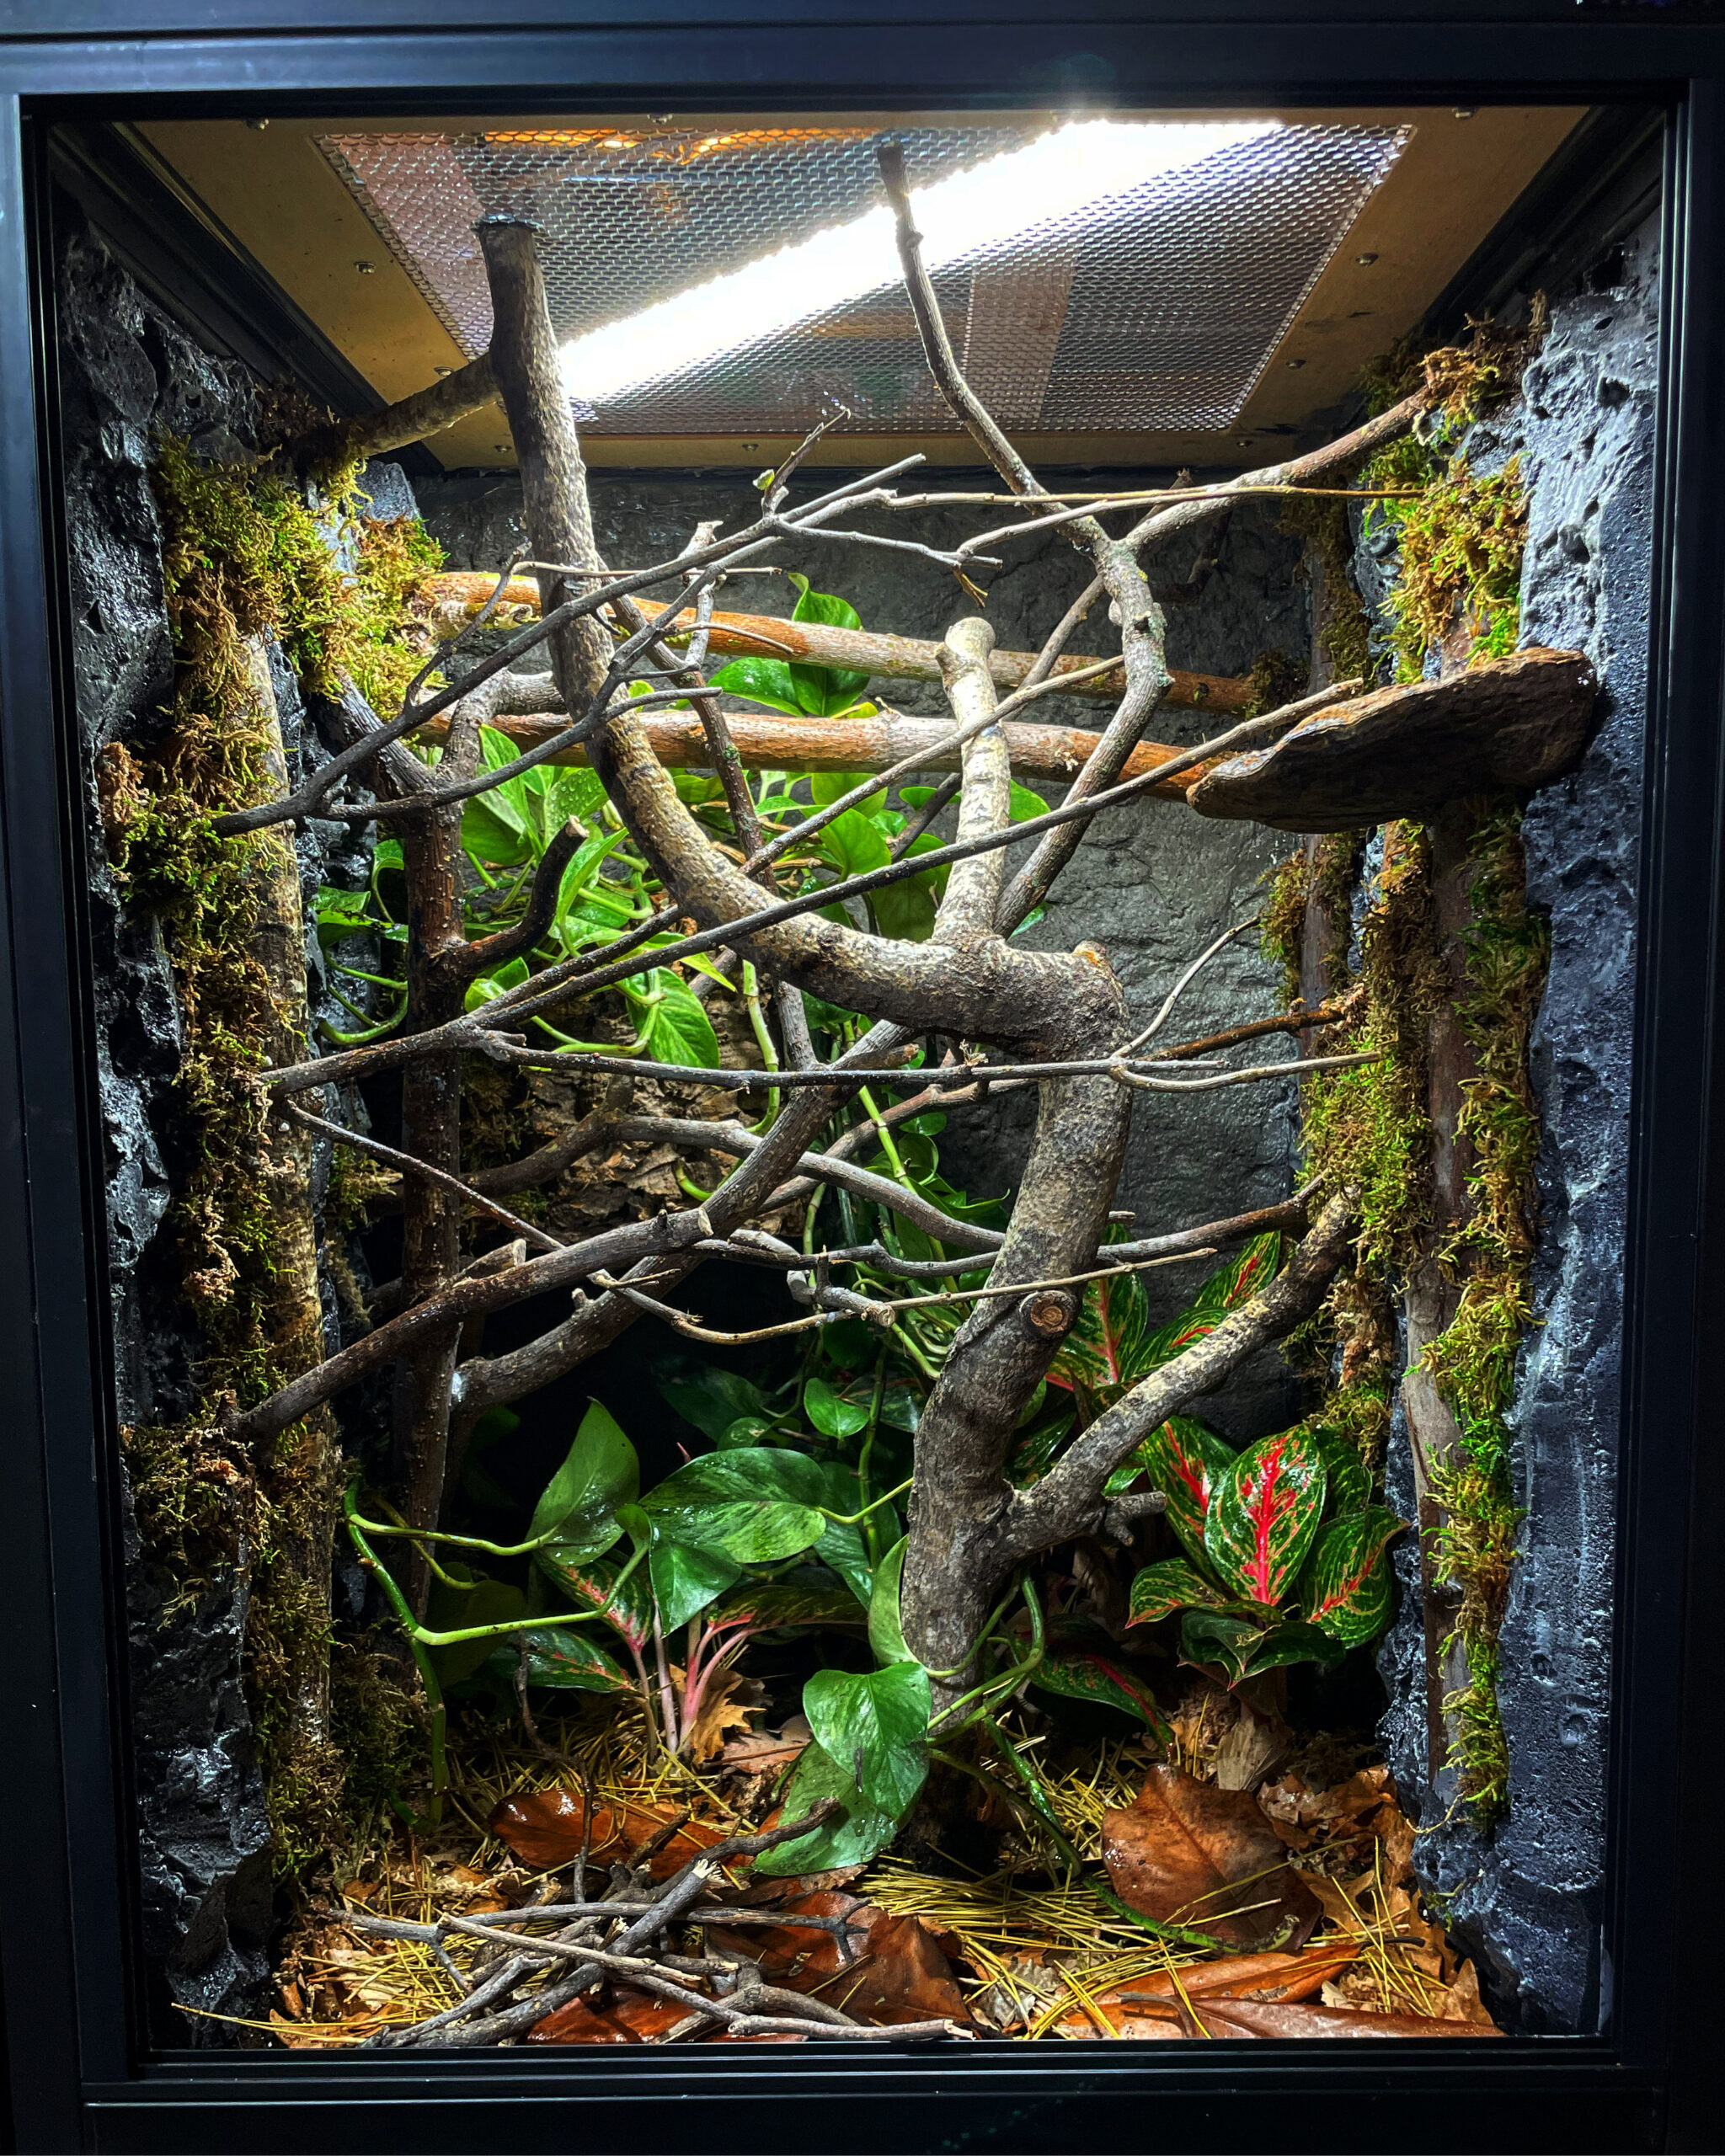
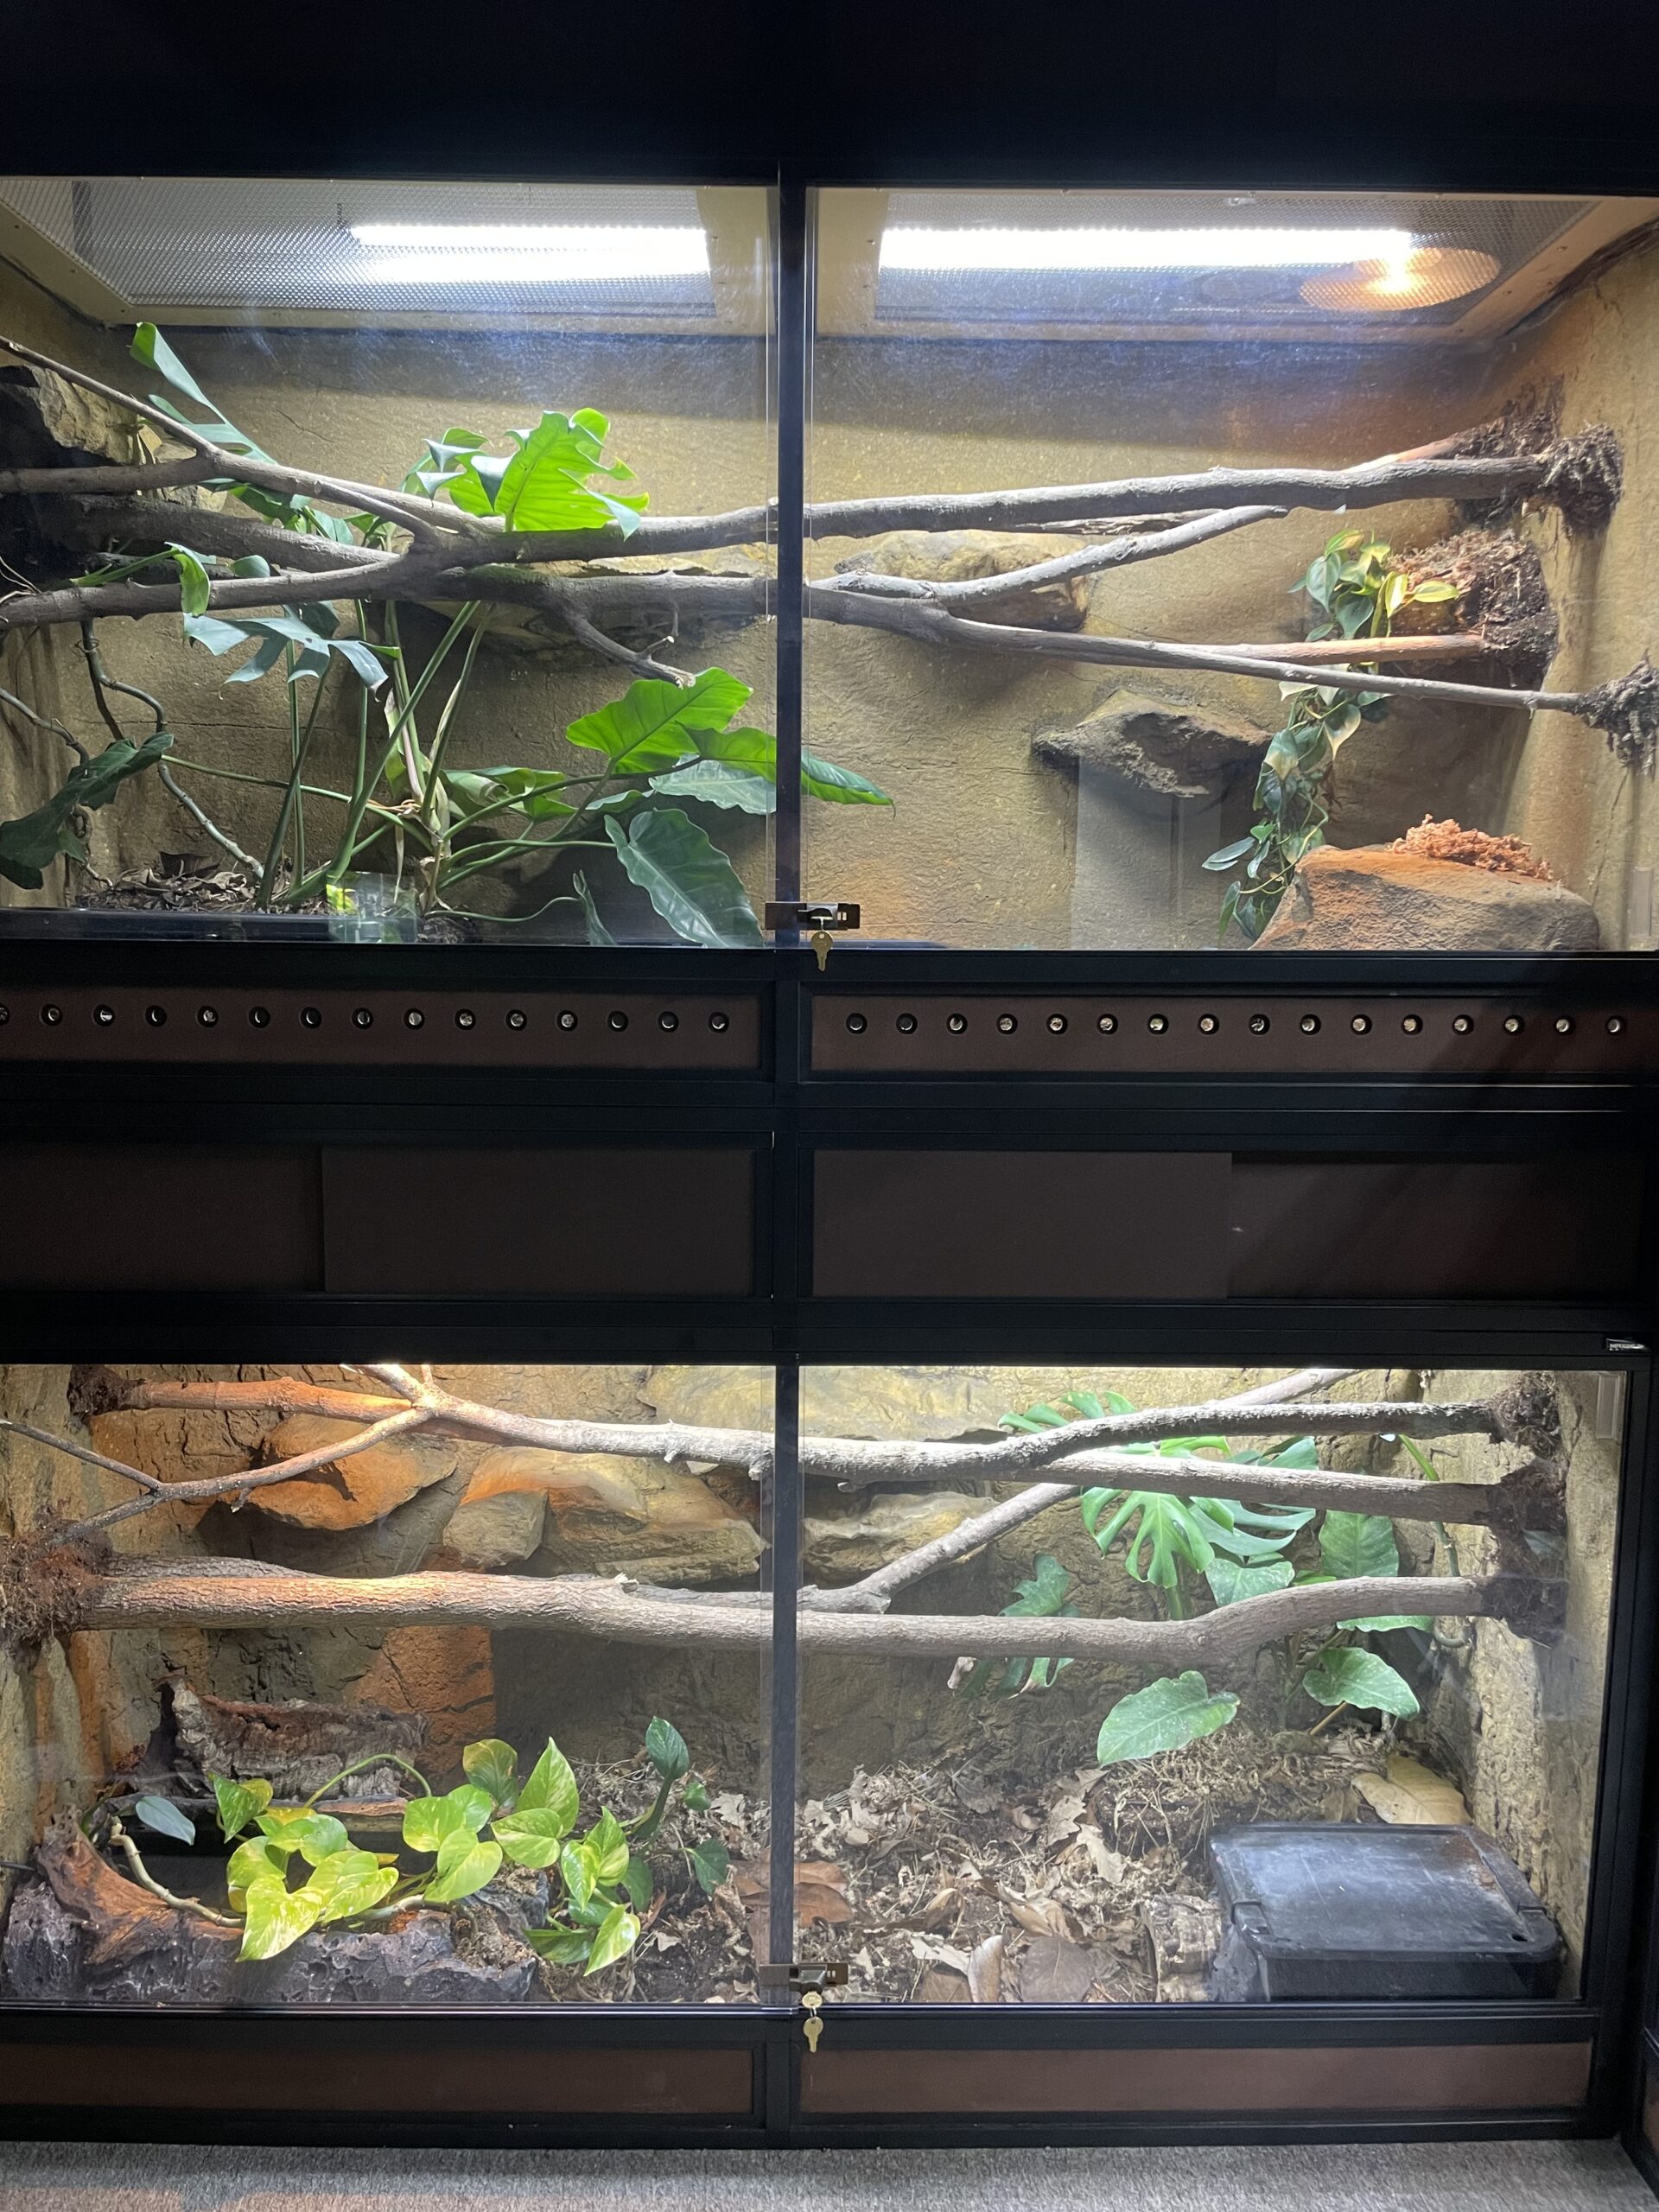
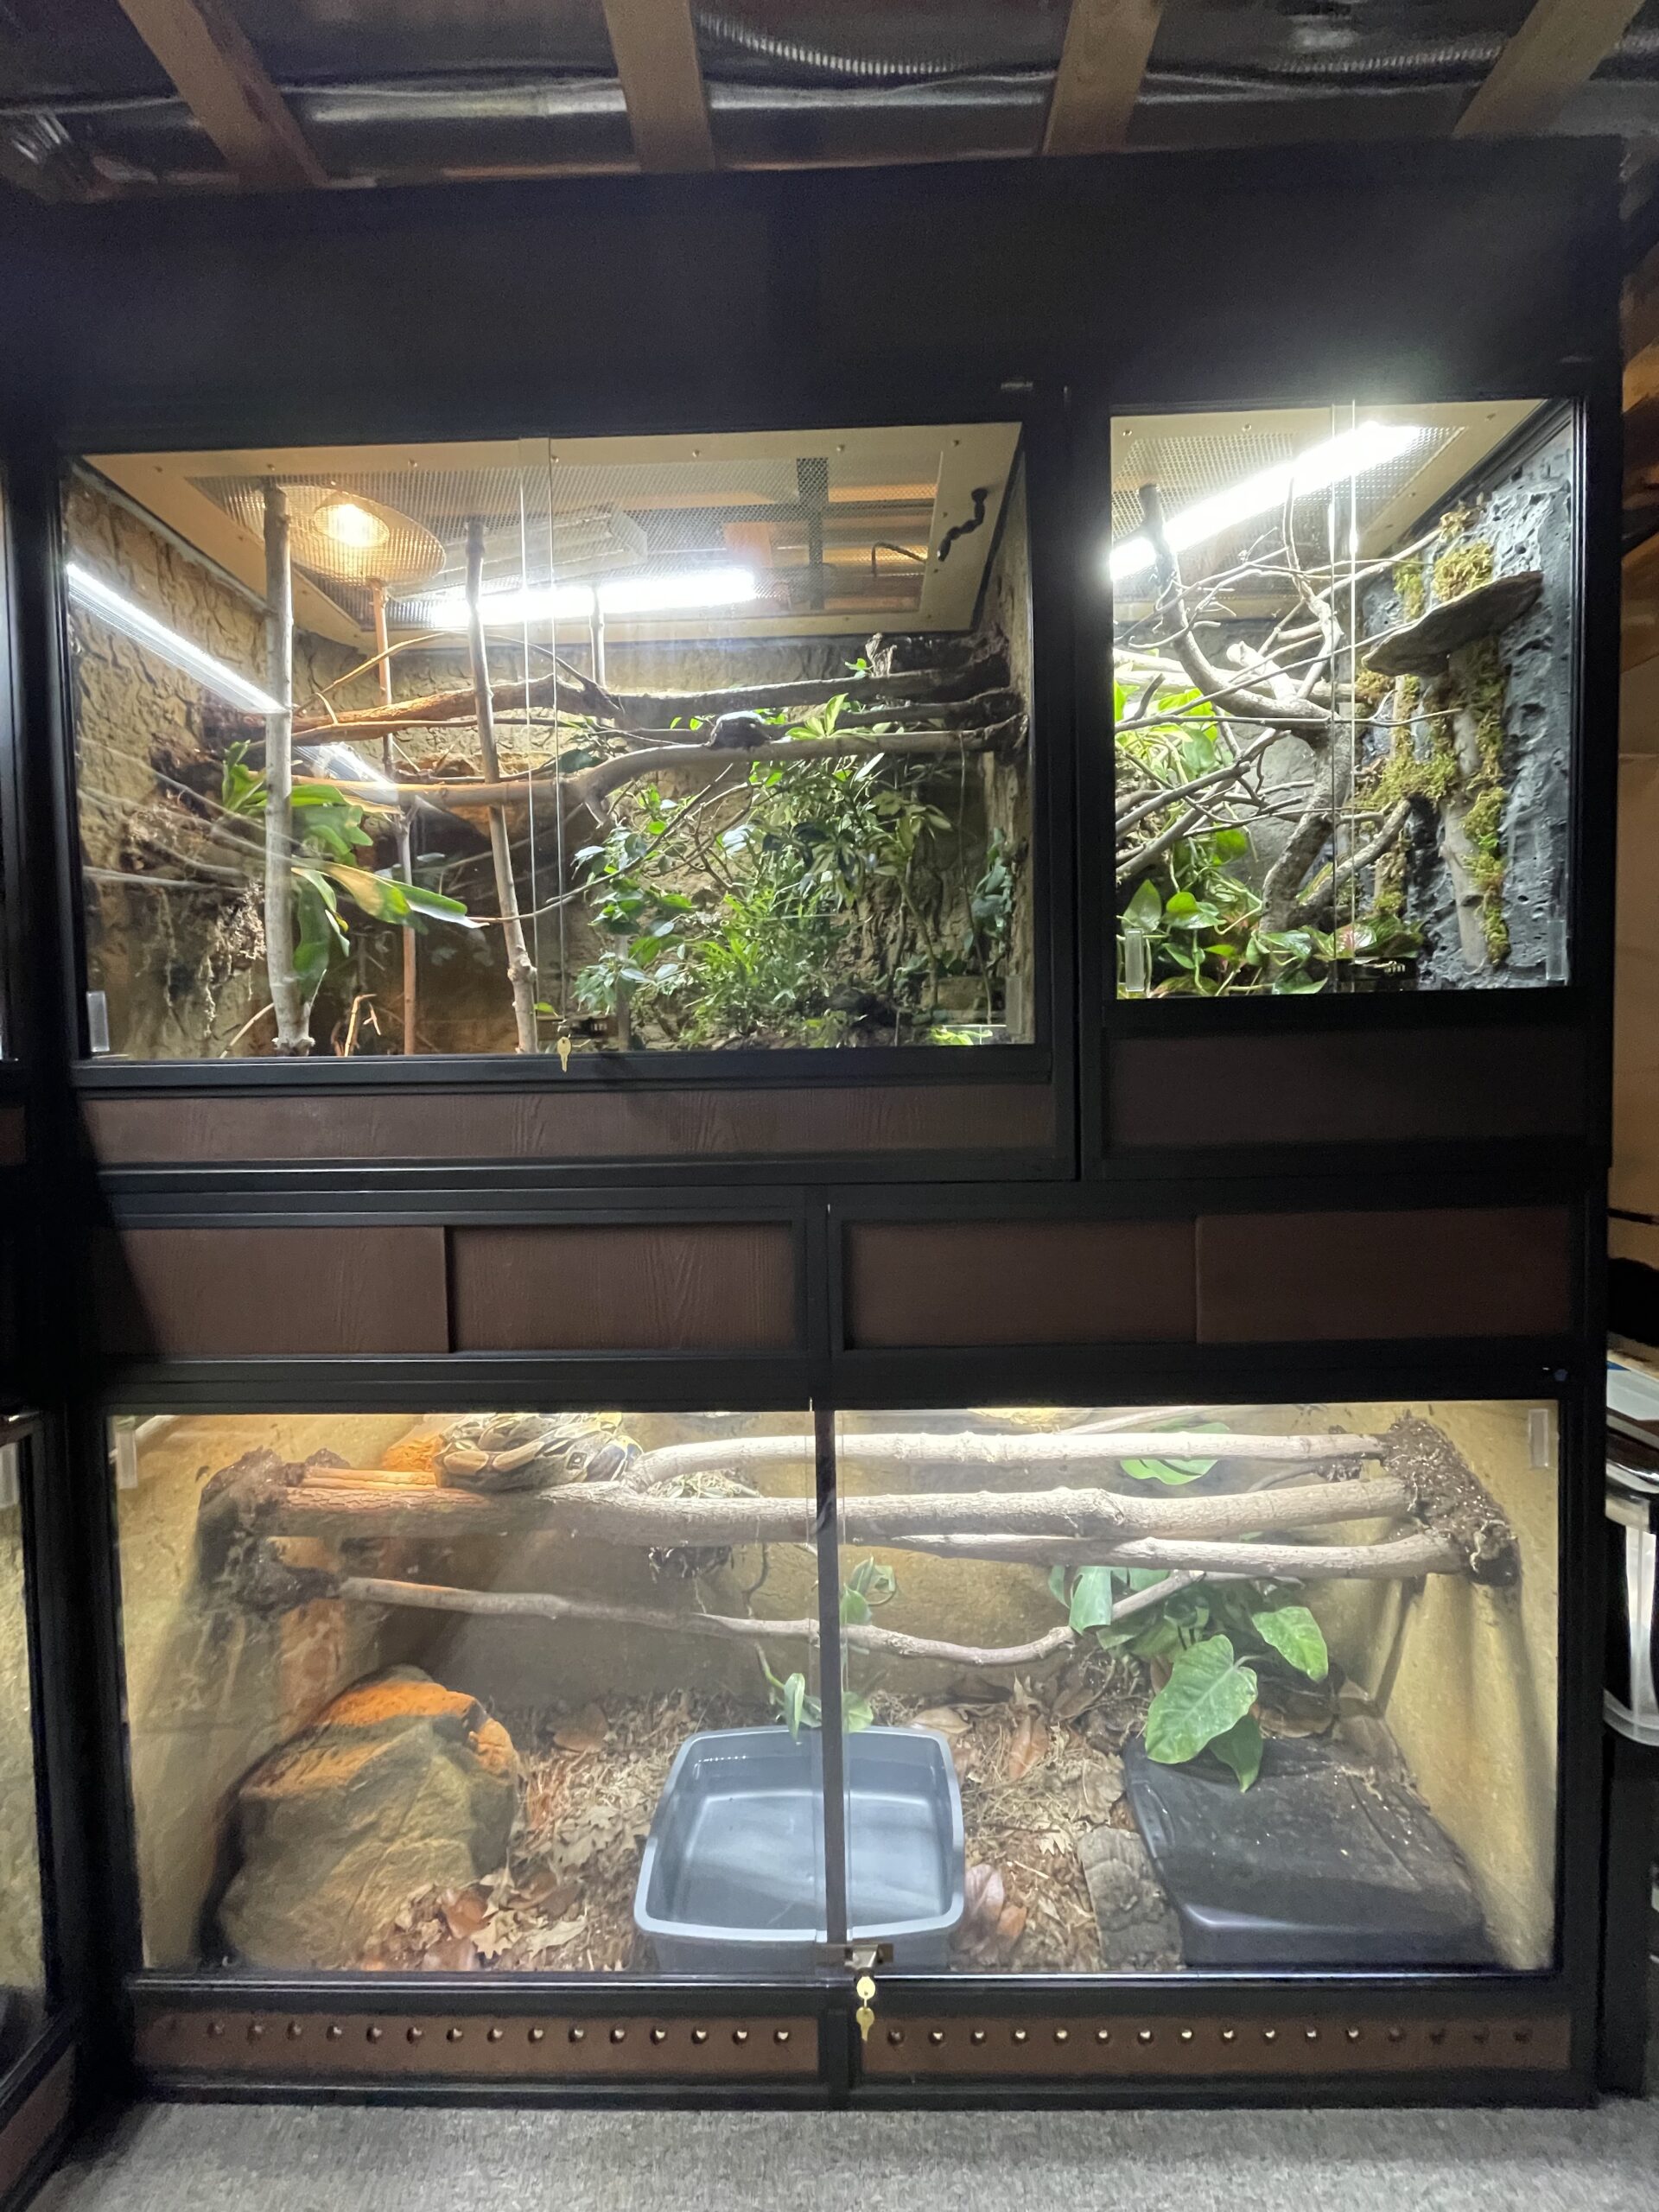
Certainly, there is a “risk vs. reward” component to providing enrichment to your reptile’s environment. However, enrichment is not always about precisely replicating your animal’s wild environment. Hard-core bio-active folks might argue that point, but the risk of a bio-active enclosure is quite high for beginner hobbyists. An advanced hobbyist will take the necessary time to properly set up a beautiful bio-active enclosure that functions as a proper ecosystem. However, fully bio-active setups can be complicated and should not be where a beginner hobbyist starts. This is one scenario where the risk of harmful mold and bacteria growth is higher than the reward of supplying your reptile with enrichment.
Greater Reward than Risk—
The ability to create a successful bio-active setup is great but there are levels of care simpler than that which can be used to enrich your reptile’s habitat. This would include adding décors such as climbing branches, and natural substrate which can be removed and cleaned. Of course, natural décor (such as wood branches) can not always be completely sterilized or at least not easily sterilized and this tends to act as evidence to support the claim in the first paragraph. However, there does not seem to be any academic evidence to support the claim that a reptile’s environment needs to be 100 % sterile. To be clear, this is NOT a suggestion to keep a dirty environment. This is only meant to point out that reptiles do not need to be kept in a clinically sterile environment (sterile meaning “free from bacteria or other living microorganisms; totally clean”).
Large-scale breeders with thousands of animals under one roof may be able to make a case for complete sterility, but the average hobbyist cannot. In fact, there is plenty of anecdotal evidence from various zoos and wildlife centers that avoid “over-cleaning” their enclosures to promote health. For example, some zoos will even leave old skin sheds and urate pellets inside the enclosure to induce breeding behavior. This works because a reptile will become familiar and comfortable with the sights and smells around them. Fully sterilizing your animal’s enclosure and plopping it back into its newly cleaned home is nearly the same as introducing it into a brand new environment, inevitably inducing a stress response. Therefore, the risk of using décor that cannot be fully sterilized as a form of enrichment is much smaller than the reward.
The Reward: Species-Specific Behavior—
The goal of environmental enrichment is to promote “species-specific behavior.” If your animal is not displaying wild-type behaviors, your setup is lacking in necessary environmental enrichment which can lead to stress. Observing your animal move around their enclosure is a great place to start analyzing their well-being.
Of course, reptiles are commonly quite sedentary but keep in mind, there is a massive difference between an animal that is seldom active and an animal that is never active. Having said that, there is a major caveat with using “movement” as a sign of well-being as not all movement is healthy.
Ideally, you have created an environment that promotes animal activity that correlates with healthy species-specific behavior (digging, climbing, basking, swimming, etc.). Healthy activity will act to replace any abnormal behavior/unhealthy activity such as pacing, aggression, absolute sedentarism, nose rubbing, etc. that may occur in captivity. Your animal will exhibit activity and movement patterns, whether the activity patterns are healthy and positive is totally dependent on how the reptile’s enclosure is set up.
Captive Reptiles Aren’t Wild—
Another classic myth thrown around in the community is that since “we are not dealing with actual wild animals,” there is no obligation to care for them that way.
While it is technically true, at an obvious level, that captive reptiles are not wild, it is important to understand that the animals are not domesticated either. We owe it to the reptiles we own to provide them with an experience that has elements of what they are genetically predisposed to deal with in the wild. We must allow the reptile to act out the behaviors it is biologically designed to act out to ensure the greatest potential of well-being. This should be at the core of the exotic animal-care philosophy. Promoting species-specific behavior through environmental enrichment is more than a mere husbandry recommendation, it is a moral obligation.
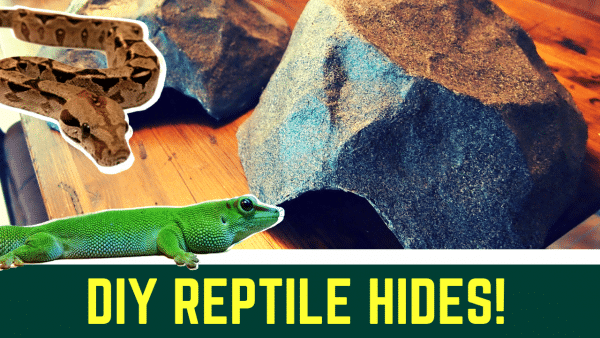
This is not cheaper or easier than buying a store-bought hide! You should only attempt this if you enjoy the crafting process. If you are someone who doesn’t want to spend the time building your own hides (I don’t blame you… it takes a long time!), then I definitely recommend using something like Reptile Basic Hide instead.
STEP ONE: TINFOIL
The first step is rolling out and folding up some tinfoil.I used 3 lengths of about 8′ long side by side and then folded it up to about a 2′ x 2′ square (roughly, probably slightly smaller).
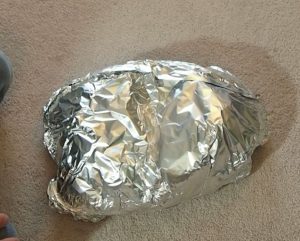
Then, find a bowl or something of similar shape to use as a mold for your snake hide. Stuff the tinfoil into the bowl!
Shaping the tinfoil
Pop the foil out of the bowl and you’ll see you hide starting to take shape. You may also cut out a door hole at this phase.
STEP TWO: MASKING TAPE
Now that we have a rough hide made from tinfoil, the next step is covering the entire hide with a layer of masking tape. Both the outside and the inside of the hide!
Masking Tape over snake hide
Once the entire snake hide is covered in masking tapeyou can use this opportunity to add shape detail to the hide. By that I mean you can make the surface of the hide look more like a rock by adding indents and angles to the surface. I found giving the hide a good “whack” with an object worked well to create realistic looking indents.
DIY Snake hide: Masking tape with indents
STEP THREE: PAPER MACHE
Next up, paper mache! The entire snake hide needs to have at least one layer of paper mache.
Using the foam brush and glue, paint on the tissue paper in small strips over the entire surface of the snake hide (outside and inside).
DIY Snake hide: paper mache
Let the paper mache completely dry before proceeding to the next step. This usually takes anywhere between 6-12 hours. Use a fan to reduce drying time.
STEP FOUR: PAPER CLAY
Last step before we paint! Go to your local craft store, or Amazon and pick up some Paper Clay. I do not recommend making your own paper clay, store-bought paper clay is non-toxic when dry (be sure to read the package)… I can’t say the same about DIY paper clay.
Paper clay DIY Snake Hide
Tear off chunks of the paper clay from the brick and begin spreading it across the top surface of the hide (no need to do the inside surface).
Paper clay DIY Snake Hide
Paper clay air dries very slowly so this is your opportunity to etch in any additional details you may want to add, crevasses and cracks for example.
Once you have fully applied a layer of clay, allow it to dry and harden. This takes about 12-24 hours or 30-40 mins in the oven set at 170°F (keep an eye on it if you do this!)
STEP FIVE: PAINT!
Once your hide’s clay has hardened, you may paint it!
DIY Snake Hide: Clay
I painted my DIY snake hides in two different ways:
Central American Boa care is really not any different than their Columbian cousins. There is a wide range of Central American boa localities, each having their own distinct color, pattern and adult size range. Typically the Central American boas are smaller than Columbian boas making them appealing to people who want a boa but want also want something that will stay quite small.
Common Columbian boas and Central American boas are the same species (Boa constrictor imperator or just Boa imperator). These are a separate species from your true Red Tail Boa Constrictors (Boa constrictor constrictor)
As a complete generalization Central American boas will range from adult sizes of 3-5 feet in length. Island boas such as the Hog Island and Crawl Cay localities tend to be quite small and mainland boas such as the Costa Rican boa tend to be larger.
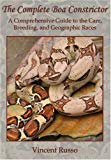
If you want an in-depth description of each Central Amercian locale along with any variations in care for each, I would highly recommend Vin Russo’s book. The Complete Boa Constrictor:
Vin goes into great detail regarding each specific locality of Central America Boa as well as any differences in care. You can find my review of the book HERE.However, I will say most of Vin’s advice is relevant if you are trying to breed. If you are just looking for general Central American Boa care, then the care sheet below will work just fine!
Central American Boa Care
Central American Boa care: Enclosure
Enclosure
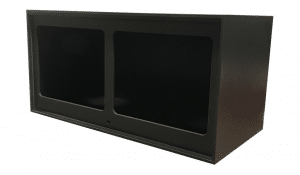
The enclosure you choose should be at least the length of your snake when fully stretched out. Longer is even better provided you have ample hiding spots! Most likely you will require an enclosure that is somewhere between 4′-5′ long and somewhere between 18″-24″ wide. Central American Boas are light-bodied and many of them are keen on climbing! I recommend providing at least 18″-24″ of climbing space.
There are plenty of caging options n the market these days, but PVC enclosures seem to be the most popular as they maintain humidity and heat nicely.
Animal Plasticshas some really nice options:
Photo from: https://apcages.com/collections/terrestrial-cages/products/t12-48l-x-24w-x-24h
If you follow my YouTube Channelyou know I have built a few of my own cages as well. You can see the examples in the video below or visit my DIY Page.
I recommend having plenty of climbing branches and shelves too! Watch the video below to see who I built shelves for my Central American Boa (Winston) and secured climbing branches inside the enclosure.
This section is SO important! So important that it needed its own post completely. I wrote an entire, in-depth article regarding how to feed your boa constrictor, Boa constrictor feeding chart.
Long story short, people tend to WAY overfeed their boas! Again, the Central American boa care is not going to differ from a Columbian boa but please do your research! The article above will provide you with what you need to know.
I am intentionally leaving out specific feed routines and practices in this article because I’d like you to read the more in-depth article available.
Humidity
Humidity requirements are fairly straightforward for Central American Boas. I try and keep the relative humidity between 60-80% in the summer and 50-60% in the winter. Your snake should shed in one complete piece if they shed in pieces you need to bump up your humidity.
This is another area where I personally believe people over-do i.e. keep their snakes too hot! Not too mention, some of the Central American localities can handle even cooler temperatures than their South American cousins. For example, in the wild Sonoran Desert boas are exposed to temperatures as low as 50°F in the winter months. As I said above, Vin Russo’s book goes into detail regarding temperatures for each locality but the general figures below will also work fine!
Summer (or year round):
Hotspot: 88-92°F
Ambient warm side: 80-85°
Ambient cool side: 72-78°F
Winter (cooling off the temperatures during the winter is not necessary if you do make sure you also reduce meal frequency):
Hotspot (no hotspot at night): 85°F
Ambient warm side: 78°F
Ambient cool side and night time: 70-72°F
If you cool down your boa in the winter, make sure you change the temperatures gradually over several weeks.
You can use a heat mat, heat tape or even a radiant heat panel to maintain proper temperatures. You must use a thermostat! Read the article below to check out my favorite thermostats as well as how to properly set up your thermostat probe:
Your boa will tell you what you need to know if you observe them closely. They should oscillate between their warm hide and cool hide on a semi-regular basis (maybe once a week or once every 2 weeks). If they spend all their time on the cool side, I would consider cooling off the hotspot. If they spend all their time in the warm hide, I would but up your cool side ambient temperature.
In my experience, boas like somewhat cooler temperatures. My boas spend the majority of their time on the cool side (usually 72-74°F) and tend to only go to the warm side to shed and digest.
Central American boa constrictors do not have any specific light requirements but in my opinion, it is healthy to offer a regular photoperiod. I use LED strip lightingfor my boas and I connect it to an outlet timer with a 12 hour on/ 12 hour off cycle in the summer and a 10 hour on/ 14 hour off cycle in the winter.
Substrate
There are plenty of great substrates to choose from! I personally like shredded aspen and coco-husk. Watch the video below or read the article for more information on the substrate.
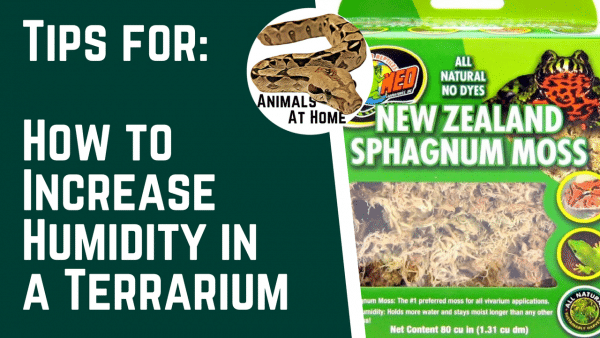
Whether you live in an arid climate or you care for a species that requires a high level of humidity (such as a rainbow boa or amphibian species), you’ll certainly need to know how to increase humidity in a terrarium!
SCROLL TO THE BOTTOM OF THE PAGE FOR MY VIDEO REVIEW OF SPHAGNUM MOSS
Sphagnum Moss is one of the best, natural ways you can increase your humidity levels.
Humidity vs Relative Humidity
Before we go any further it is important we understand what we are talking about!
Humidity: as you probably know is the term we use to describe the amount of water vapor in the air.
Relative Humidity: on the other hand, is the actual measurement of the amount of vapor in the air represented as a percentage of the amount needed to fully saturate the air at its current temperature.
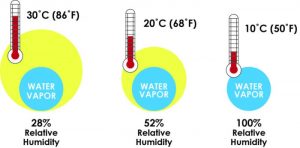
Relative humidity is what you are working with when discussing humidity levels inside your terrarium. The reason it is “relative” is due to the fact that air is capable of holding different amounts of water vapor at different temperatures.
Warm air can hold more moisture than cool air as shown in this image below.
An equal volume of water vapor will result in different levels of relative humidity at different temperatures. Therefore it is important that you are trying to balance your reptile’s humidity levels after you have established the proper temperature parameters.
If you are looking for how to increase humidity in a terrarium… then here are the first two keys takeaways:
Higher relative humidity will require more water vapor in the air
You must ensure your temperatures are set properly for the species you care for before trying to establish proper humidity levels.
How to Measure: Best Hygrometer for Reptiles
Okay, so I understand what relative humidity is but how do you measure it? What is the best hygrometer for reptiles?
There are many digital hygrometers on the market, typically you can save money by buying one off of Amazonrather than your local pet store.
You have two options when it comes to hygrometers:
Inexpensive ($3-8), the two below are the ones I use (the white one seems to be more accurate, see below).Inexpensive hygrometers have two fairly serious faults. The first is that they are typically not that accurate and the second is over time they will become even more inaccurate as extended exposure to high humidity tends to damage the sensors.
Best reptile hygrometer- DC103Best reptile – Brand: Amir
Or expensive ($10-25). You’ll find high-quality hygrometers in the cigar hobby. Those guys are serious about there relative humidity! Cigar hygrometers are very accurate, can handle high humidity for a very long time and can be calibrated and recalibrated to maintain accuracy.
Best Reptile Hygrometer- Hydroset II
Best reptile hygrometer- Cigar Oasis Caliber IV
If Cheap Hygrometers are Inaccurate, Are they even worth it?
You don’t feel like spending the extra money on an expensive, more accurate hygrometer hey? I don’t blame you! I didn’t either. Fortunately, there is a way you can calibrate even the cheap units!
Instead of a ziplock bag, I used a Tupperware container like in this video:
Note: You need to wait the full 24 hours, as the video says. Not 6 like the wikiHow article says.
Your inexpensive hygrometer will not have a button to adjust the reading it gives you so it is just something you’ll have to keep in mind. For example, this was my result after calibrating my units:
Best Reptile Hygrometer
This meant that the white hygrometer bang on but the black ones seem to read about 10-12 % high. There is nothing I can do to the black ones to make them display an accurate figure, instead, I just have to do some mental math every time I look at them.
NOTE: I redid this calibration about 1 year later and the white one then displayed 72% (i.e. 3 % low) and the black ones displayed 79% (4% high). As I said above, over time the inexpensive hygrometers will fluctuate in their accuracy.
How to Increase Humidity in a Terrarium
There are several different ways you can increase humidity in your animal’s terrarium. Your goal should be to set your enclosure up in a way that the relative humidity stays within your animal’s requirements with little to no regular intervention.
In other words, you should not be fighting with your humidity levels on a regular basis. Things should be set up in a way that your humidity natural sits in the healthy range for your specific animal.
How to Increase Humidity in a Terrarium: Various Methods
Ventilation:
The more ventilation you have the lower you relative humidity will be. If you have an animal that requires high levels of humidity than limited ventilation is in order.
My Brazilian Rainbow Boa enclosure only has eight vent holes, four of them are shown below:
Brazilian Rainbow Boa Ventilation- How to increase humidity in a terrarium
Water Dish:
This one is pretty straightforward! The larger the surface area of your water dish, the more evaporation, the more water vapor in the air of your terrarium. Some people like to but their water dish on the warm side of the enclosure to illicit more evaporation. In my opinion that encourages bacteria growth in the water dish.
I like to use large plastic containers for my water dishes (without the lid obviously):
Large water dish- How to increase humidity in a terrarium
Substrate:
There are many types of substrates you can use to help maintain humidity in your terrarium. Cypress mulchand EcoEarthare my favorites, you can read more about that in this article: Best Ball Python Substrate.
Cypress Mulch- How to increase humidity in a terrariumEcoEarth- How to Increase Humidity in a Terrarium
These are great substrates but keep in mind there affects on your terrarium’s humidity is not permanent. They will slowly dry out over time and no longer provide as much moisture as they did right out of the bag.
Misting:
Misting your terrarium is one of those controversial methods! Many people say you should not use misting as a way to maintain humidity (unless of course, you are using it for your animal’s drinking water).
Generally, people say to avoid this method for two reasons: 1) it implies that you have not done a great job setting up your enclosure so it can maintain proper humidity on its own and 2) it can lead to too much sitting-water in the terrarium.
Exo Terra Mister- How to Increase Humidity in a Terrarium
“Anti-misters” definitely have a point! This is a method that should be used sparingly but I do think it has its place provided it is done properly. If you are like me and have to deal with an extremely arid climate then misting may be a necessity for you on occasion.
When I mist, I make sure to mix around the substrate while I do it. I am looking to create a slightly moistened substrate and that is it, not sopping wet!
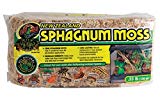
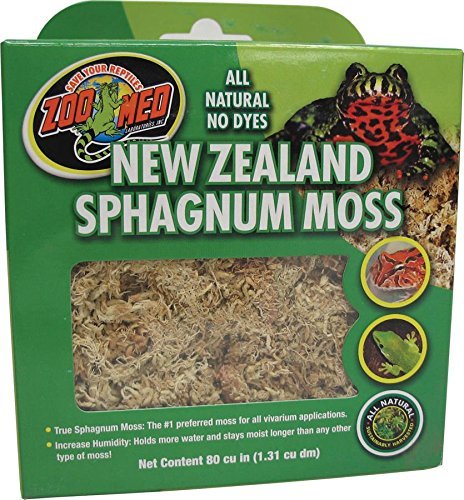
Sphagnum moss for Snakes and other Critters!
Just recently I tried outsphagnum mossby Zoomed and loved it! It is a very easy (and reusable) product that holds moisture for a very long period of time! I added it to my Brazilian rainbow enclosure and it maintained a relative humidity of over 90% for more than 2 weeks straight without having to be re-moistened.
I highly recommend this product if you are needing a boost in your humidity levels. Watch my full video review below:
BSFL or black soldier fly larva are some of the best feeder insects available for your reptile. They are my go-to feeder for my giant day gecko. They are very easy to care for, extremely nutritious and can provide some great environmental enrichment when they turn into flies!
Watch the video below!
ALL BSFL are not made the same!
There are many different brands of black soldier fly larvae but the only brand I can recommend is Phoenix Worm.
Phoenix worm’s: Best feeder insects
Phoenix Worm feeds their BSFL an enriched grain-based diet which causes the larvae to be very high in calcium. You may be able to find other brands you are satisfied with but always I stick with Phoenix Worms
Phoenix Worm: Best feeder Insects
Why Choose BSFL?
Black soldier fly larvae produced by Phoenix Worm are a far superior feeder than most of the other common feeders available. The main reason for the difference is their nutritional makeup as you can see in the chart below.
BSFL (especially from Phoenix Worm) have a VERY high calcium to phosphorus ratio. This means you are not required to dust them before feeding!
You also do not have to gut load them. They can survive for weeks inside the tub you purchase them in. When I say you don’t have to gut load… I really mean— don’t gut load! Guting loading can cause your colony to die off and rot inside the container.
Ideally, you keep your container of BSFL at a temperature of around 50-60°F as this will slow down their life cycle considerably. In the winter months I keep my container on a window sill (it is very cold where I live) and in the summer I don’t worry about it. i.e. I just deal with the quicker life cycle.
Feeding BSFL to your Animal
When you first open your container of Phoenix Worm’s you’ll think: “what? the container is empty?” but if you dig around you will find plenty of worms!
BSFL: best feeder insects
Here is what one looks like up close:
Black soldier fly larva
When I am getting ready to feed my animal I dig out about 8-12 worms (larvae) and place them in a glass dish. The larvae don’t move around a ton but they do wriggle around enough to draw the attention of my gecko (and yours too probably).
BSFL: best feeder insects
And again, no need to dust with powdered supplements so once I have removed them from the container the feed dish can go directly into the enclosure!
Black soldier fly larva feeder
Mealtime!
Day Gecko eating Black Soldier Fly Larva
Ruby loves these things!
Day Gecko eating BSFLDay Gecko eating BSFL
Can you Feed Black Soldier Flies to Your Animal?
So, what happens when the larvae start to pupate?
Eventually (if you don’t go through your colony fast enough), the larvae will begin to pupate. BSF pupae look like this:
Black Soldier Fly Pupa
They are stiff, black, cacoon looking things. They still have essentially the same nutritional value as the larvae but they don’t move! Therefore, your animal will likely not eat them.
But, that doesn’t mean they are useless! When the larvae enter this phase of their life it means they are getting ready to metamorphose into the adult form: the black soldier fly!
Black Soldier Fly Pupa
Black soldier flies are great to feed your animal as it forces them to really hunt which is very fun to watch (click the video to see that in action). Every few days I collect any pupae I find in the BSFL container and I chuck them into the soil of my giant day gecko enclosure.
Over the next few weeks (sometimes months) the pupae will complete their life cycle and you’ll find a fly buzzing around the enclosure. Usually, they have fairly short lives… it typically takes my gecko about 3-5 minutes to grab them.
Black Soldier Fly: Best feeder insectsBlack Soldier Fly: Best feeder insects
Watch the video below to watch a giant day gecko hunt down some black soldier flies!
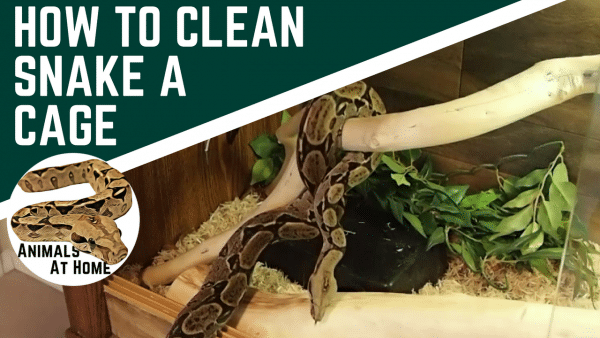
How to clean a snake tank? Well there is definitely more than one way to do this but I will layout the way I go about it and the reasons why!
SCROLL TO THE BOTTOM FOR A FREE SNAKE CARE LOGBOOK!
Spot Clean or Full Tank Clean?
Spot Clean: When people use the term “spot clean” they essentially mean they remove feces & waste when the see it. Basically the same thing you see people do with their dogs when they take dumps in the park.
During a typical spot clean, the owner scoops out the waste (and usually some of the substrate) throws it out and moves on to the next enclosure. This is a quick method for removing waste, especially if you have many animals to clean.
People who subscribe to this method normally do a full tank clean every few weeks so they can wipe down the floor, and replace the substrate etc. as spot cleaning does not normally take care of all the waste (especially urates).
Full Tank Clean: The other common way people clean their snake’s tank is by doing a full clean. In other words, they pull everything out (animal, decor, water dish, etc), throw all the old substrate out, and then sanitize the floor and the walls. Once clean, they re-add fresh substrate, decor and of course the animal!
This method is common for tanks with a paper towel or newspaper substrate because the urates are not contained very well i.e. snake pee tends to spread out over a larger foot print.
So what is the better of the two methods? In my opinion: neither!
Freshly Cleaned Cage
How to Clean a Snake Tank-The Hybrid Method:
The method I use is a combination of both a “spot clean” and a “full clean.” First, let’s take a look at the reasons I don’t like the spot clean and full clean methods.
Why I Don’t Spot Clean:
Urates tend to remain in the enclosure. Feces are very easy to scoop up in a spot clean but urates (snake urine, which is both solid white clumps and liquid) are harder to pick up because the liquid seeps into the surrounding substrate.
This can leave the offensive smell of snake urine inside the enclosure. This is a very bad smell. If you’ve ever been to a reptile breeder or pet shop that doesn’t do a good job cleaning, the smell of snake pee will hit you like a truck when you walk into the door. I do not want my office smelling that way (the room I keep my snakes).
There are a few reasons why I don’t like to do a full clean of my snake enclosures every time they defecate. The first (and less important of the two) is to save time and money, doing a full cleaning takes more time and you end up going through way more substrate because you replace all the bedding every time you clean.
The real reason I don’t like doing a full cleaning is because I think it is important to keep the snake’s environment as consistent as possible. Snakes are very sensitive to their environment, especially due to their powerful sense of smell. Drastically changing a snakes environment can actually induce a stress response in the animal.
Think of it this way— your snake has been crawling and borrowing all over its substrate and decor for weeks, it becomes familiar with the smells of the enclosure. I also think (me speculating) that the animal itself emits its own body odor throughout the enclosure, an odor which that maybe we can’t perceive but it can. In other words, its enclosure “smells like home.”
When you perform a full clean, you completely strip all of that away in one fell swoop. This thrusts the animal into a brand new environment, an environment it has not explored (even if it looks the same, it doesn’t smell the same), an environment that may not be safe. Hence a stress response. Take a listen to this HerpNation Podcast @ 45:10 ,the whole podcast is good but the 45 minute mark discusses this in more detail.
In my opinion, the “hybrid” method I use is best of both worlds. It removes all the urates, removing the pee smell and allows most of the substrate to remain in the enclosure to hopefully keep environment slightly more familiar to the animal.
Remove feces, urates and substrate! I ONLY remove the substrate that falls within about a 8-10″ radius around where the waste was found. Essentially I am trying to remove all substrate that has absorbed any of the urine.
Snake poopHow to clean snake tank with kitty litter scoop
Once I am left with only unsoiled substrate, I push what is left over to the sides of the enclosure.
Left over, clean substrate
STEP FOUR:
Next, I spray the area down with the 10% bleach solution. I let the solution sit for 10-15 minutes to give it time to kill any bacteria.
Clean snake tank with bleach solution
Then I wipe up the bleach!
Paper Towel- How to clean a snake tank
STEP FIVE:
Once the bleach is wiped up, I then mist the whole area down again but this time with fresh water. The idea here is that the water is absorbing any leftover bleach solution that remains on the floor of the enclosure.
How to clean a snake tank- water spray
Once I wipe up the water, I try my best to use my nose to determine if I can either still smell urine, or bleach. If I don’t smell either, I move on!
STEP SIX:
Time to replace the soiled substrate with fresh substrate!
Fresh Aspen
Once the new substrate is in, decor can also be re-added!
Freshly clean tank
STEP SEVEN:
This is a crucial step in my opinion! I know not everyone is going to do this but I highly recommend keeping a logbook. I have attached a PDF copy of the logbook I made and use below. Download it, print it and use it if you like!
Snake care is not complicated, but a lot of the care is “few and far between,” especially feeding and cleaning. A logbook just makes your life easier, and allows you to maintain healthier animals.
After every defecation I always weigh my snakes. Waiting until after they have defecated will allow you to get a more accurate weight, as you will be weighing close to “empty.”
Weighing a Boa constrictor
A healthy snake should be always gaining or maintaining their weight (give or take). Of course if you are breeding your animals they will be subject to weight changes but generally you are looking for any unexpected changes in weight. An animal that is loosing weight unexpectedly could be ill, and if that is the case I would consider taking them in to see a vet.
Snake Care Logbook
Here is a snapshot of my logbook. First I write in the date, then the weight of the snake, next to the weight in brackets I right how much weight was gained or lost, then I will make a note regarding the waste itself (eg. usually I put an, “N”= normal, but if I notice anything strange or different I will jot that down instead), and finally I put another number in brackets indicating how many days since last defecation.
The particular example above the animal actually lost weight but if you look at the line above you will see why. The day before the snake produced urates only and when I weighed him he was still holding on to 50g of feces.
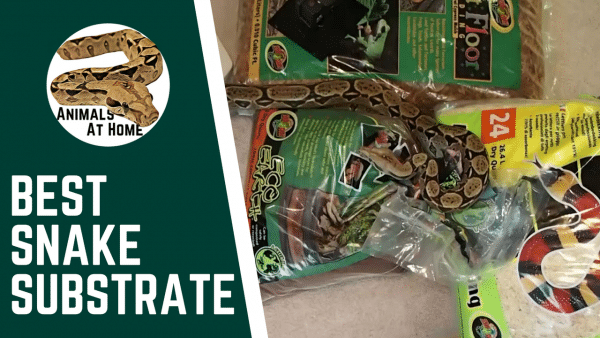
Question: What is the best substrate for ball pythons (or for any snake for that matter)?
In this article I am going to give my review and opinion on 5 different substrate options you could use for your ball python, boa, corn snake, king snake, etc.
I am all about NATURAL SUBSTRATES! The best substrate for ball pythons in my opinion is either aspen or coconut husk. If you own a different species of snake, you may find another substrate on this page to be beneficial.
Here are the 5 Snake Substrates I review in the article:
What is the Best Substrate for Ball Pythons and Other Captive Snakes- VIDEO:
ASPEN
Brands/ Where to Buy:
The most common brand available is Zoo Med Aspen Snake Bedding.There are other brands of “pet” aspen bedding widely available as well but the nice thing about the Zoo Med product is it is designed for snake use.
Aspen Substrate for snakes
The issue with “general use” aspen bedding, i.e. bedding that is made for rodents, birds, etc. is that the chips are much larger (could potentially lead to digestion issues if swallowed), and they tend to be quite dusty.
Aspen Substrate for snakesZoo Med Aspen Snake Beddingis “double shredded” for smaller chips (can safely pass through digestive system if they happen to ingested, this needs to still be avoided!) and they have also removed all of the dust!
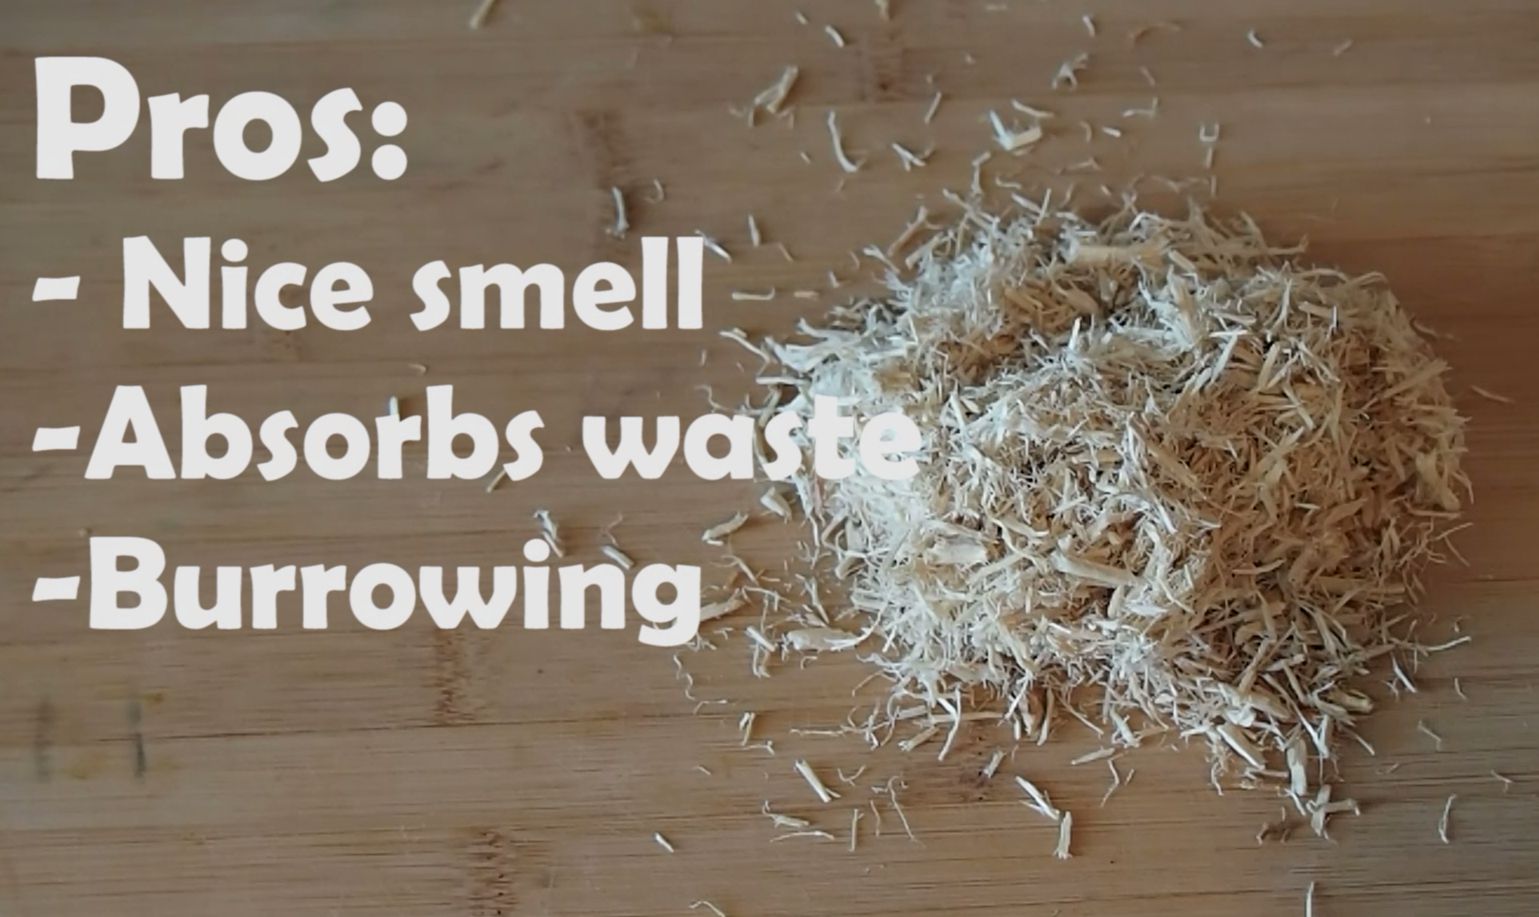
Pros:
Aspen has a nice, natural “woody” scent
It absorbs waste well
Its texture and size make it a great substrate for burrowing animals
It is very light in color— this may seem like a random “pro” so let me explain. The light color makes it very easy to spot your snakes waste in the enclosure. Spot checking is much quicker with aspen when compared to darker substrates (the waste sticks out like a sore thumb!)
Cons:
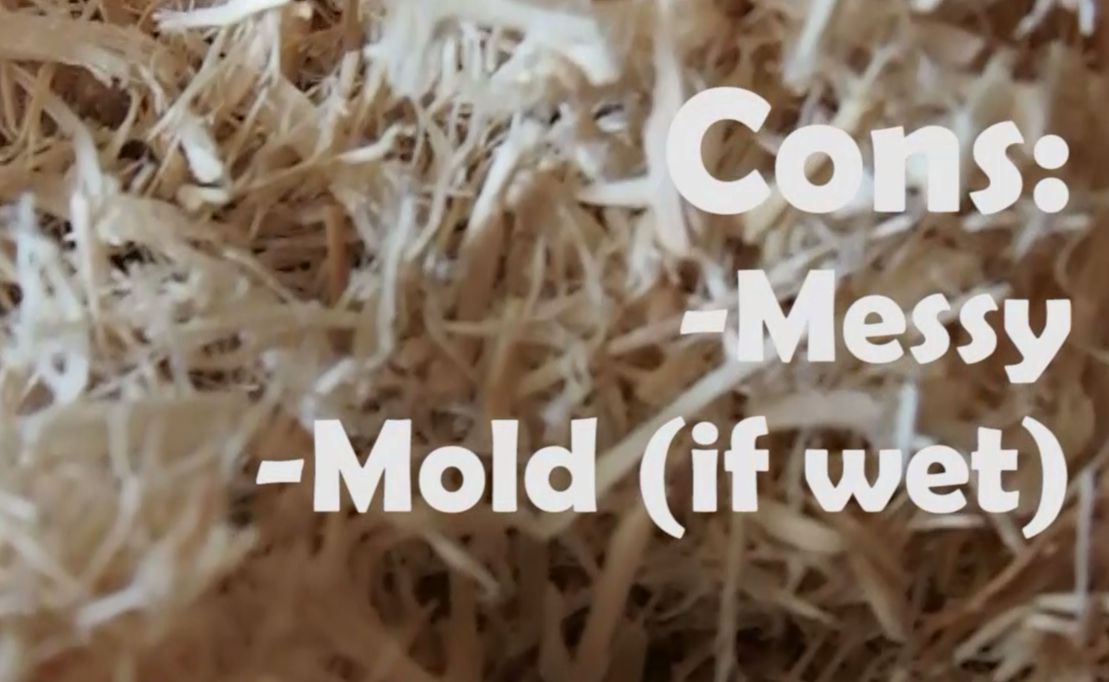
Messy! No matter how careful you are… you will need to vacuum or sweep your floor on cleaning day. The light weight aspen will find its way to the floor no matter what!
If aspen is left damp for a long period of time it will grow mold
Final Thoughts:
Aspen is often considered the best substrate for ball pythons, boas, corn snakes, king snakes, hognose… well pretty much any kind of snake! This is totally subjective but I definitely recommend trying it out to see what you think! This is a great substrate if you are looking for something natural looking (and smelling) and will give your animal something to burrow through.
I would only advice against using it in very humid enclosures, for example I wouldn’t use it for my Brazilian Rainbow boa.
COCONUT HUSK
Brands/ Where to Buy:
There are many different brands of coconut husk available on the market, and it really comes down to your personal preference. A few of the popular pet brands are:
Repti-Chip(I have not tired Repti-Chip but I always hear it advertised on Herp Nation Radio)
This substrate is highly absorbent! It does a great job of not only absorbing liquids but also smells too.
Like most coconut products, coconut husk is anti-bacteria/microbial meaning you do not need to worry about mold growing on the substrate.
Coco bedding for snakes
Cons:
Coconut husk is made of fairly large “chips”. Because of this I am always extra careful when feeding my snakes on this substrate, as swallowing a large piece of substrate could cause digestive issues. On occasion one of my animals will ingest some coconut husk… It has never caused a problem but I still try and avoid it.
Due to its size it in not the best substrate for burrowing
Coco bedding for snakes
Final Thoughts:
I highly recommend coconut husk as a snake substrate for pretty much any snake you own (ball python, boa, corn, etc.). Is it the best substrate for ball pythons or other snakes? Again, it is up to personal preference. I love coconut husk and it is pretty much all I use for my boas (although right now they are on a aspen/coconut husk mix). Here is a reason you might not want to use it:
Due to its coconut husk’s color and amazing ability to absorb smells and waste it can actually make spot checking a little more challenging as your snakes waste is camouflaged better (both visually and scent-wise). Now this is hardly a “con” but it you have many animals to check on, you might gravitate towards a lighter color substrate (such as aspen) so you can more easily see your snakes waste.
CYPRESS MULCH
Brands/ Where to Buy:
The only brand of cypress mulch I have found locally is Zoo Med Forest Floor, although you might be able to find better deals on Amazonfor other popular brands. You can also find cypress mulch at your local gardening store but make sure it contains CYPRESS MULCH ONLY, some contain pine and cedar chips which are toxic to your animal.Cypress mulch for snakes
Pros:
Cypress mulch is the go-to substrate if you need a bump in your humidity. When cypress mulch is bagged it begins to go through a decomposition process, this process releases moisture from the wood chips. You will notice when you first open a fresh bag, the chips are very damp.
Luckily cypress mulch is very resistant to mold growth so the heavy moisture level is not an issue.
Cypress mulch for snakes
Initially, cypress mulch will induce a humidity spike in your enclosure. Although, over time cypress mulch will dry out. After that you can mist down cypress mulch every few days to try and re-hydrate it, as it holds onto moisture quite well…although it will never be as wet as it is right out of the bag.
Cypress mulch for snakes
Cons:
I would not consider cypress mulch as an ideal burrowing substrate as it is not easily dug through (without feet and claws that is!).
The chips size is variable but some pieces are very large, and rather sharp. This is another substrate I am very careful when feeding on.
Cypress mulch for snakes
Final Thoughts:
Cypress mulch is not the best substrate for ball pythons, as most likely it would provide more humidity than you require. However, cypress mulch is a fantastic substrate for other snakes, especially humidity living animals such as rainbow boas.
This is another GREAT smelling substrate too, it will give your animal’s enclosure a nice “woody” scent and provides some awesome environmental enrichment.
COCONUT FIBER
Brands/ Where to Buy:
Coconut fiber is the last natural substrate I am covering in this article. The brand I use is Eco Earth Loose Coconut Substrate. You can find it in both a “loose” form and “compressed” form. The loose stuff is definitely easier to work with as the compressed stuff needs to be soaked first. This is another subsrate you may be able to find in a gardening store: Kempf Compressed Coco Fiber.Coco fiber bedding for snakes
Pros:
Due to coconut fibers “soil like” texture it makes for a great burrowing substrate!
Again, just like coconut husk, coconut fiber is highly absorbent of snake waste (including smell).
Its high surface area allows it to retain much more moisture than coconut husk
Anti mold
Coco fiber bedding for snakes
Cons:
This is a messy substrate! When it is dry it gets everywhere and is actually quite dusty which is a definite downside.
Coco fiber bedding for snakes
Final Thoughts:
This is a snake substrate that I would again reserve for animals that require higher humidity, i.e. I wouldn’t rank it as the best substrate for ball pythons, and would actually recommend against using it for any snake that doesn’t require elevated humidity. Again it is quite messy and retains quite a lot of moisture. Used on its own is usually more work that its worth (gets in water dishes etc.) although, I have come up with a good solution:
I am currently using a blend of cypress mulchand Eco Earth for my Brazilian Rainbow boa. I find the cypress mulch contains the mess of the Eco Earth and the Eco Earth allows for more opportunity to burrow than the cypress mulch would have to offer on its own.
PAPER TOWEL/ NEWSPAPER
Paper towel and newspaper are probably the most frequent substrate recommendations, however, are they actually the best substrate for ball pythons or other snakes?
I think NOT! Although they can still play an important role in your animal’s care.
Paper Towel- the Best Substrate for ball pythons?
There are two scenarios (actually maybe 3) when I would consider paper towel to be the best substrate for ball pythons and other captive snakes. The scenarios are:
Paper Towel- Best Substrate for Ball pythons?
Quarantine
Hospital
Neonate
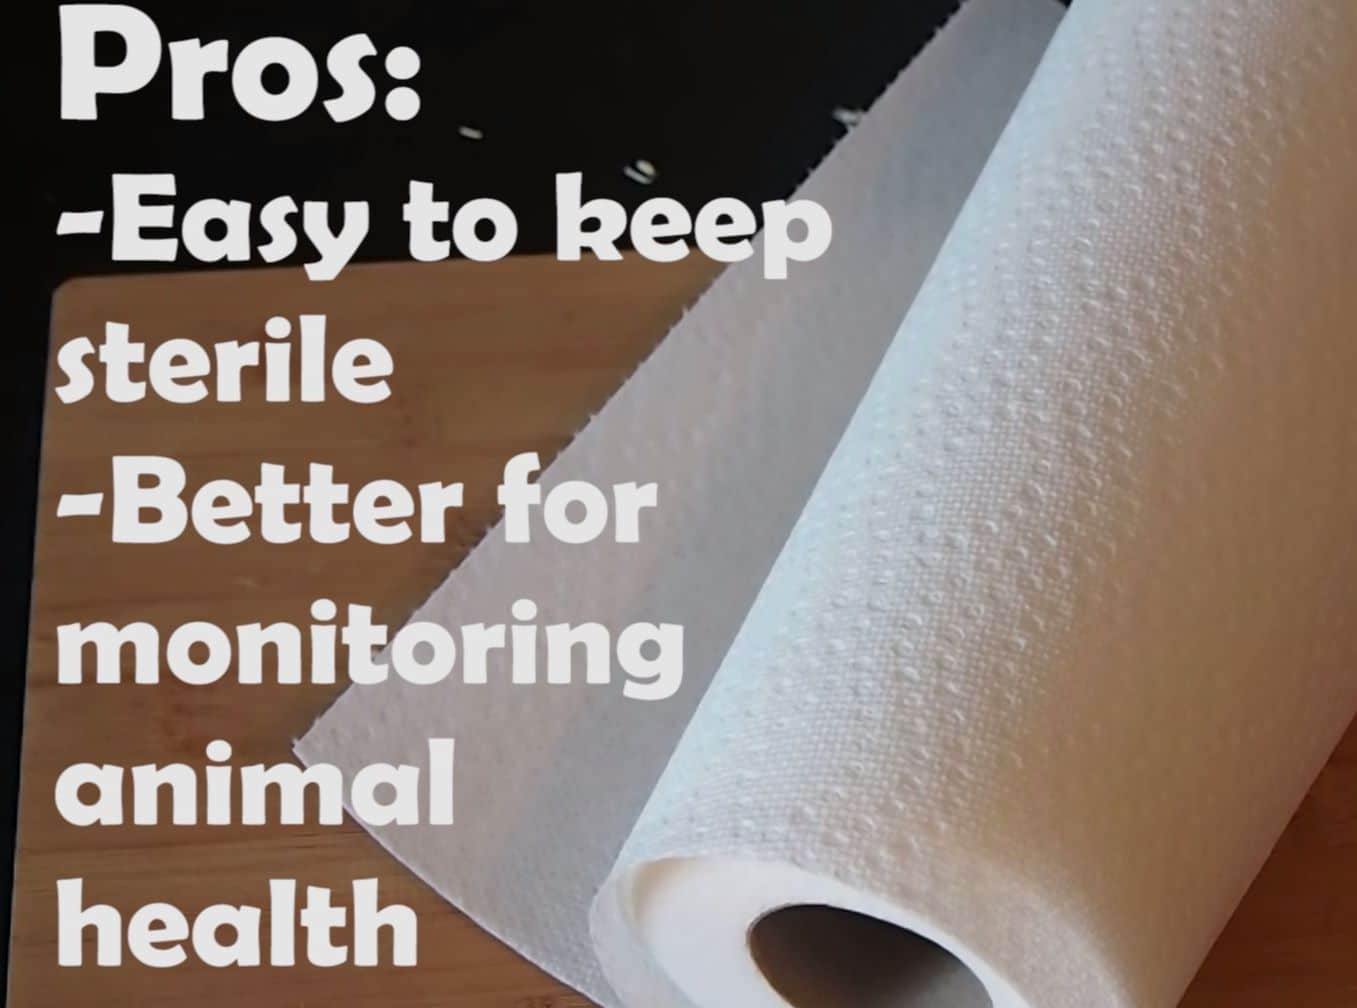
Each of these scenarios require you as the caregiver to observe your animal more closely and more carefully. Eliminating the variable of substrate can be highly beneficial when monitoring an animal’s health.
If you are not using paper towel in one of the 3 scenarios listed above, I highly recommend against using it!
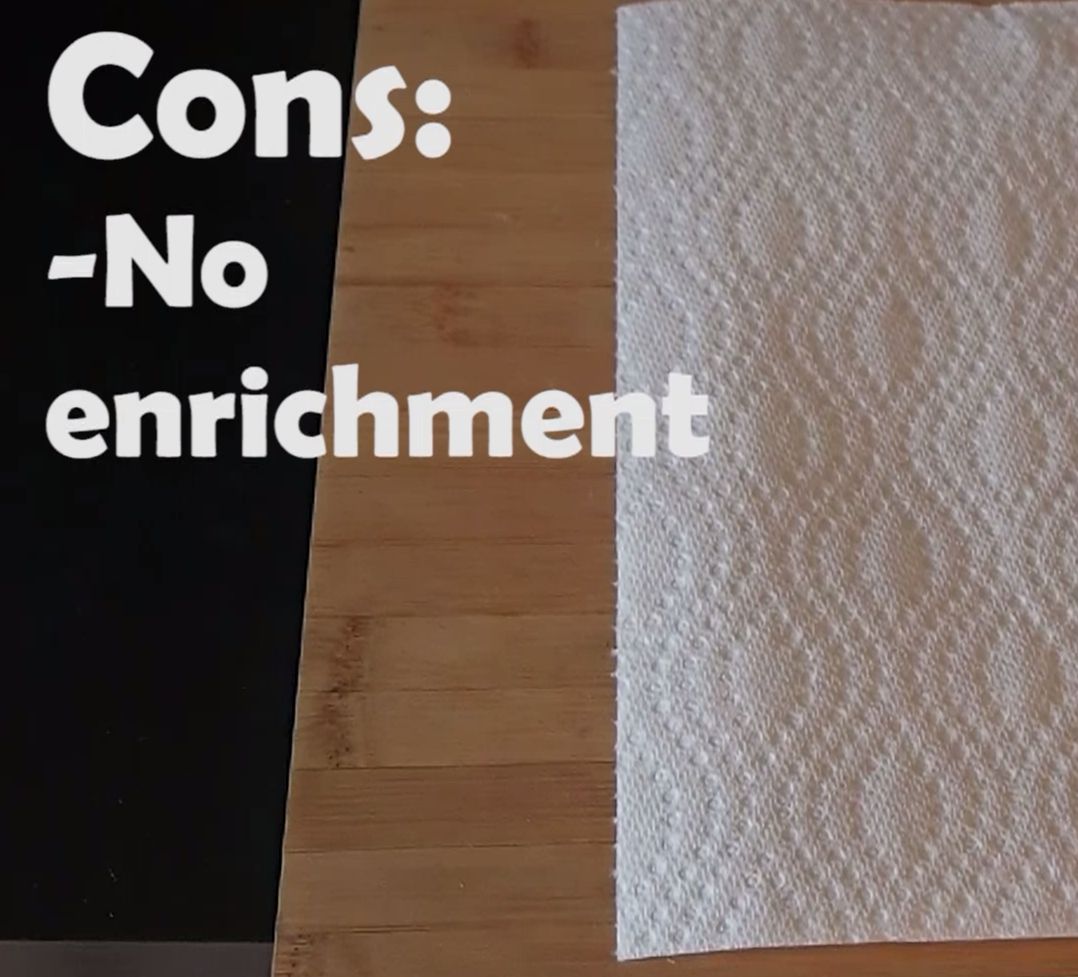
Paper towel provides no enrichment for your animal. They can’t dig through it, burrow under it, or smell it. When they slither over it, it provides zero environmental feed back.
Many claim paper towel/ newspaper to be the “easiest” and “quickest” substrate to use, clean and maintain. I totally disagree with that! Unlike the natural substrates listed above, paper towel allows for urates and waste to spread across a much larger area as it is not capable of absorbing as much liquid.
I find the mess from your snake’s waste is much less contained (smell included!) and requires a much larger clean up.
All in all it is a boring substrate to use. As animal owners we can do much more to provide a more enriching environment for our captive animals! There is plenty of research showing, environmental enrichment leads to healthier animals… I find that very easy to believe, I hope you do too!
How to Sterilize Wood for Reptiles? I am guessing you are here because you recently had the experience below:
Every pet owner has had this experience:
Hey, I am going to stop by the pet store to pick up a climbing branch for my animal…
$35.00 for a stick?! HUH?
Don’t you hate that? I know I do.
SCROLL TO THE BOTTOM FOR THE VIDEO
If you follow my blog or my YouTube videos you know that I am all about including natural features in your reptile’s enclosure to enrich their environment! Adding real branches to the enclosure is a great way to achieve that… but who wants to spend a bunch of money on something you can get outside for free!
How to Sterilize Wood for Reptiles
Collect your Wood!
First you need to find some wood! Here are somethings to keep in mind:
Stay with hardwood trees (Oak, Ash, Maple, etc.), softwood trees contain sap that can be toxic to your animal. Likewise, stay away from any hardwood trees that seem to be very “sappy” for whatever reason.
Find an area that that is unlikely to have pesticides or chemicals sprayed. I.e. stay away from areas close to farmers fields (pesticides) or areas that may have been fogged for mosquitoes.
I look for trees that have recently fallen down. You don’t want something that has been decaying for a long period of time. I guess live trees would work fine as well.
Forested AreaDead tree
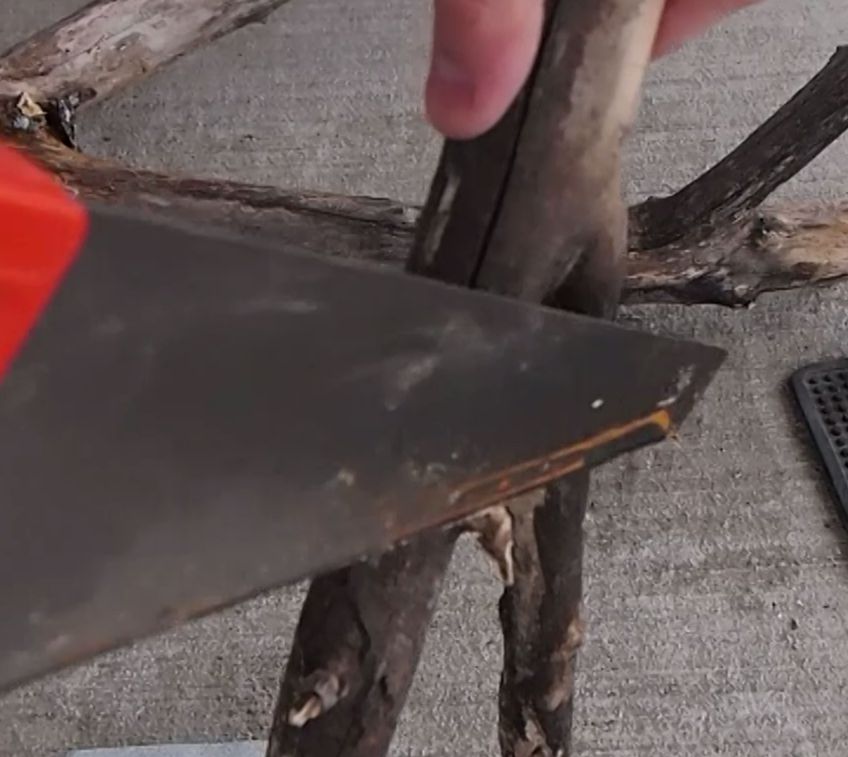
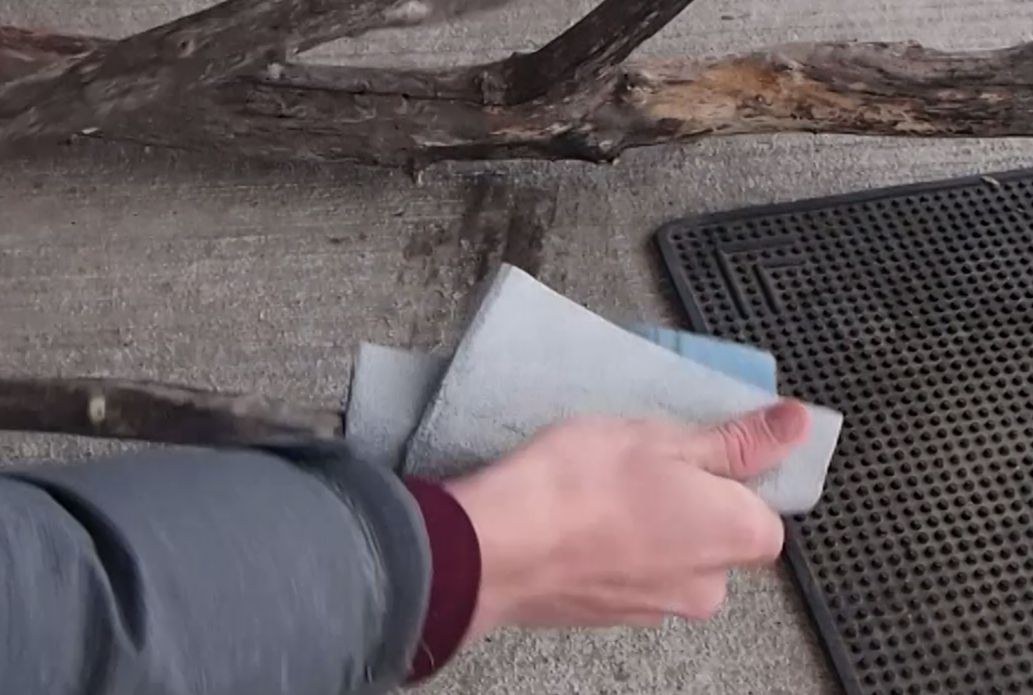
Clean Up the Branches
Once you have found a suitable branch you need to “clean it up”. In other words, use a hand saw and sandpaper to smooth out any areas that could cause an injury for your animal.
Tools: Sandpaper and saw
I generally use a hand saw to remove any sharp leftovers from smaller branches.
Remove any loose bark. Then, smooth out the entire branch, once with course sand paper and once with fine sandpaper.
It is perfectly okay to leave some rough edges here and there as some animals will use it to scratch and/or shed themselves against, but you should remove anything that feels sharp to your touch.
How to Sterilize Wood for Reptiles: Method #1
If your branch is small enough to fit inside your oven, than you can follow the directions for Method #1 (and consider yourself lucky)!
Set your oven to 250°F
Set yourself a 10 minute timer (reoccurring)
Place your branch in the oven and bake for 2 hours
Check it every 10 minutes to ensure there is no charring
Bake wood for reptiles10 Minute timer: Bake Wood for Reptiles
The heat of the oven will slowly kill any bacteria and microbes found deep inside the tissue of the wood. Using a higher temperature DOES NOT make this process any faster and increases your chance of starting a fire! I promise… 2 hours is not that long, especially considering how long Method #2 takes!
Once 2 hours has surpassed, pull the branch out of the oven, wait for it to cool off and you are done!
How to Bake wood for reptiles
How to Sterilize Wood for Reptiles: Method #2
If your branch is too large to fit inside your oven then you are stuck with Method #2! This method is equally effective, but takes much, much longer!
Find a barrel, bin or tub large enough to contain your branch.
Fill the tub with water, roughly keeping track of the volume of water you are using. I use a pail to fill my tub to keep track, i.e. 10 pails full of water is around 30 gallons total.
Filling the tub, pail by pail
Add bleach, using a ratio of 1/3 – 1/2 Cups of bleach for every gallon of water. Make sure you use regular bleach, do not use any products that have additives for laundry use, etc.
Bleaching Reptile wood
Bleach Ratio
Let the branch soak for a full 24 hours. If you have a portion of your branch that is above the surface of the water (like mine in the photo), change the orientation of the branch after 12 hours so the exposed portion is now submerged.
Bleaching reptile wood
After 24 hours, drain the tub of the bleach solution. You will notice the color of your branch will be lighter, the bleach pulls the tanins and pigments out of the wood. You now need to flush the wood to remove the bleach. Soak the wood for at least 48 hours in fresh water, change the water every 2-8 hours.
Flushing the bleach from the wood
After the wood has been flushed of the bleach you now need to let it dry. Wood will take anywhere from 3-5 days to dry depending on the size and the climate you live in. You MUST wait for the wood to dry out completely before adding it to your reptiles enclosure for one of two reasons: 1) If you add it to a humid environment it will never dry and likely grow mold or 2) if you add it to an arid environment it will spike the humidity of your enclosure for several days.
Adding natural wood to your enclosure can really enhance your animal’s environment and I highly recommend you do it!
Looking to create and build custom terrariums from home? Hopefully this article and video can point you in the right direction! This article would also be helpful if you are looking to convert an aquarium into a snake cage.
IN THIS ARTICLE:
Detailed description for Step by Step Process
Pros and Cons of a Glass Terrarium
Step by Step Video (Scroll to Bottom)
Pictures of Brazilian Rainbow Boa (Scroll to Bottom)
Should I build my own terrarium?
This is a good question. I believe you should only tackle a DIY build if:
You aren’t trying to save money: DIY doesn’t always mean cheaper, after time and supplies doing-it-yourself can sometimes be more costly than purchasing something new.
You actually enjoy building: This one seems obviously but some people go into a build with the idea that they are going to save money regardless of whether or not they enjoy building. Someone who doesn’t enjoy building will end up get very frustrated with the process and most likely spend MORE money than they would have if they just bought sometime brand new.
If you love to build and you don’t mind spending the money than you need to 100% move forward with your build! Custom terrariums will open up a door of possibilities for your animal, far beyond anything a store bought enclosure can provide.
In this article I breakdown my Custom Terrarium build for my Brazilian Rainbow Boa. If you want to skip right to the video, scroll right to the bottom of the article!
Side note: Why are Brazilian Rainbow Boas named after the rainbow? Scroll to the bottom for pictures of my boa… her colors will shock you!
Supplies and Plan
In the summer I stumbled across a stack of of old windows at a family farm. I immediately saw past their rough shape and started mentally building an enclosure out of them.
The windows cleaned up quite well and I was able to examine precisely what I had. What I had was this:
8 Windows with dimensions of 36″ L x 21″ W
This would work!
There are very few examples of custom terrariums being built from glass for snakes (for reasons I discuss below) so I really had to think through a detailed plan to determine whether or not this would work.
Here is a picture of the sketch I came up with:
When Building Custom terrariums: have a plan!
The plan was to:
Create a glass box using 3 full sized sheets of glass (36″ x 21″), 1 for the top, 1 for the bottom and 1 for the back.
I would have to cut glass for the side pieces which would measure roughly 21″ x 21″.
The front facing opening would be trimmed with “something” (at the time I wasn’t sure I was going to use glass or wood, I used wood).
A drop down acrylic door would be installed with the necessary ventilation drilled.
The sides, back and bottom would be blacked out with paint.
As I am typing this I am realizing this exact procedure would probably also be suitable for converting an aquarium or fish tank into a snake enclosure.
The Glass Box
As stated about, the first step was to build the glass box.
First, I cut the glass for the sides. I used this cheap glass cutterdipped in mineral oilto score the glass. Once the glass was scored, a little bit of pressure was enough to force a break at the score line. Easy Peasy!
**Remember to wear safety glasses AND be mindful of the fact that the fresh cut edge of glass is sharp as hell! Sand it down afterwards**
Cutting Glass
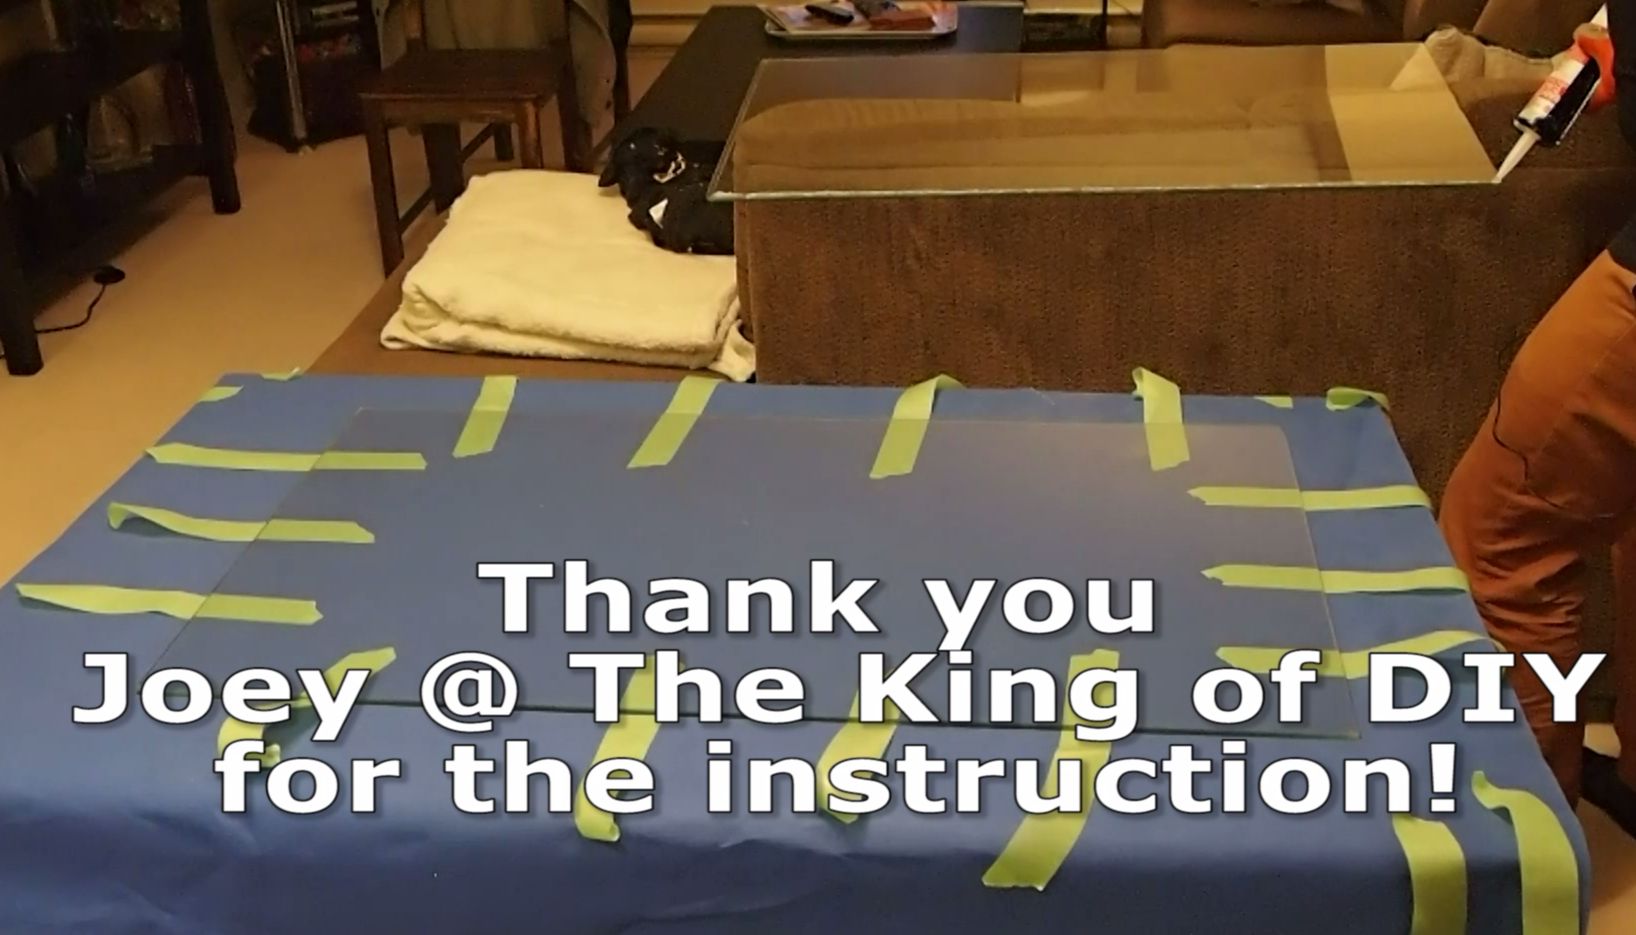
The actual assembly of the glass box was fairly straight forward. I followed Joey’s instruction from The King of DIY YouTube channel. If you’d like more detailed instructions on how to do this I highly recommend checking out his video here: https://www.youtube.com/watch?v=HSKIT2OLOYQ He has an AWESOME channel. Thanks for the help Joey!
Before I even started the build I spent some time thinking about the structure itself. How did I want the weight to be supported? It is very important to think this through.
Especially because I had to assemble the box in its wrong orientation. I.e. The front opening would have to face vertical during the assembly… assembling it in the right orientation would have required me to lower the top panel of glass on to the sides and back wall, I didn’t think that would be a smart way of doing it.
So the initial panel I placed flat on the table is actually the back panel. So back to the original point, how did I want the weight to be supported? Well I did not want any of the panels to be “hanging”, in other words I want the appropriate panels to be supporting the weight of the others.
Here’s how:
The side and back panels are placed directly on the bottom panel and the top panel is placed directly on top of the sides and back panels. This way the weight of the top panel is supported directly by the sides and back which is resting right on top of the bottom panel.
But remember… I had to assemble it out of its correct orientation so I had to keep that in mind. I.e. the “bottom” during the assembly was actually the back.
I set up strips ofpainters tapethat could be flipped up once a sheet had been placed. The tape is strong enough to keep the glass in place while you work.
Other than that, all I did was run a bead of GE Silicone I(very important to use GE Silicone I and not II, I is non-toxic when dry) along the appropriate edges and place the glass in its rightful spot.
Custom Terrariums
I used a square as I went to make sure things were straight. Silicone and glass is quite forgiving, you have time to move the panels around once they have been placed.
Squaring the tank: Custom Terrariums
Done! Easy has that, it took only about 10 minutes from start to finish.
I did also add a bead of silicone on the inside seams to add more structure and a better seal.
Sealing inside seam
Pros and Cons of a Glass Terrarium
If you build your own custom terrariums you know there are pros and cons to the materials you use. Here are the pros and cons of the glass terrarium I built.
Pros:
I already had the glass
Glass is relativity easy to work with
Cons:
It’s heavy
Hard to raise humidity- I solved that by having a front facing acrylic door that closes tightly
Too much light- snakes like to be in dark space, a clear glass terrarium can stress a snake out. I solved this by painting the sides black.
Hard to maintain temperature- glass tends to loose heat relatively easy compared to a plastic enclosure. I plan on using Reflectixto help insualte the walls… although I was also pretty surprised at how well the paint itself works as insulation.
Paint it Black
Time to paint the walls! This was also pretty straight forward.
Afoam rolleris really the best way to go here as it will not leave any brush marks.
Paint foam roller
At first I used regularblack acrylic paint as I was naive enough to think I would one have to do 1 MAYBE 2 coats. Wow was I wrong! It took a good 5-6 coats to fully cover the glass, luckily the dry time between coats is very short (15 minutes).
Black acrylic paint
The acrylic paint worked fine but since I required a larger volume of paint I upgraded to a quart of Black Indoor/Outdoor Latex paint. I didn’t notice a difference between the two types of paint, it was just cheaper to buy the latex paint due to the quantity I needed.
Indoor/Outdoor Latex Paint
I alternated between doing one coat with horizontal strokes and one coat with vertical strokes and eventually…
Painting the walls
It was finished! I was actually pretty happy with the result… although I was definitely nervous through the first few coats.. “Is this ever going to cover..?”
Custom Terrariums: Painted wall
Wooden Trim
As stated above, I used wood to trim out the front facing hole where the door would go. I used:
Oak 1″ x 3″ for the bottom
Oak 1″ x 2″ for the top and sides
The purpose of the trim is three fold:
Stop substrate from falling out
A place to fasten the door and hinges
A place for the door to rest and lock against
I decided to also paint the wood black to match the rest of the custom terrarium. I used the same latex paint from above, and I did 3 coats.
Painting Oak Runner BoardPainted Oak runner board
It was also important for me to seal the wood to protect it from moisture damage. I used 3 coats ofMinwax Polyurethane to do the job.
Minwax Polyurethane
I prepped the wood by running very fine steel woolover the entire surface to remove any fine hairs and wiped off the dust with a dry cloth. Then, I brushed on the polyurethane.
Brush on Minwax Polyurethane
Sealing the wood with Minwax Polyurethane
And of course, I went through the identical process with the side/top trim pieces!
Painting trim
The Sample Door
Now it was time to assemble the door. This was the part of the build I was the most worried about. Acrylic cracks quite easily and it is priced at $70/sheet!
So instead of jumping right into drilling the door panel … I decided to exercise some patience and used a scrap piece of acrylic and scrap piece of oak to build a “test door”.
I used black 3″ door hinges, pictured below. This way I could get a feel for what drilling through acrylic was like.
Small Test Door
Instead of using screws for the top hinge, I replaced them with bolts and acorn nuts. Obviously, I couldn’t have 6 screws poking through the door into the enclosure.
Acorn Nuts
The Real Door
Once I felt ready I screwed the hinges to the bottom oak trim and then was ready to tackle drilling the holes for the door.
Attaching Hinges
I dry fit the acrylic door (I bought the acrylic sheet from the local hardware store and cut it to size) and marked off where the hinge holes needed to be drilled with a dry erase marker.
Custom Terrariums: Dry fit door to hingesMarking off hinge holes
Drill time! The trick to drilling acrylic is you have to start small and slowly increase your bit size until you reach the desired size of hole. If you start with a bit to large, the acrylic will crack under stress… and so will you probably!
9 bits for one hole!Smallest Drill bit
Eventually I made it to the final bit… 2 hinges, each with 3 holes, each hole took 9 drill bits… wow! But nothing cracked so going slow and steady was well worth it!
Finally on last drill bit
I ended up having to make wooden spacers to sit between the hinge and the acrylic door. Without the spacer the door wasn’t sitting vertical, luckily the spacers completely corrected that. I eventually painted them black.
Wood Spacer
I also used black spray paintto paint the bolts black so they matched the hinge.
Spray painted bolts
Whenever I create custom terrariums I try and make everything as professional looking as possible. I am happy with the way the hinges turned out, the wooden spacer completely blends in.
Completed hinge with spacer
Mounting the Trim
At this point I was ready to fasten the wooden trim to the glass terrarium. Gluing wood to glass is a relatively uncommon thing to do… I’m not sure I have seen anyone else online build custom terrariums this way.
I used the products No More Nailsas the main adhesive for this job. I have been very impressed with this stuff! It bonds well to almost anything.
I first roughed up the gluing edge of the wood with 60 grit sand paper, and then ran a generous bead of No More Nailsdown the entire length of the board.
No More Nails
I used spring clamps to hold everything in place for 24 hrs.
Clamped Runner Board
And then I followed the same process for the top and side trim!
Custom Terrariums: Trim
Once everything was cured, I ran a bead of silicone on the inside seam to seal it and also provide extra support. Now that everything is dry, it feels incredibly sturdy!
As a nice touch, I also painted out the trip on the top. This way I could keep the top clear as a viewing panel but also could hide the No More Nails and Silicone that was holding everything together.
Top TrimTop Trim painted black
Cam Lock
The light at the end of the tunnel! All I had left to do at this point was to add locks to the door, and polish up the acrylic!
I went with cam (or cabinet) locksbecause they are quite easy to install and do a good job of keeping everything secure.
Cam Locks
The only down side to these locks was the size of hole I needed to drill to fit them into the acrylic door. The locks require a 3/4″ hole, the largest drill bit I own is 5/8″ so I had to get creative.
Once I reach the 5/8″ bit, I dropped back to a smaller bit and slowly “carved” out the hole to increase its diameter.
Carving out the hole
I also used sand paper and a whole lot of elbow grease to bring the hole to size.
Sanding the hole
Eventually, it fit!
Custom Terrariums: Cam lock installed
Final Steps
A couple small things left and then I was done!
First, I had to polish the acrylic. Acrylic scratches pretty easily and over all the panel needed a good cleaning. I used a headlight buff kitto make the door as clean as I could!
Plastx Polish
I wasn’t quite satisfied with the way the door was locking. The cam locks made the door feel very secure on the top and sides, but I felt like the bottom could be flexed enough for a snake to try and squeeze through (and probably get stuck).
So I picked up some storm door panel clipsand put one in each corner. This completely solved the problem!
Storm Door Panel Clips
Custom Terrarium Complete
And just like that, I was finished! I have to stay I am pleased with the way this turned out! It looks a lot better than I thought it would.
Here’s the deal
I made a plan, and I stuck to it! Scroll up to the top and take another look at the original plan sketch I drew up before starting the build.
Custom Terrariums DIY
I live in an apartment, I do not own many tools. Because of that, I was required to very thoroughly plan the build. I built this terrarium in my head 100’s of times before even starting the work.
Custom Terrariums drop down door
Do not be intimated by making custom terrariums of your own! If you create a detailed plan and follow it, you can build anything you like! You do not need any expensive tools or specific craftsman skills, I have neither.
Custom Terrariums made with glass
I hope this article can point you in the right direction, and like I said above, I believe this process would also work if you are wanting to convert a fish tank or aquarium into a terrarium!
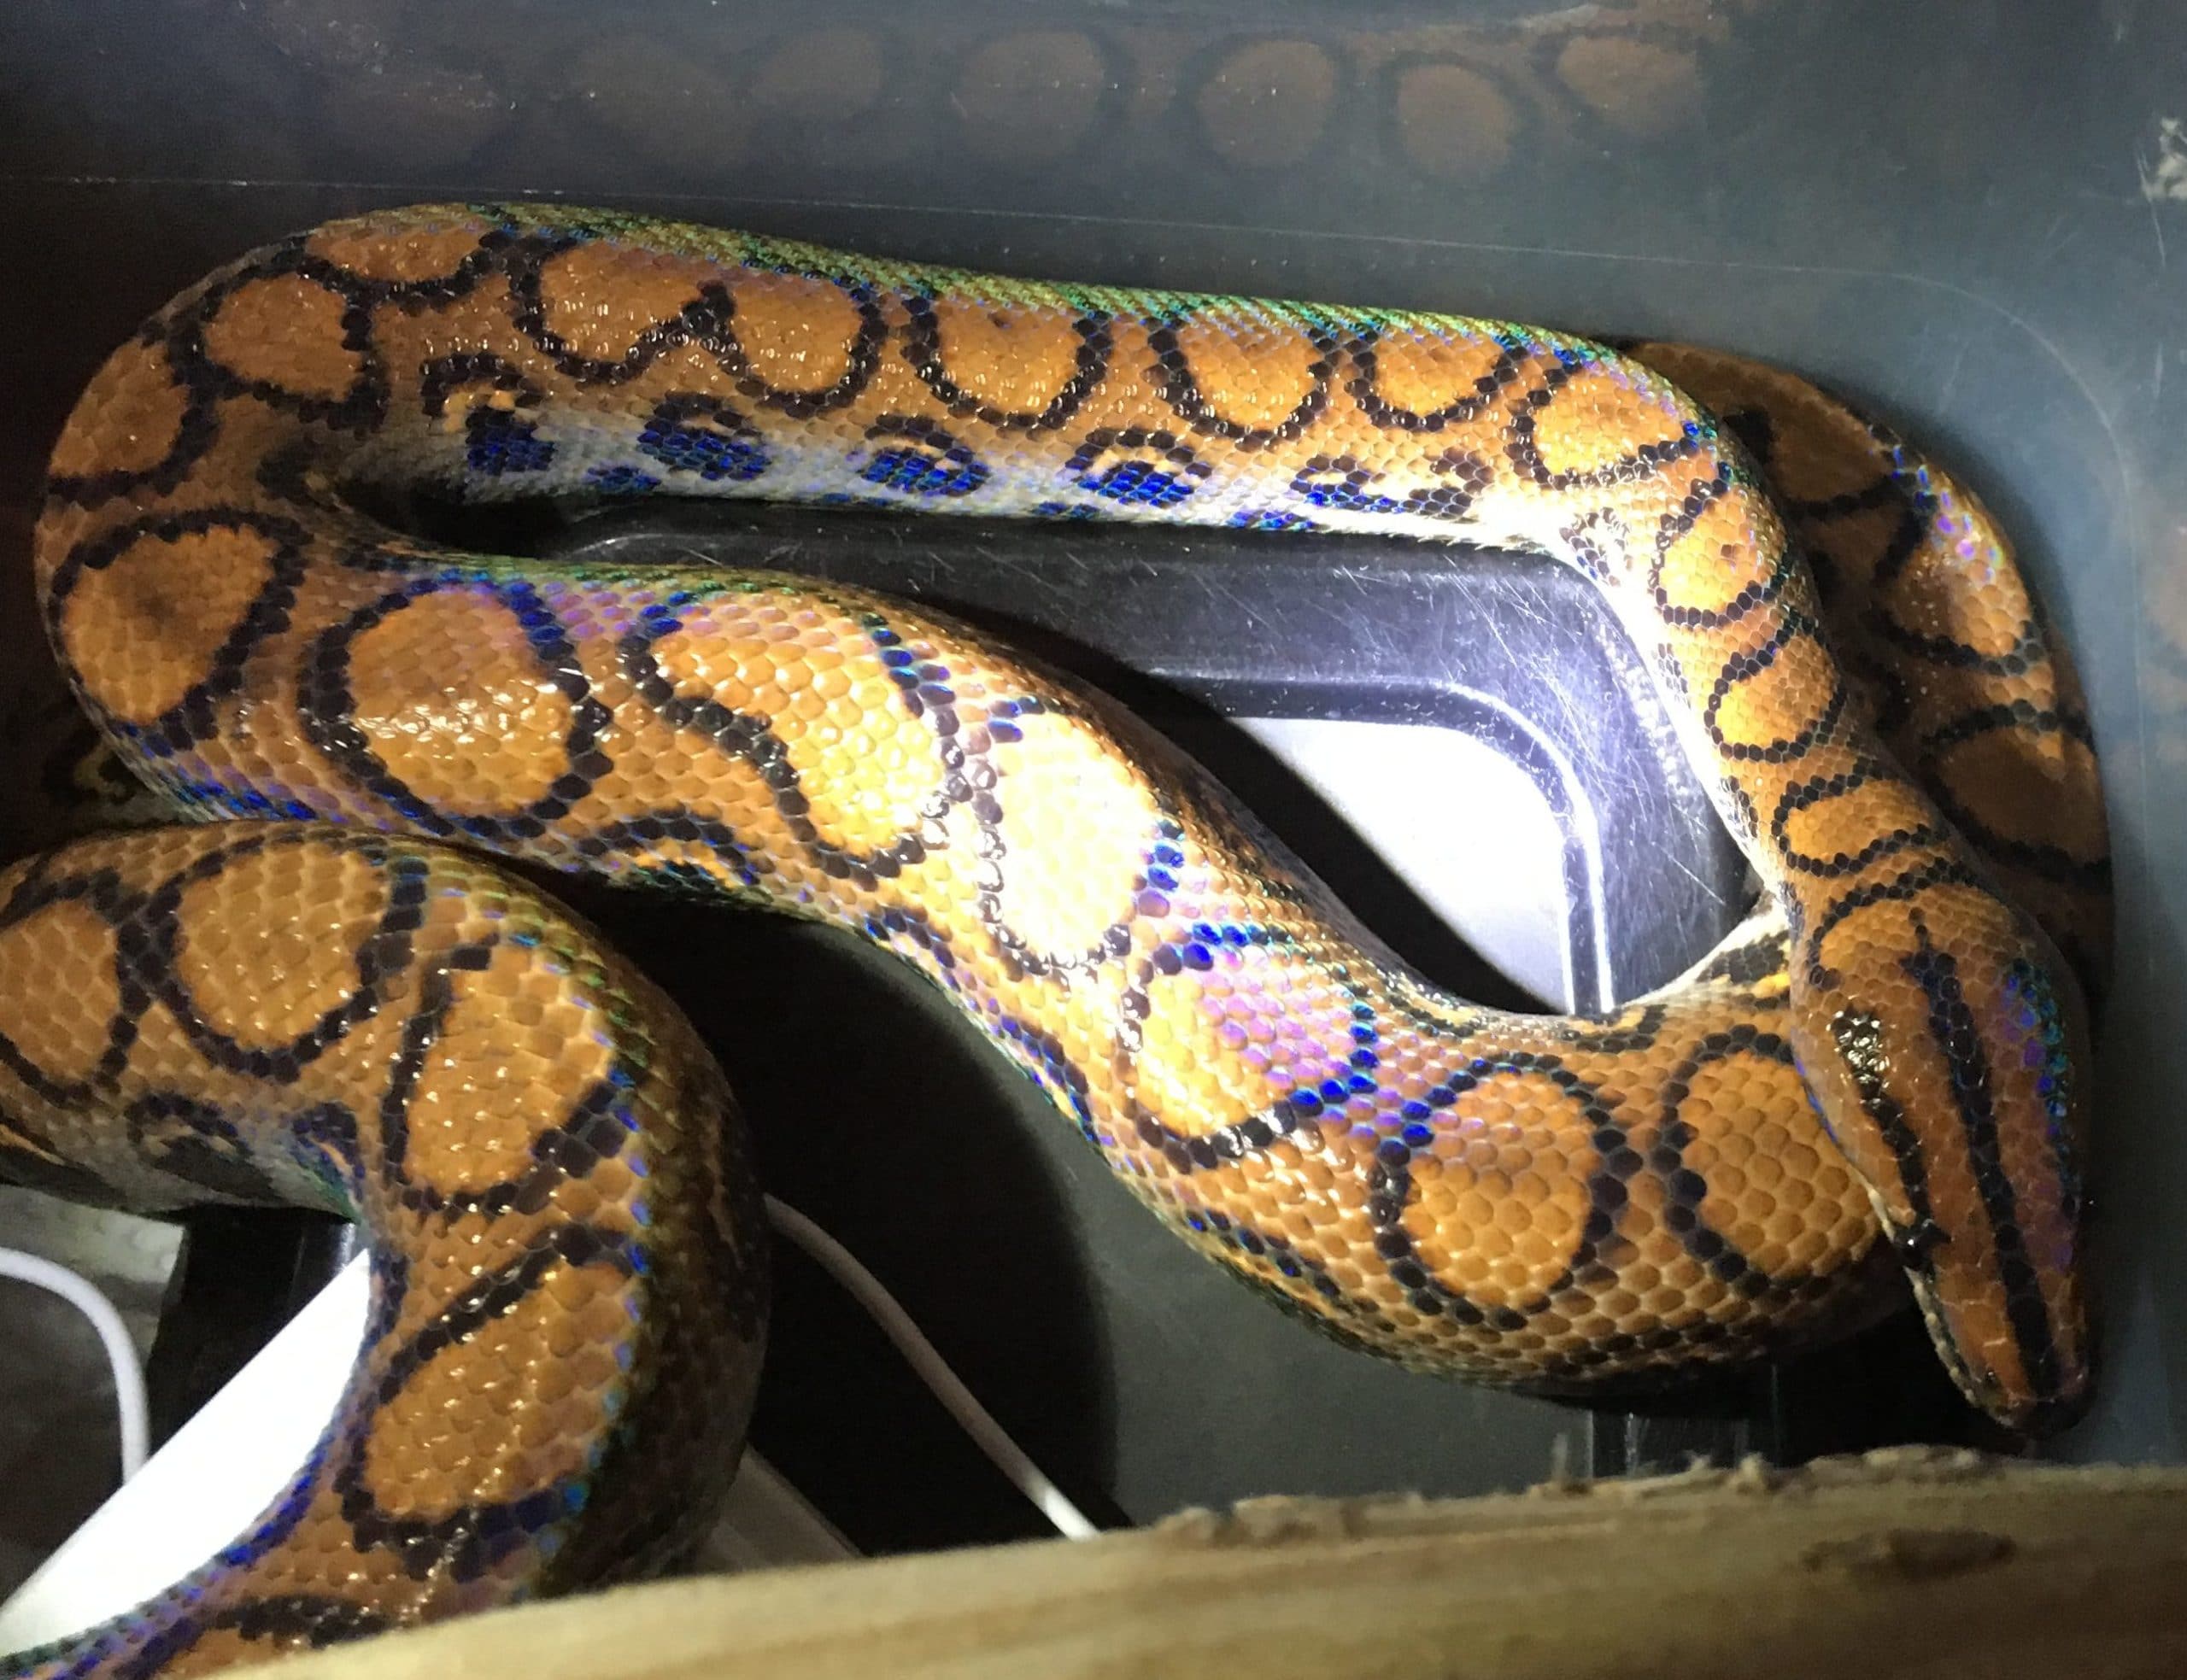
Consider this a “check mark” off my wish list! I have recently added a Brazilian Rainbow Boa to my collection and I could not be more excited! In this article I will breakdown how I setup the quarantine tub for this new addition (scroll to the bottom for the video).
Brazilian Rainbow Boa
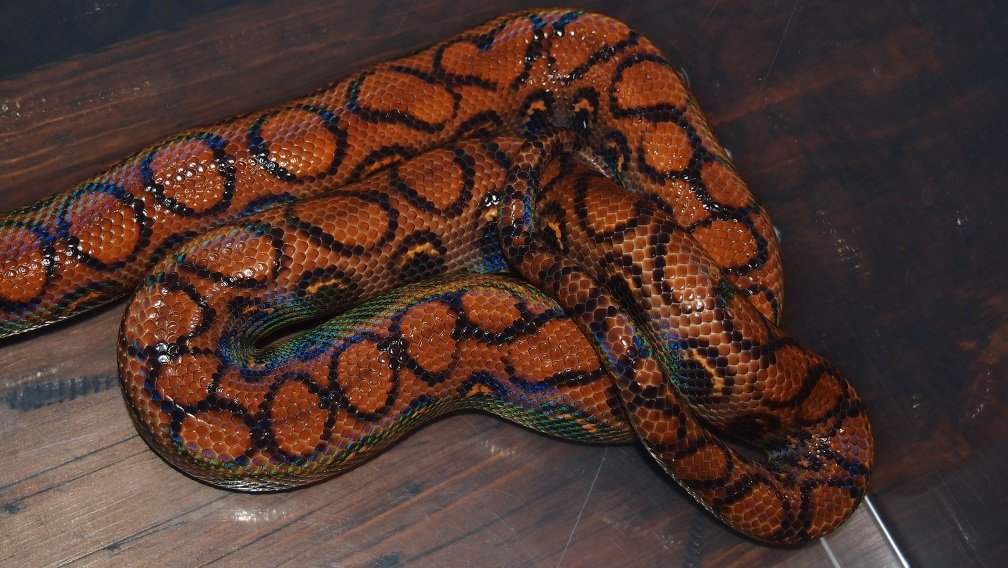
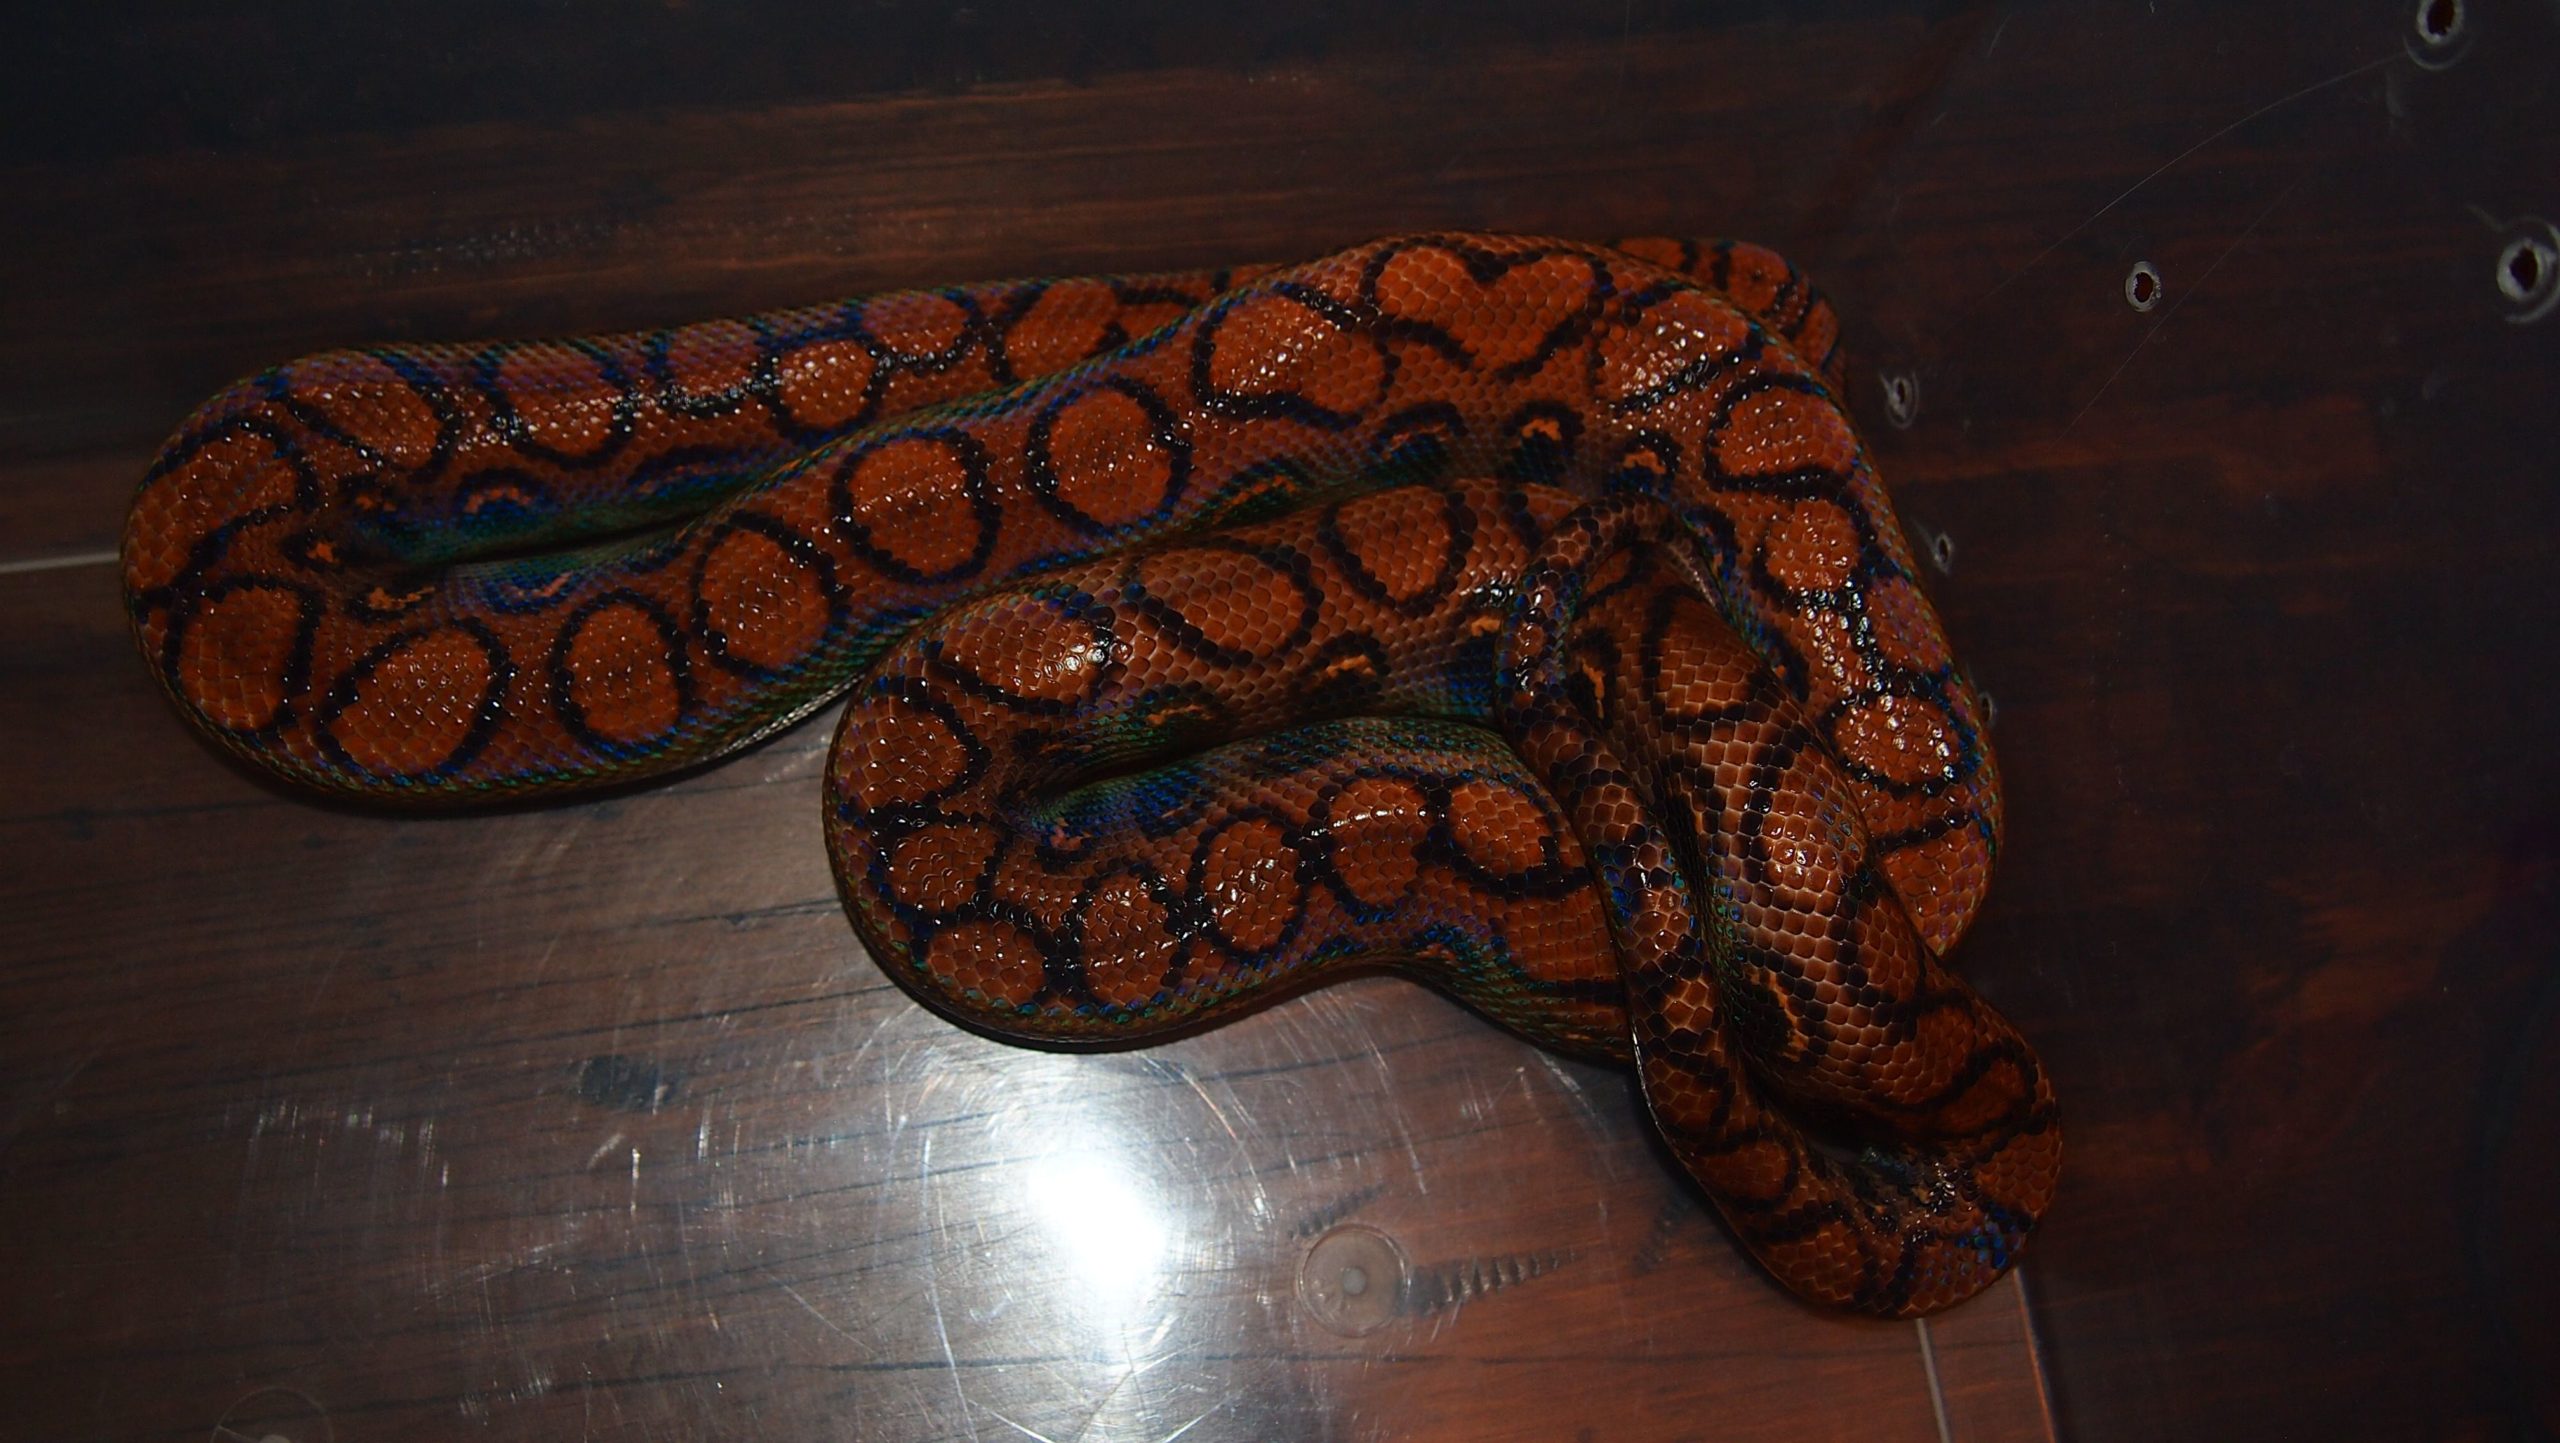
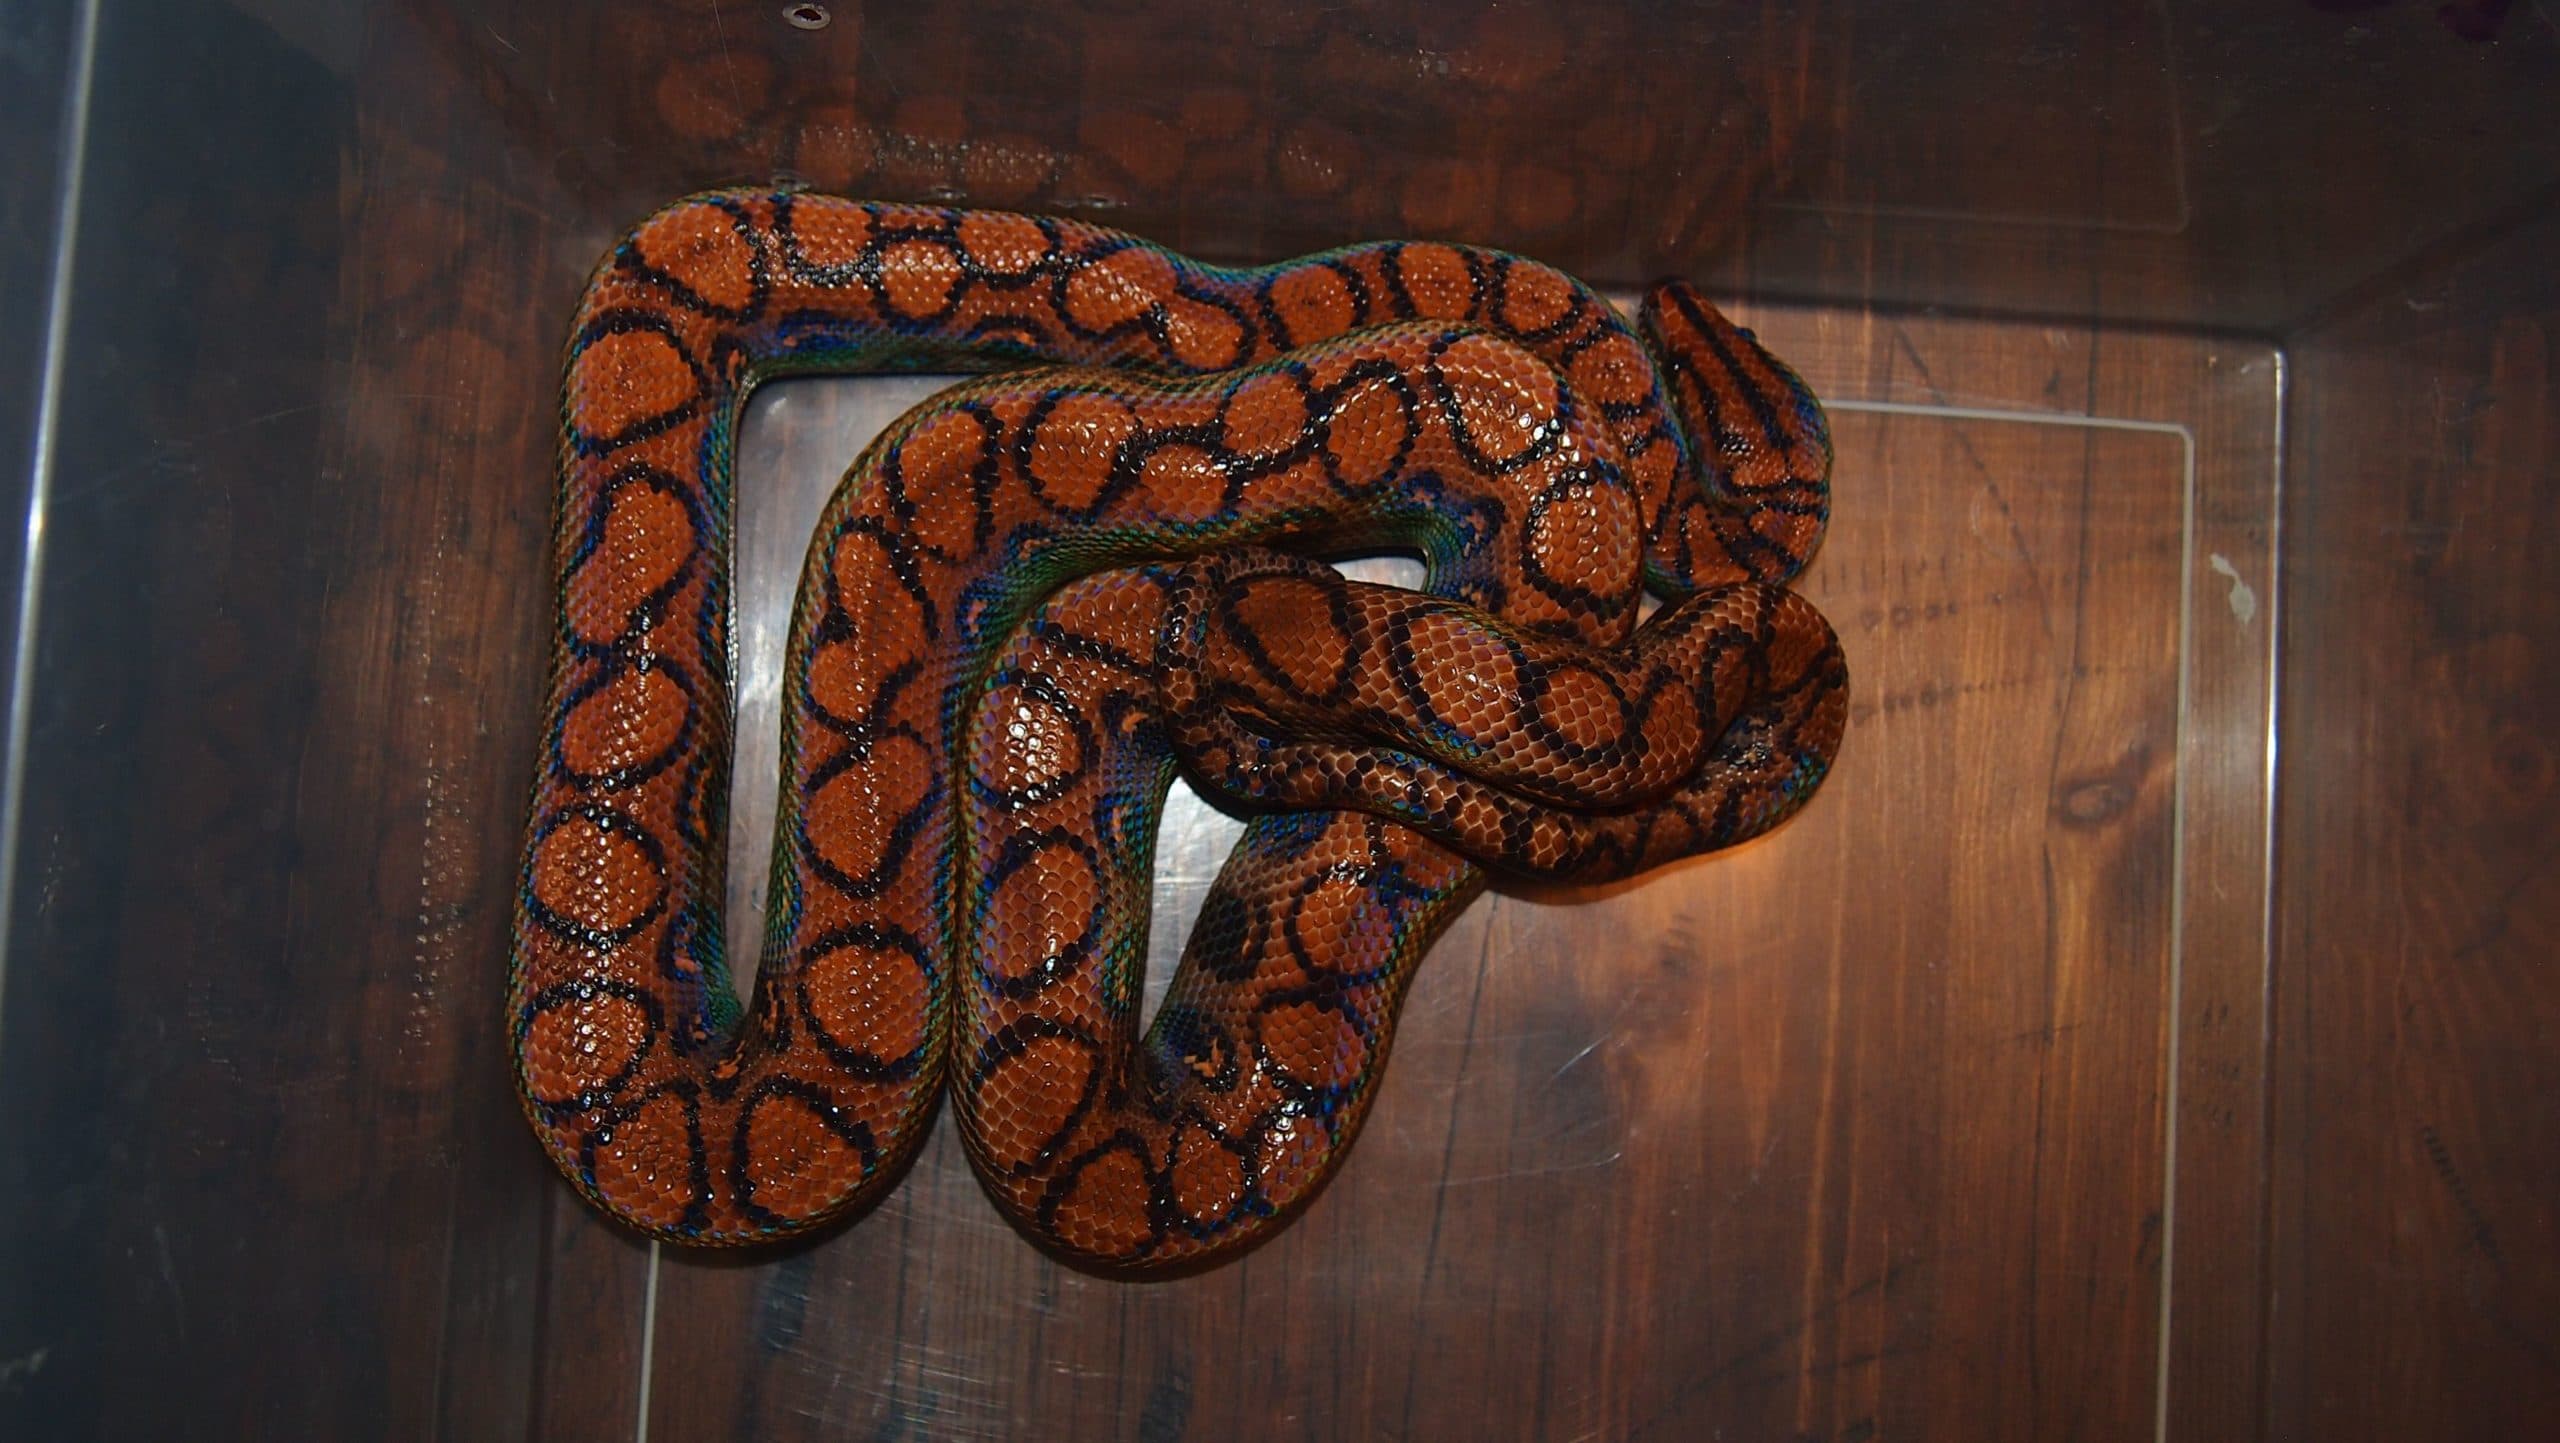
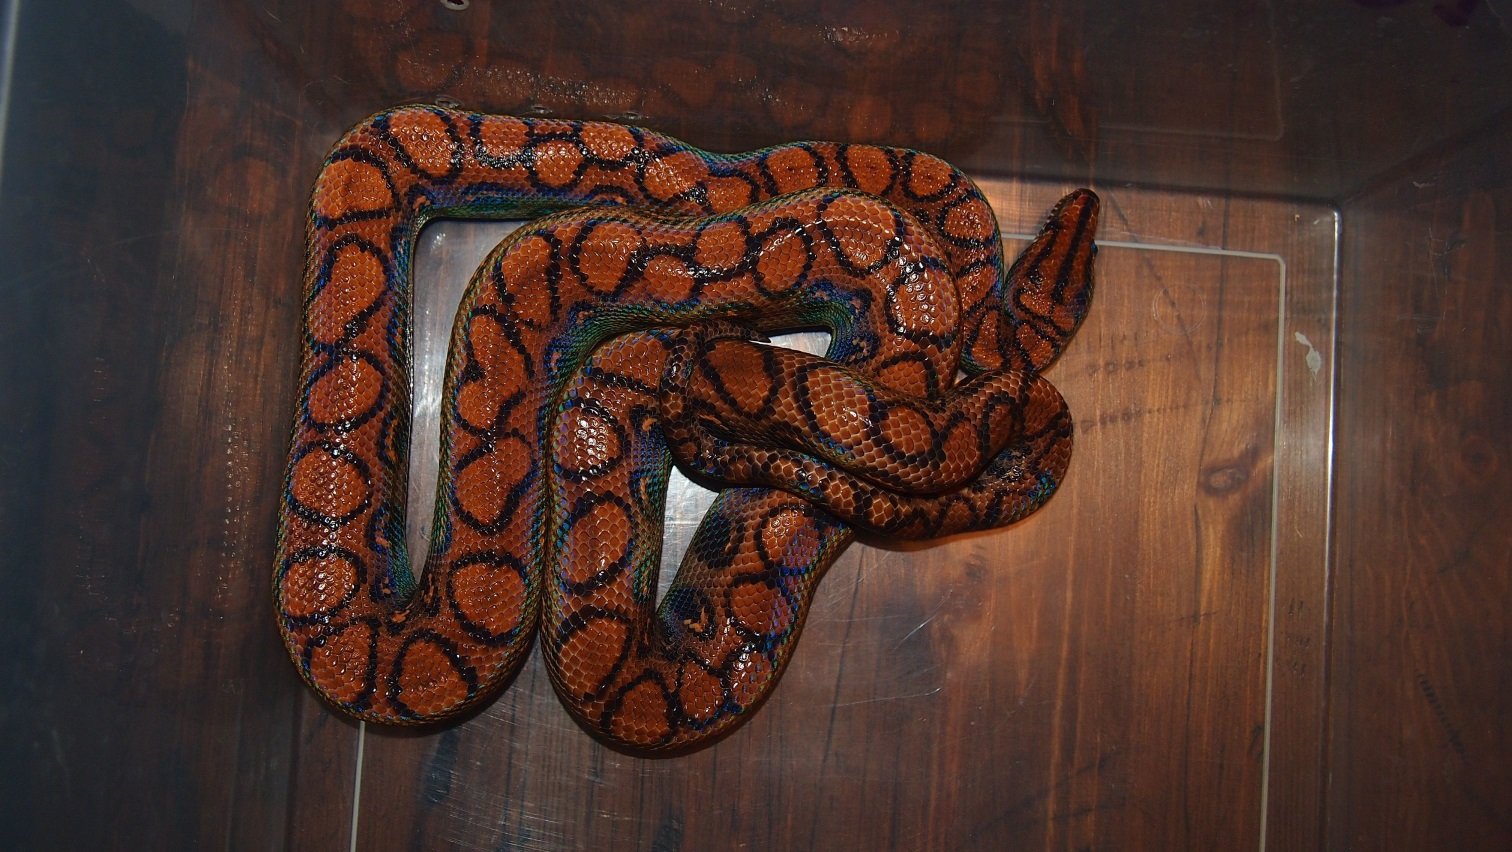
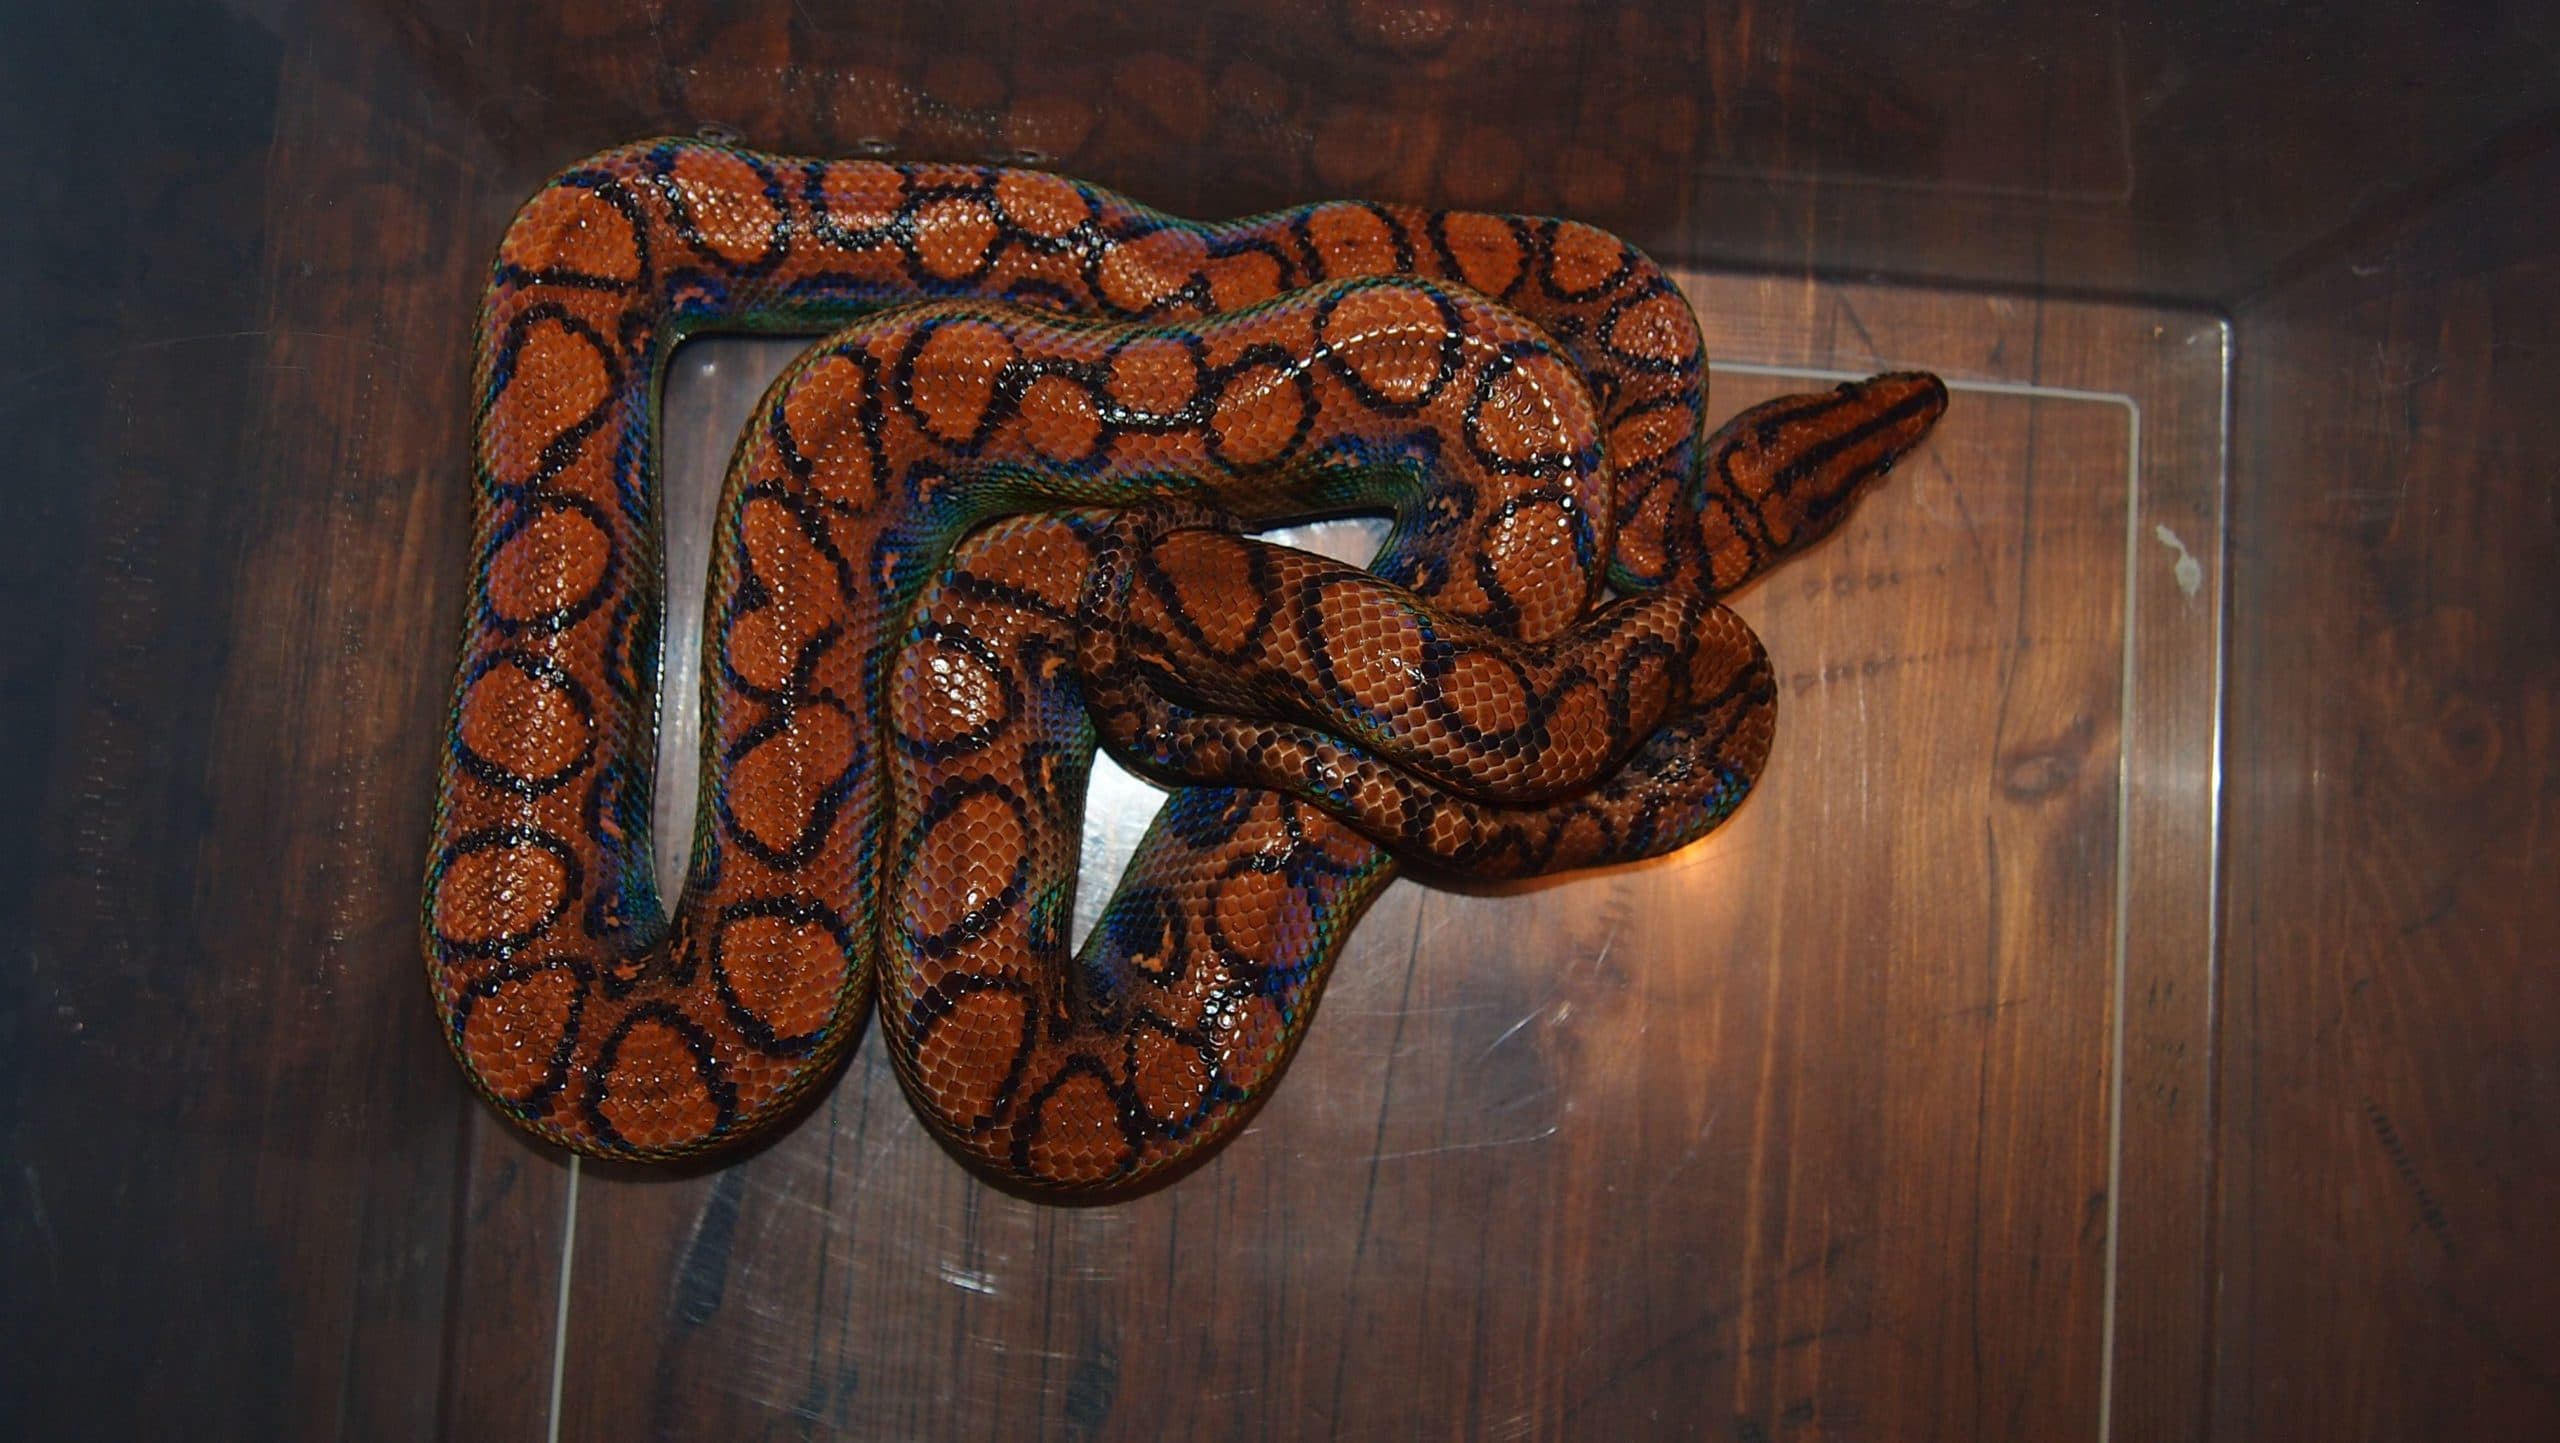
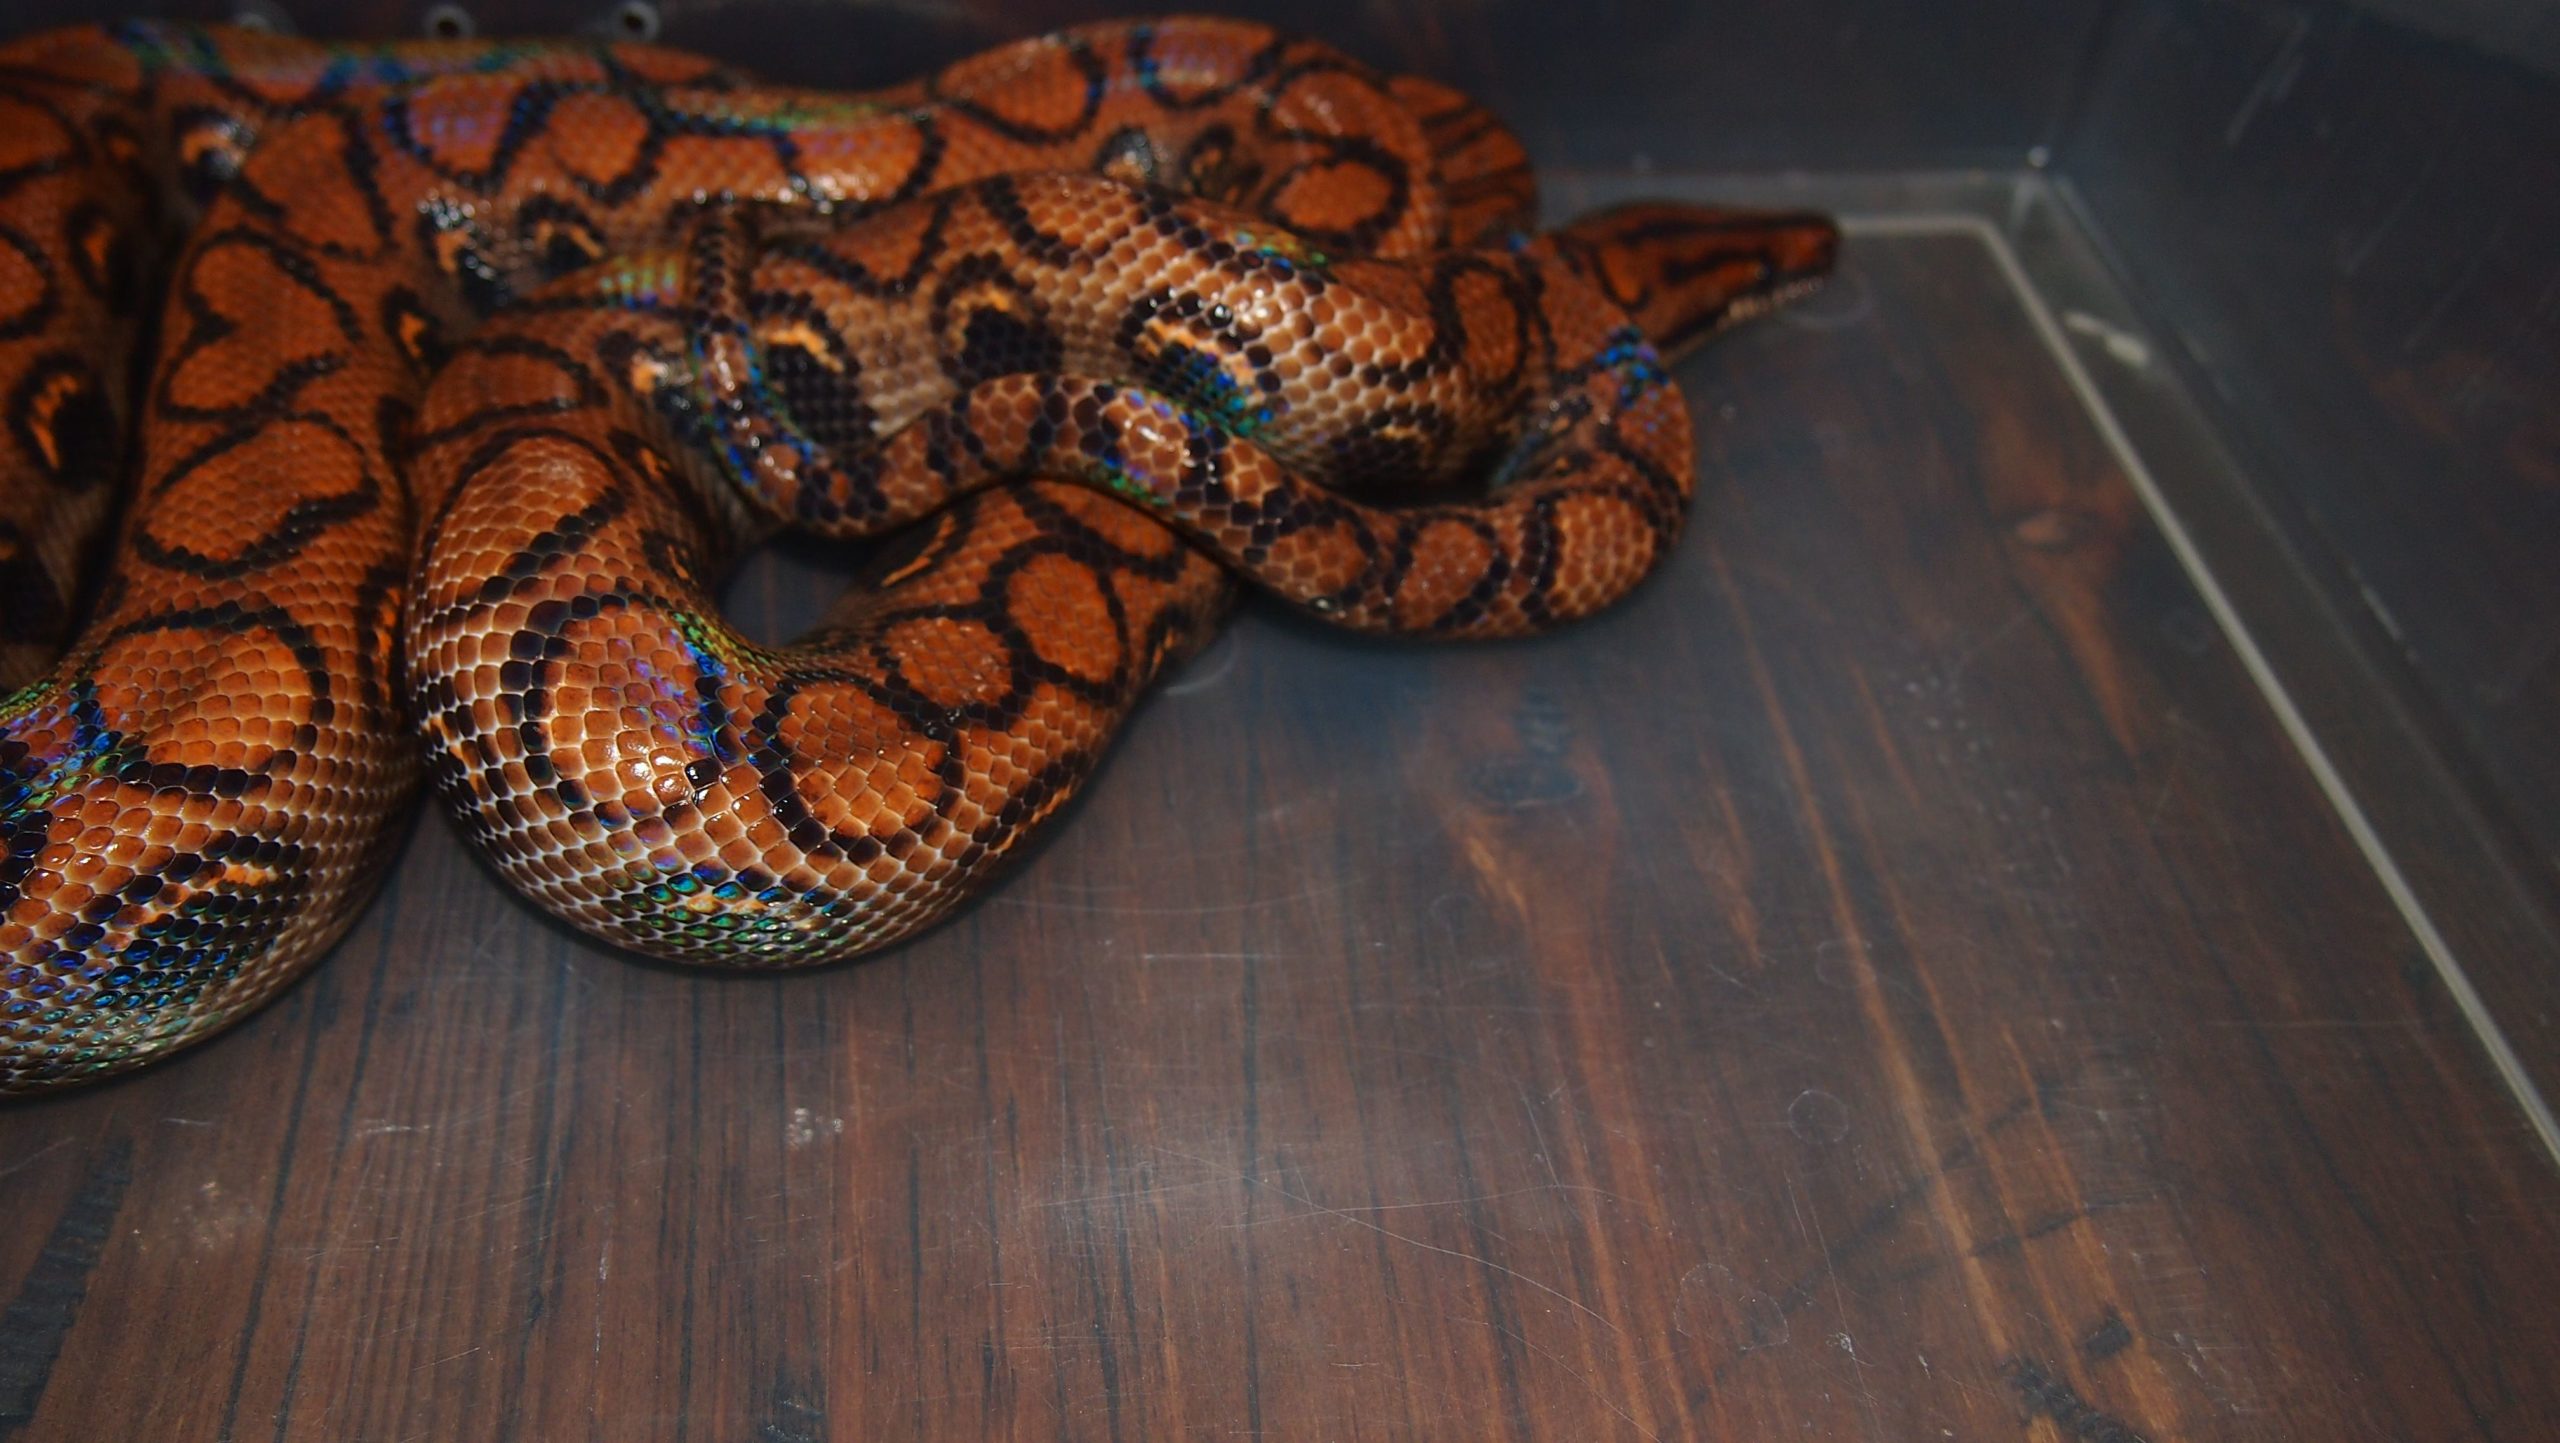
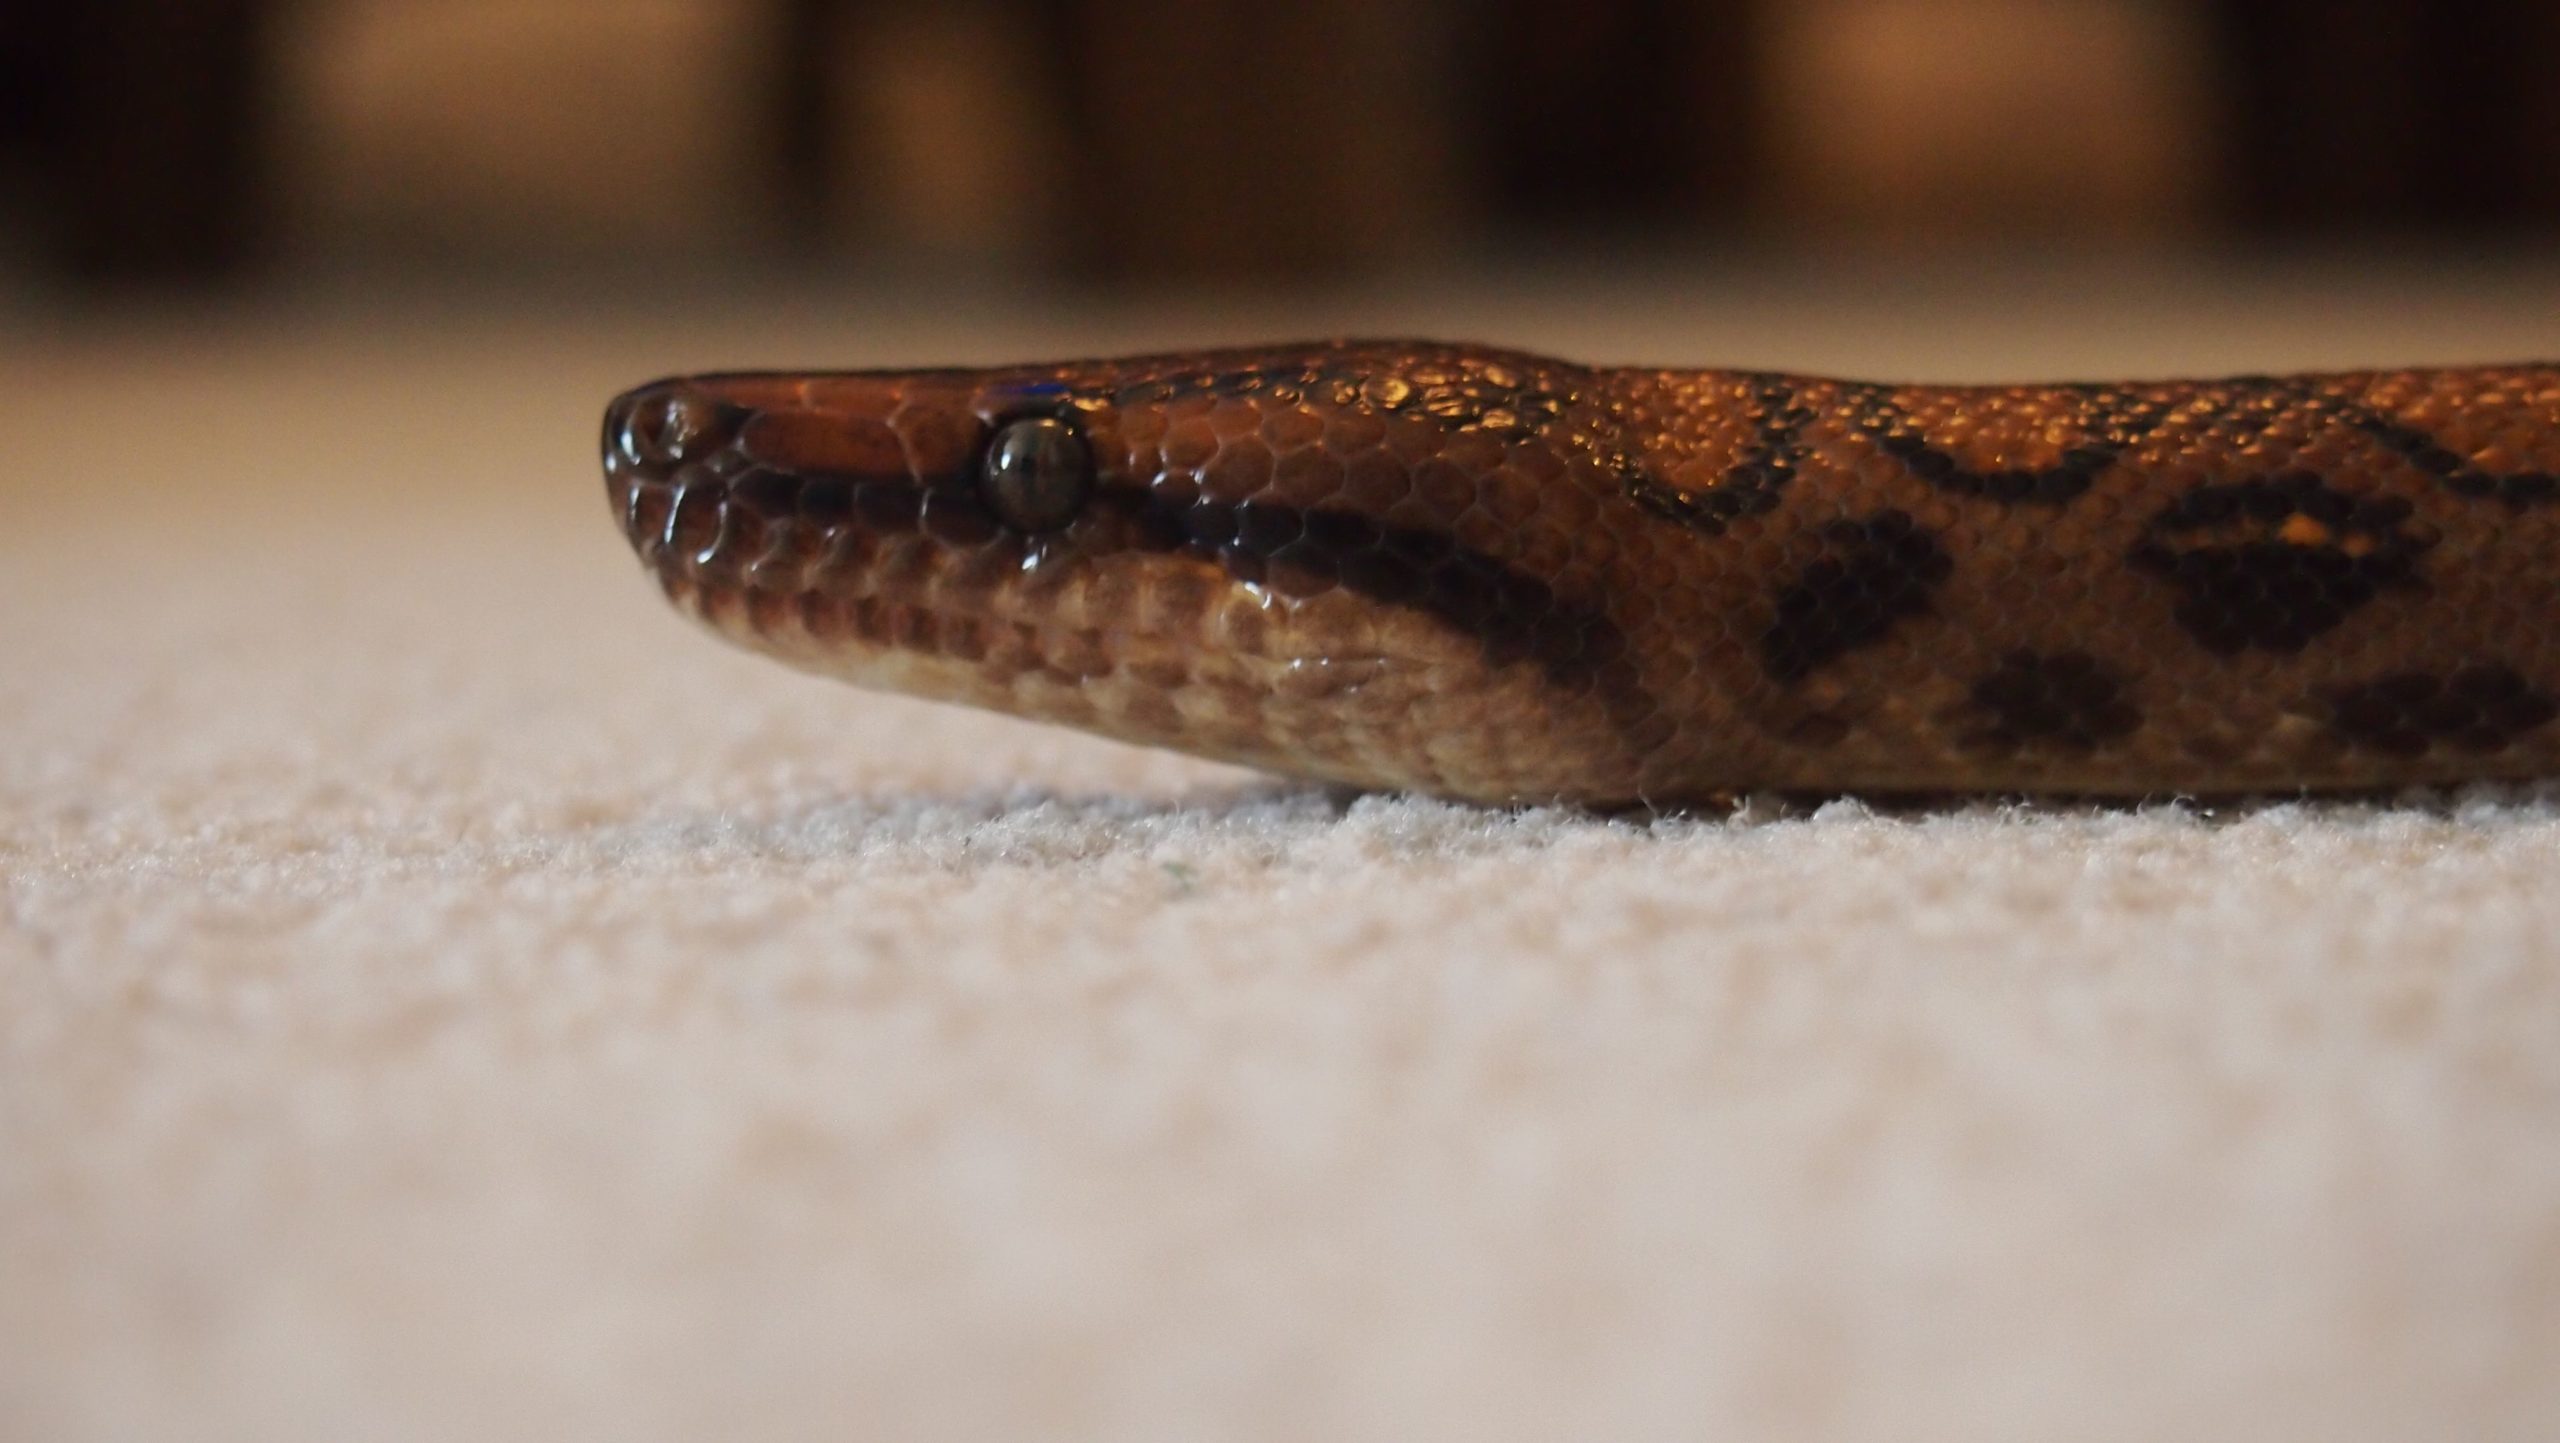
Brazilian Rainbow boas are some of the most beautiful snakes in the world. They range from deep to bright orange in color with a very interesting spotted pattern. Although, what really sets them apart from other snakes is there brilliant iridescence. A rainbow boa under sunlight (or artificial light), explodes with color. They truly glow.
Naturally, when a 2 year old female was posted on my local classifieds I had to scoop her up!
I plan on building her a new adult sized enclosure in the coming weeks but first she must be quarantined!
Why Quarantine?
Anytime you bring a new animal into your home, a quarantine period is highly recommended. An animal may appear healthy but could be carrying parasites, or bacteria/viral infections that could be transmitted to your other animals. A isolation period of 60-90 days is recommended, some people even do 5-6 months to be safe. This means, your new animal should be kept in a separate room (or floor or building if possible) and any tools should be cleaned with bleach before/after use.
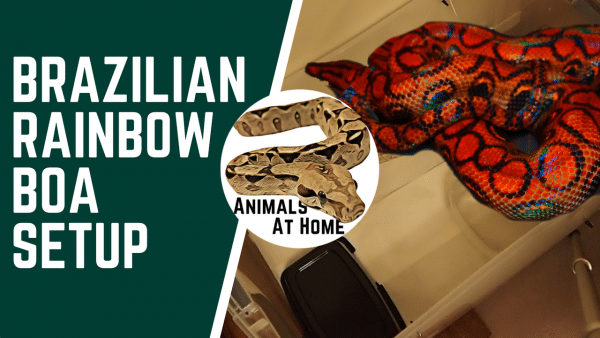
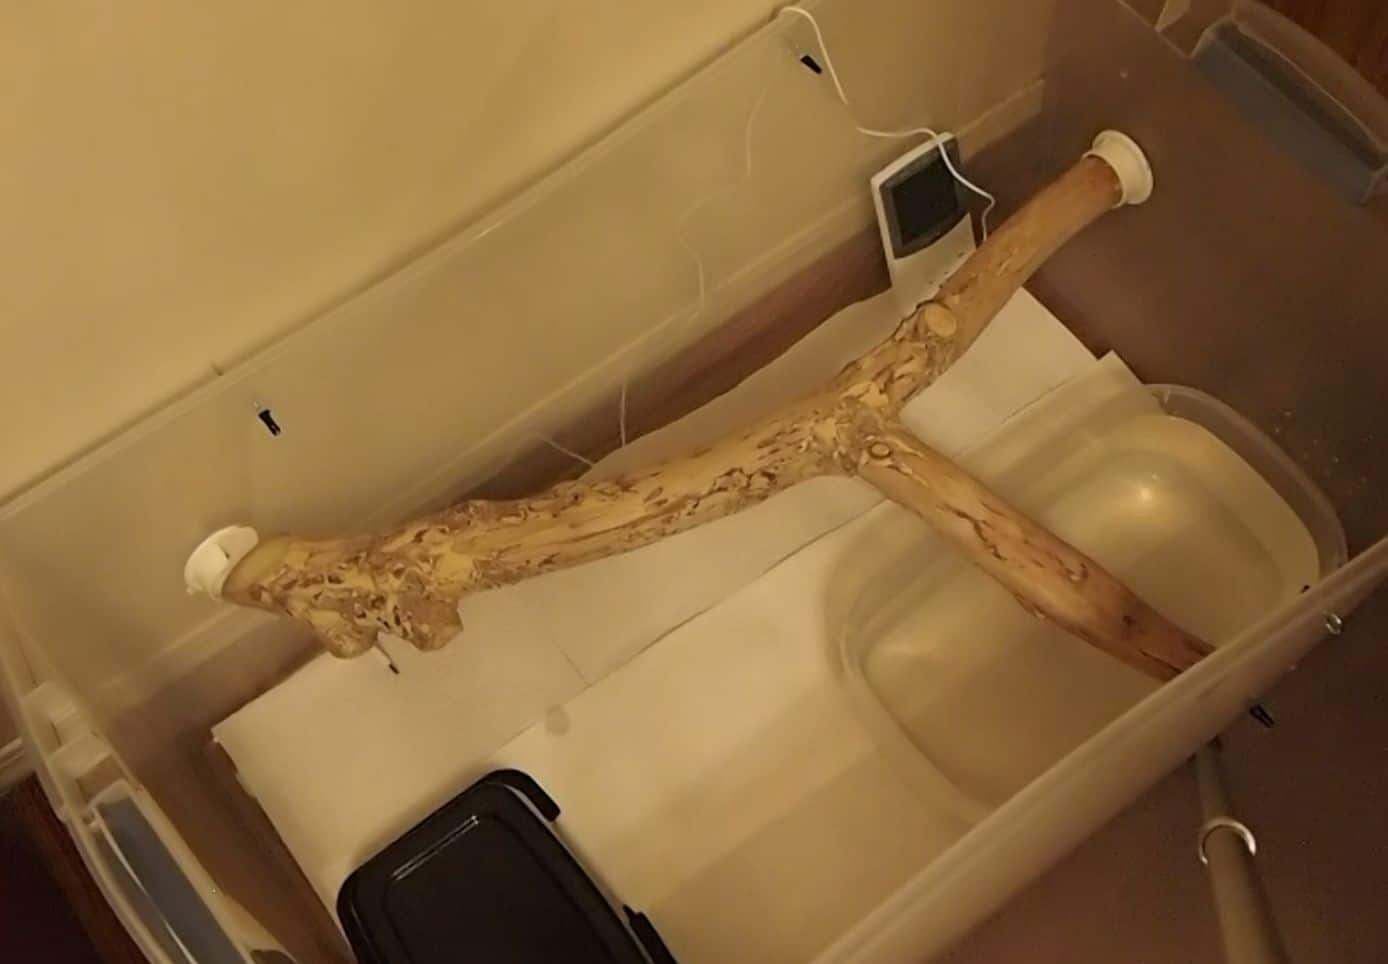
Brazilian Rainbow Boa Setup
For the enclosure, I used a Sterilite 110-Quart. This is definitely a little small for her — she is about 44″ and 650 g — but it will work well for the next 60- 90 days as a quarantine enclosure.
The tub has been placed in a quiet corner in a separate room.
Tub: Brazilian Rainbow Boa Setup
Heating
Brazilian Rainbow boas do not require a ton of heat… actually prolonged temperatures over 85°F can be dangerous. That being the case I just went with a medium sized Exo Terra Heat Mat 8 Watt. This mat is more than enough to do the job. Here are the temperature perimeters I aim for:
Cool Side Ambient: 72° – 74° F
Warm Side Ambient: 75° – 80°F
Hot Spot: 83° – 85°F
Heat Mat: Brazilian Rainbow Boa Setup
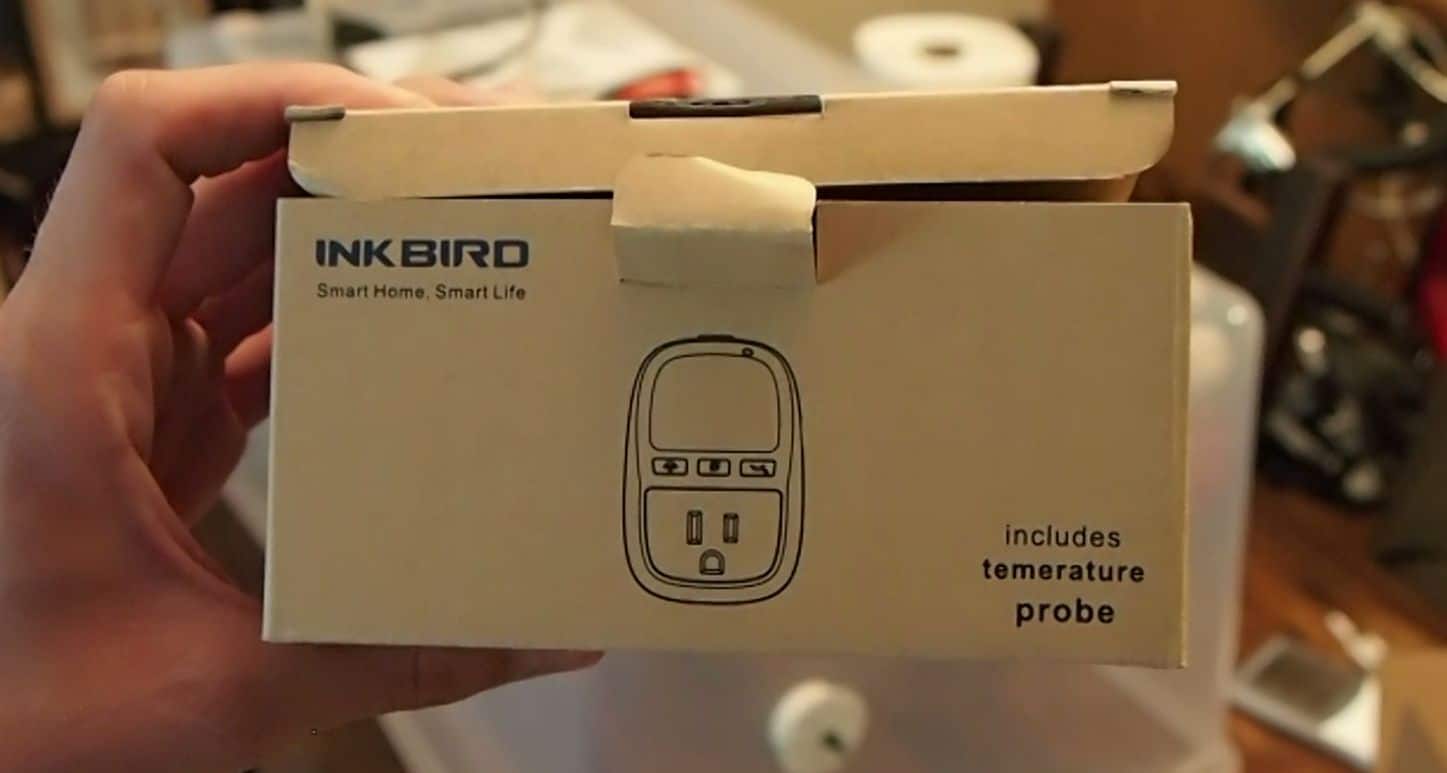
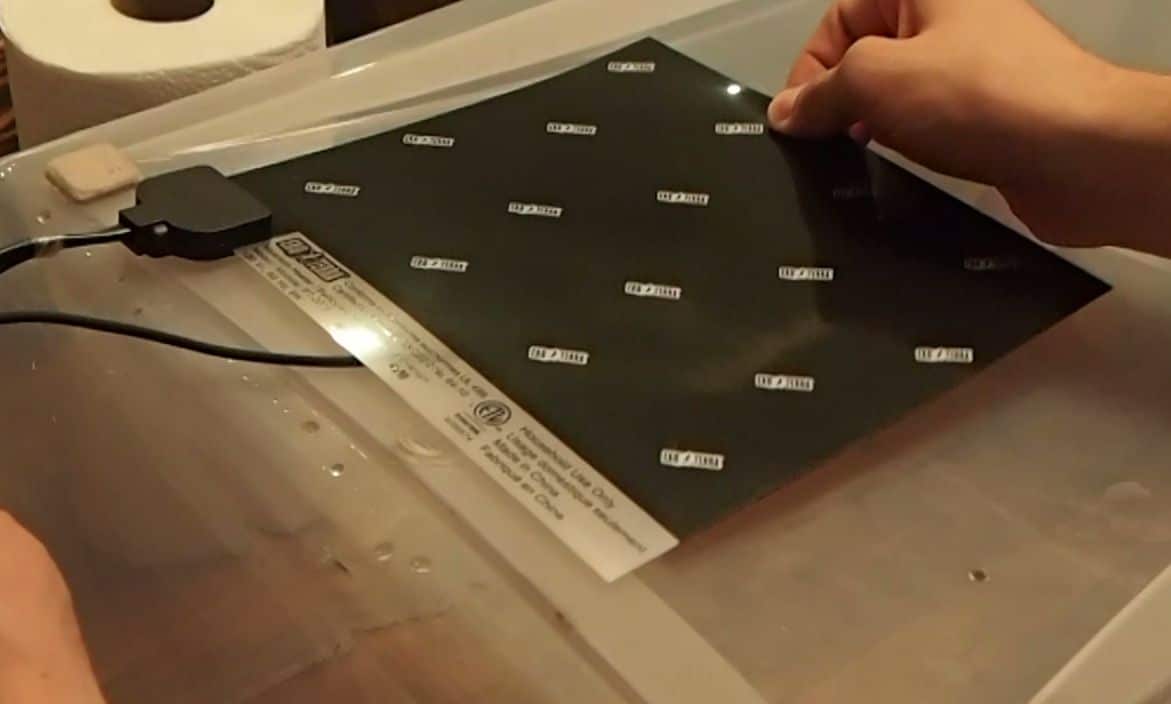
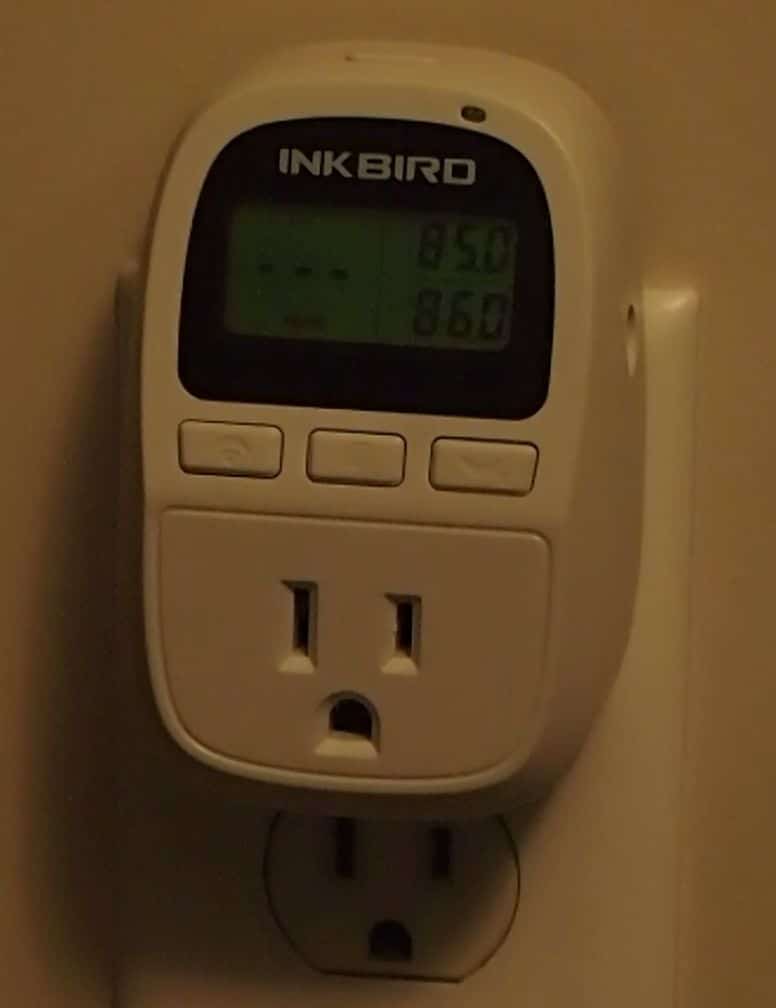
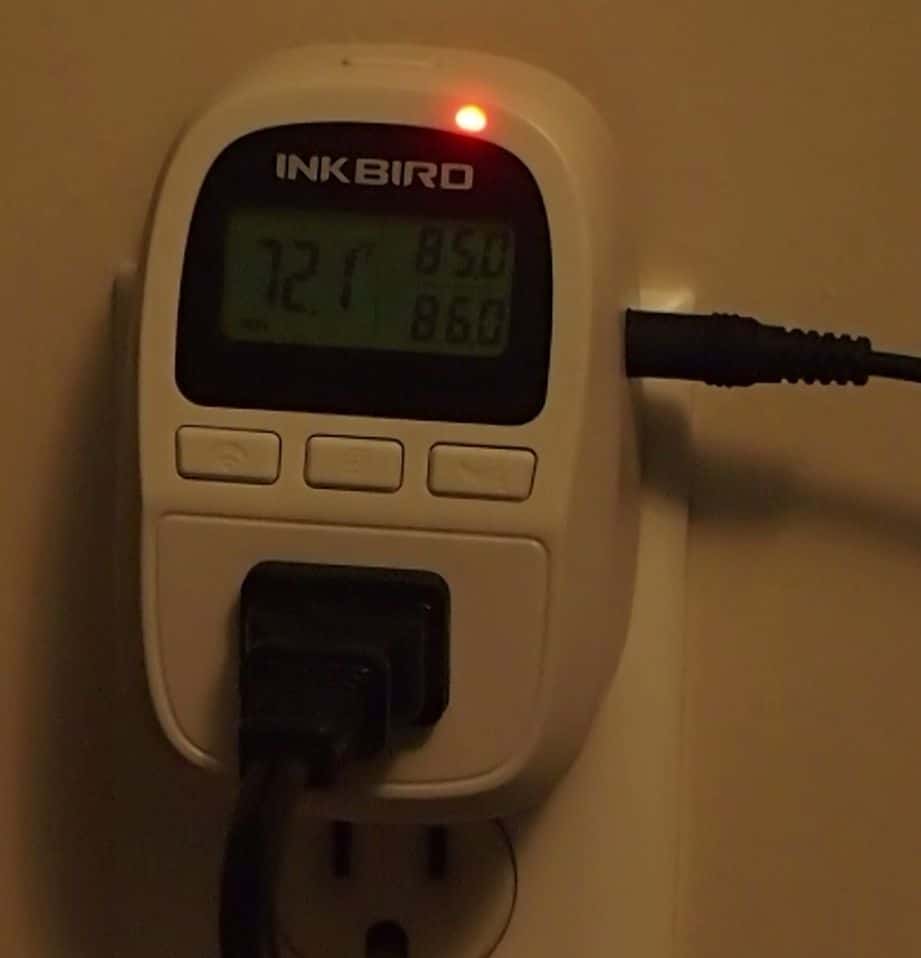
Of course, no heat mat should ever be installed without a thermostat to regulate it! I ordered Inkbird Temperature Controller off of Amazon. It is a good little thermostat so far! Very easy to set up, it was inexpensive and the probe itself is long and detachable which is great!
My only regret is I just noticed they make a slightly more expensive model that is capable of doing Day/Night temperatures! Dang I wish I had noticed that before. Next time that will be the one I order!
InkBird Thermostat: Brazilian Rainbow Boa Setup
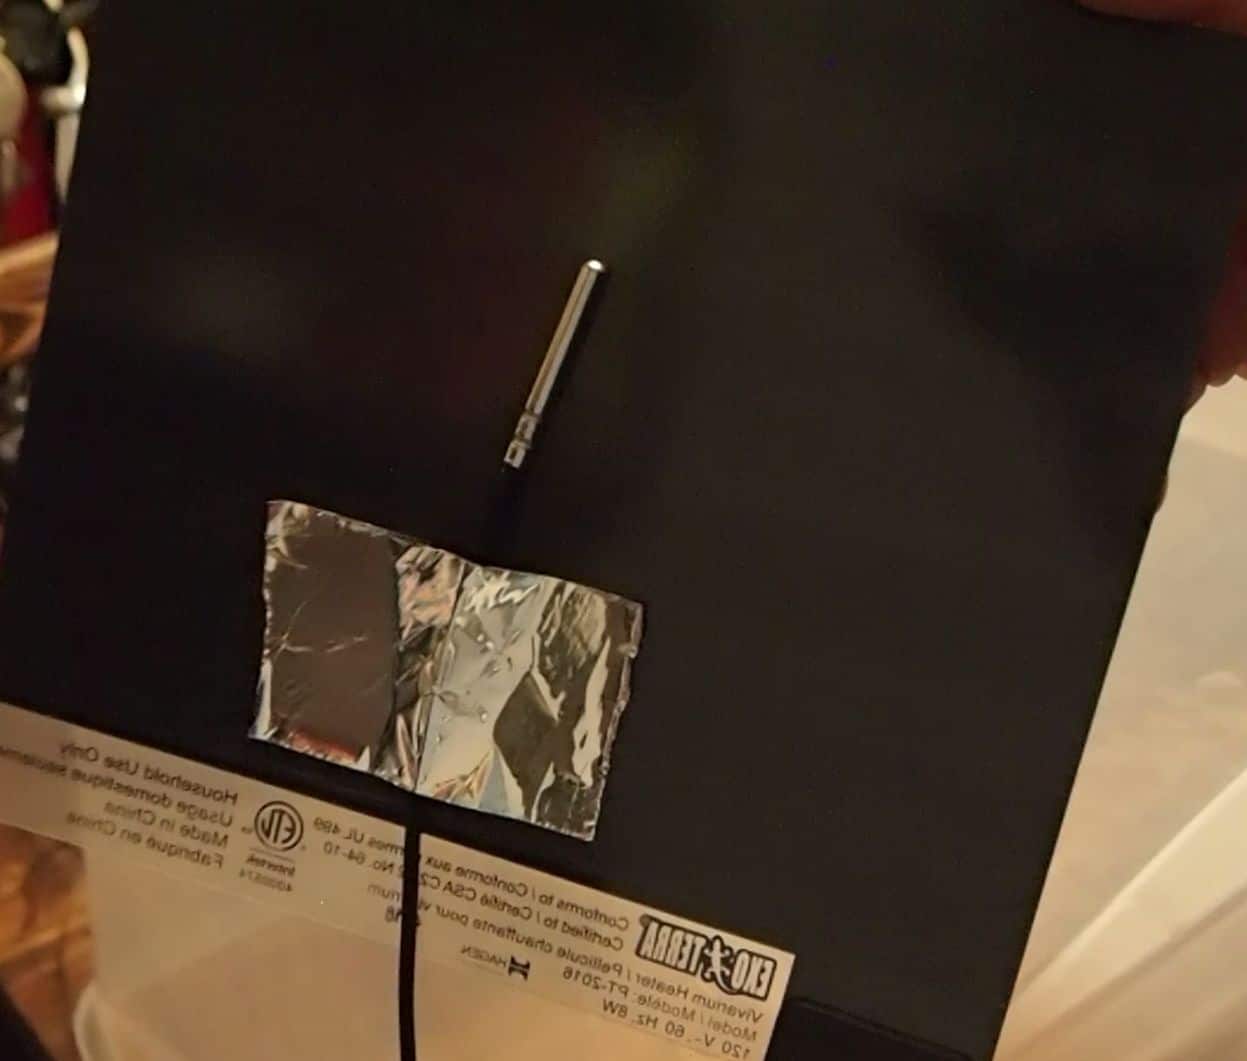
Here is how I set up the heat mat and thermostat probe:
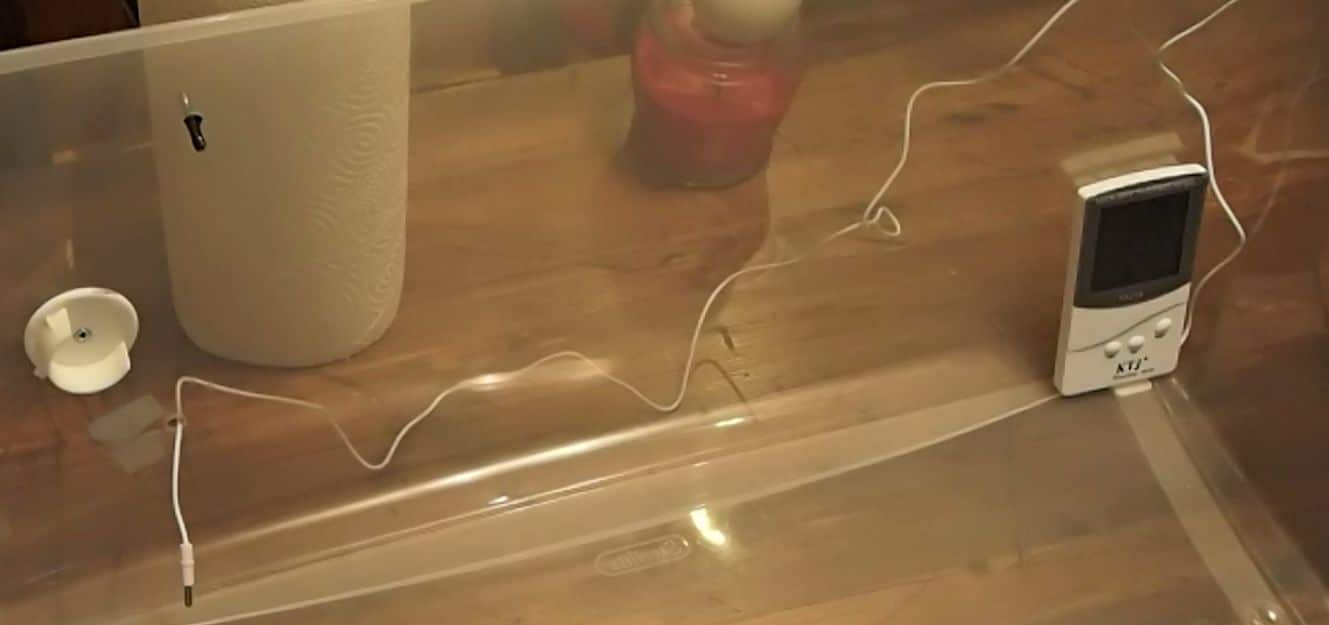
Stick the thermostat probe to the heat mat withfoil tape.
Stick the heat mat to the bottom of the tub (the probe is between the mat and the bottom of the tub)
Normally I would secure the heat mat to the tub with foil tape, but since this is only a temporary Brazilian rainbow boa setup I didn’t bother.
DIY Snake Hide
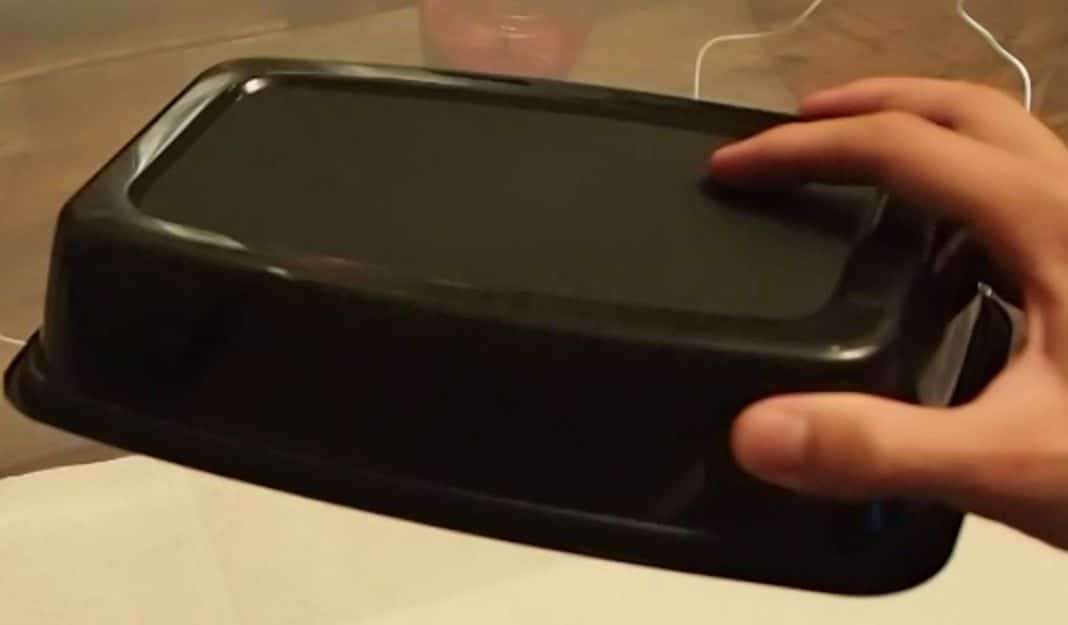
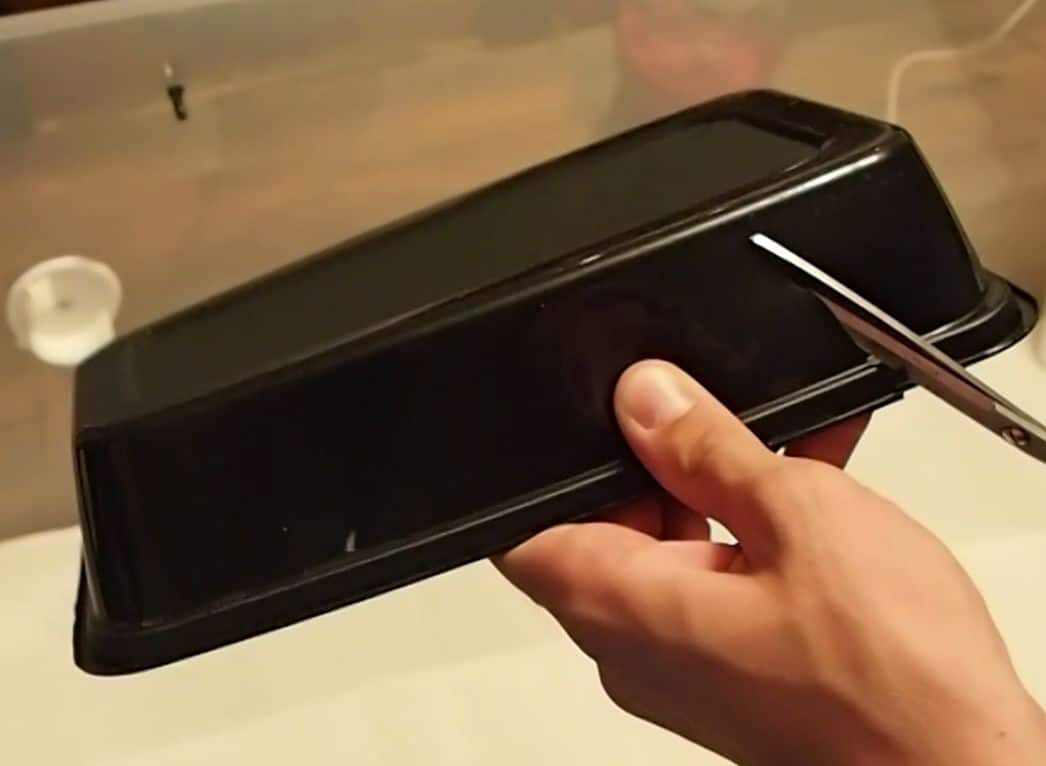
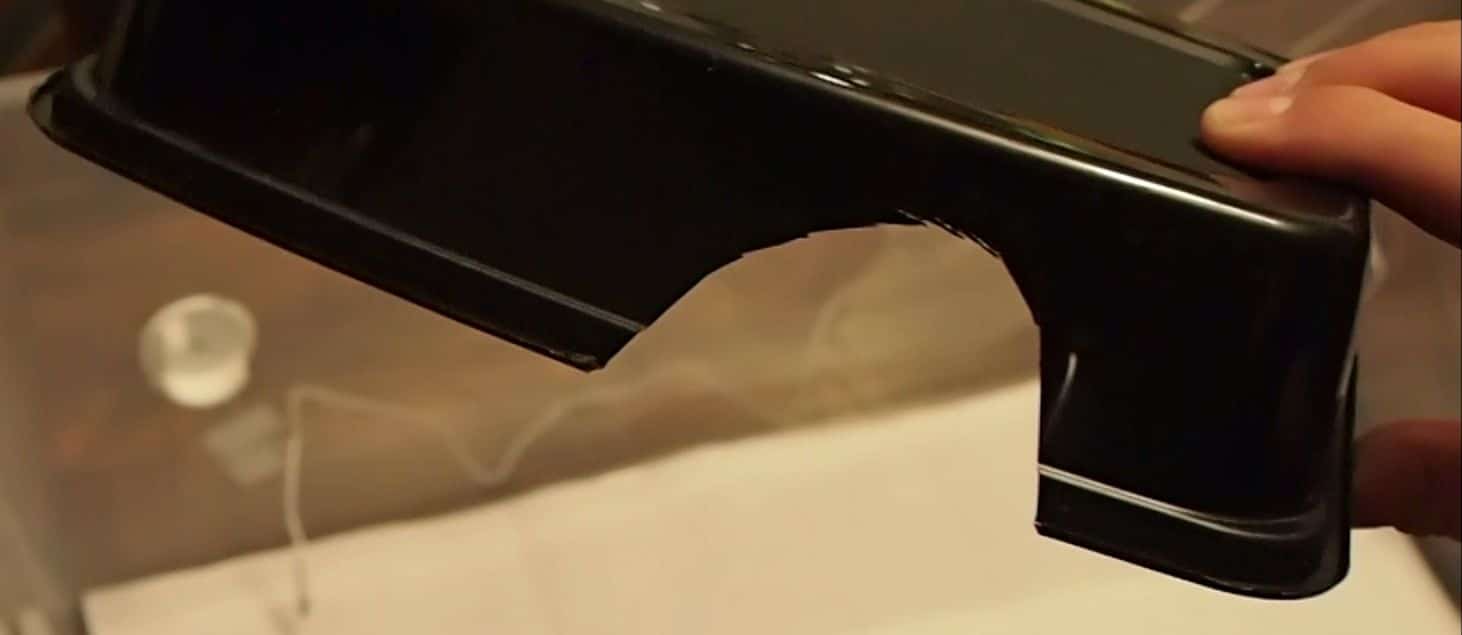
Here is a quick DIY snake hide for ya! This is a take home food container from Boston Pizza… not sure if you have that restaurant where you live. Anyway, we have a bunch of these laying around and I decided to turn this on into a hide.
Here are the intricate, complicated steps:
Use pair of scissors and cut out a door
Use sand paper to smooth the edges
Done…
Ta Da!
Thermometer
For a thermometer I ordered this: Indoor Outdoor Thermometer Hygrometer. I put the actual device on the cool side of the enclosure, the strung the probe up through the lid, around the back and through a small hole I drill through backside. The device is very basic but seems to be accurate for both the temperature and humidity.
Substrate
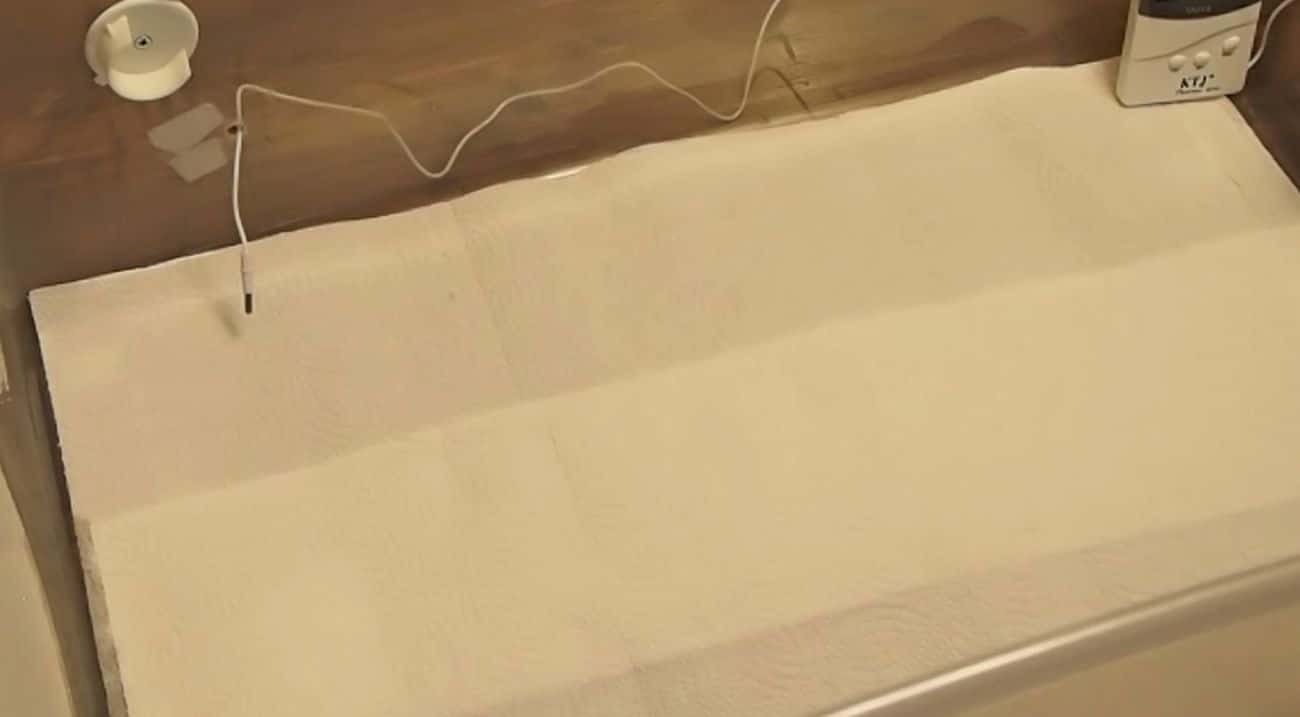
Since this is a quarantine tub I have decided to use paper towel as a substrate. Although I hate the look of paper towel as well as the mess it makes when the snake eliminates waste (aspen and/or coco husk tend to absorb more urates and reduce smell), it is much easier to monitor the health of the animal. Mites are much easier to spot and you can inspect their waste much easier.
I treat quarantine tubs the same way I would treat a “hospital tub,” i.e. I err on the side of making things more clinical than visually appealing.
Humidity
If you know anything about Brazilian Rainbow boas you know they need a high level of humidity. These tubs easily hold humidity but a large water dish is necessary to get there.
With a sub-adult to adult rainbow boa you want the humidity to be above 75%, keeping in mind that as long as the substrate isn’t wet there is no such thing as “too humid” for them.
I haven’t had to mist or spray the tub at all and the humidity has balanced somewhere between 85-95%, luckily without producing any condensation.
Basic Setup: Brazilian Rainbow Boa Setup
Decor
Again, I didn’t plan on adding much decor to this tub. I did however add a branch to climb on. I purchased Closet Pole Socketsfrom Home Depot to suspend the branch in the air. Brazilian Rainbow boas aren’t avid climbers but they will climb from time to time. I also added a second hide on the cold side, I just bought it the day after I took the photo below.
Brazilian Rainbow Boa Setup
Setting the Thermostat
Now that the Brazilian Rainbow boa setup was complete, I was able to set the thermostat and wait to see if my temperature and humidity perimeters fell in line.
The top temperature is when the heat mat turns on and teh bottom temperature is when the mat turns off.
I simply, set the temperatures, plugged in the heat mat and the probe and that’s it! The red LED comes on when the heat mat is on and the temperature on the left hand side of the screen is the current temperature reading.
A few days later I picked up the new snake! So far she seems to be in great health. After letting her settle in for a week, I have been handling her every couple days for 3-5 minutes at a time, she has been very relaxed.
Again, this is an appropriate Brazilian Rainbow boa setup for a smaller animal ( I would say up to 3.5′ and under) or in this case is ideal for a quarantine tub for the next 2 months or so.
I will be doing another DIY snake cage build for this animal so make sure you subscribe on YouTube so you don’t miss it!
We use cookies to ensure that we give you the best experience on our website. If you continue to use this site we will assume that you are happy with it.OkPrivacy policy